Apache Flink是什么?
Apache Flink 是一个分布式大数据处理引擎,可对有限数据流和无限数据流进行有状态计算。可部署在各种集群环境,对各种大小的数据规模进行快速计算。上面是非常官方的描述,说白了我们为什么选择Flink,是因为他在社区口碑非常不错。在国内的话有阿里这种大数据大流量的公司一直在输出,当然像腾讯、华为、饿了么、滴滴等也都有使用Apache Flink。
进入正题
本篇博文涉及到的软件工具以及下载地址:
Apache Flink :https://flink.apache.org/downloads.html
Netcat:https://eternallybored.org/misc/netcat/
Netcat是一个有“瑞士军刀”美誉的网络工具,这里用来绑定端口等待Apache Flink的连接
第一步:启动Flink
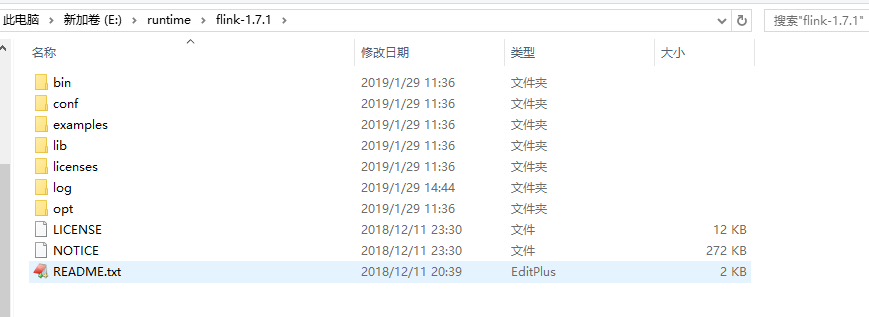
从上面的地址下载Flink后是一个压缩包,解压后的目录结构如下:
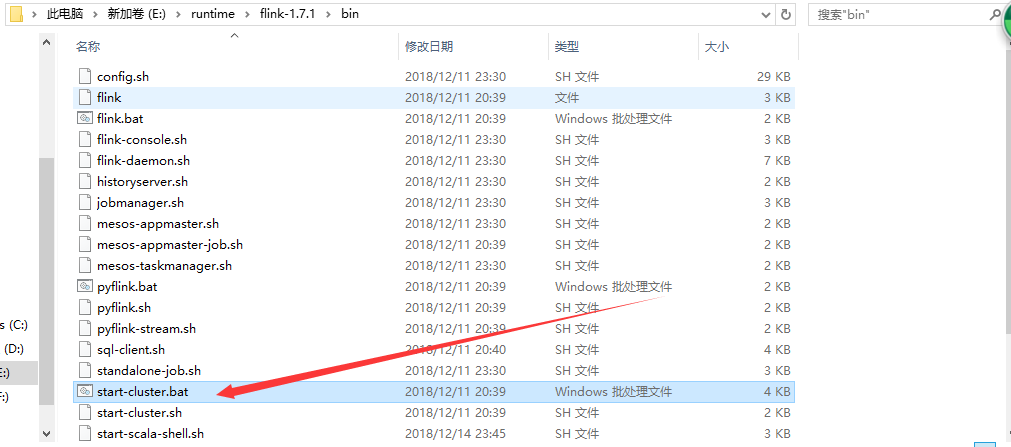
/conf/flink-conf.yaml里有一些Flink的基本配置信息,如,jobmanager、taskmanager的端口和jvm内存(默认1024M)大小,web控制台的端口(默认8081)等。我们可以不该任何配置,然后进入到bin下,执行start-cluster.bat。这里要注意不是并不是flink.bat。flink.bat是用来提交job的。还有要确保相关的端口没有被占用
运行成功后会有两个java黑窗口(一个TaskManager、一个JobManager),如果只有一个java黑窗口,很可能是你的TaskManager因为端口占用没有启动起来,成功后访问:http://localhost:8081.就会看到如下的web管理控制台了:
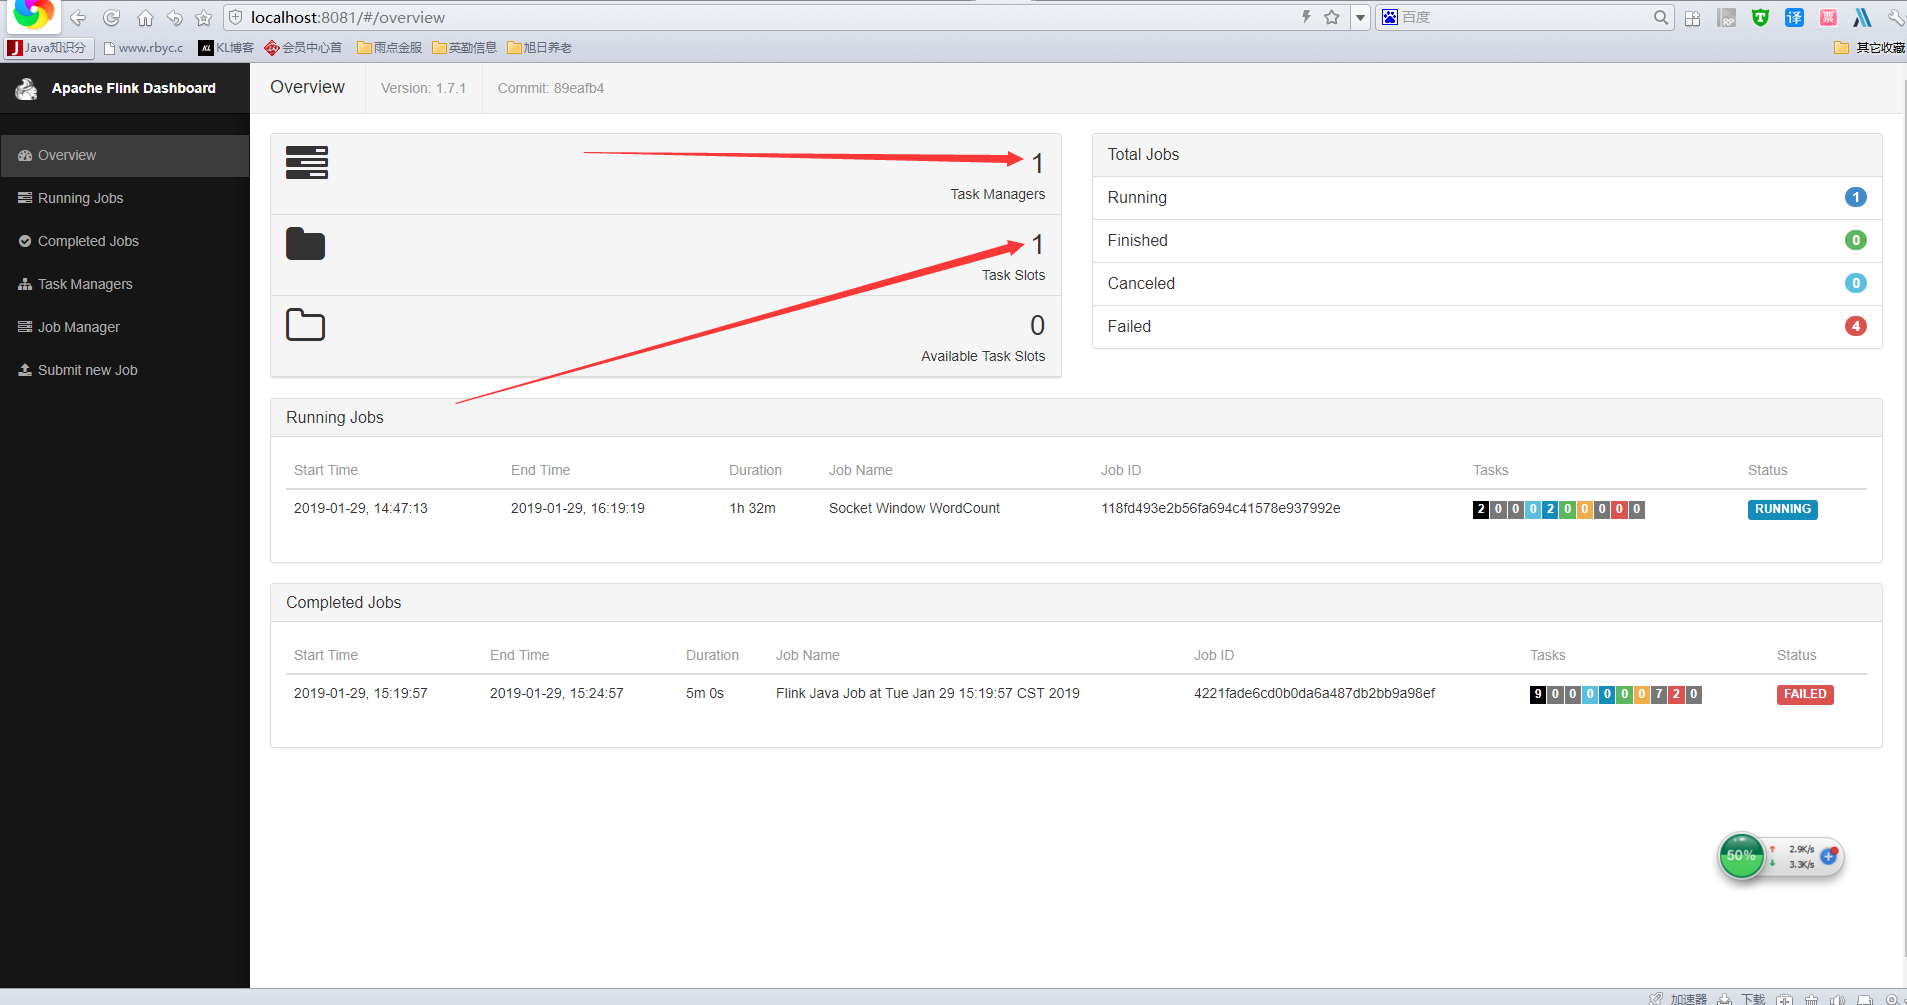
如果启动失败的话,上面箭头所指向的地方应该是0.
第二步:job任务编写
1.首先需要新建一个maven工程,然后导入Flink的接口依赖
-
<groupId>org.apache.flink</groupId>
-
<artifactId>flink-java</artifactId>
-
<version>1.7.1</version>
-
<groupId>org.apache.flink</groupId>
-
<artifactId>flink-streaming-java_2.11</artifactId>
-
<version>1.7.1</version>
-
<groupId>org.apache.flink</groupId>
-
<artifactId>flink-clients_2.11</artifactId>
-
<version>1.7.1</version>
2.编写具体的job,官方提供了一个单词统计的demo
package com.kl;
import org.apache.flink.api.common.functions.FlatMapFunction;
import org.apache.flink.api.common.functions.ReduceFunction;
import org.apache.flink.api.java.utils.ParameterTool;
import org.apache.flink.streaming.api.datastream.DataStream;
import org.apache.flink.streaming.api.environment.StreamExecutionEnvironment;
import org.apache.flink.streaming.api.windowing.time.Time;
import org.apache.flink.util.Collector;
public class SocketWindowWordCount {
public static void main(String[] args) throws Exception {
-
// the host and the port to connect to
-
final String hostname;
-
final int port;
-
try {
-
final ParameterTool params = ParameterTool.fromArgs(args);
-
hostname = params.has("hostname") ? params.get("hostname") : "localhost";
-
port = params.has("port") ? params.getInt("port"):9000;
-
} catch (Exception e) {
-
System.err.println("No port specified. Please run 'SocketWindowWordCount " +
-
"--hostname <hostname> --port <port>', where hostname (localhost by default) " +
-
"and port is the address of the text server");
-
System.err.println("To start a simple text server, run 'netcat -l <port>' and " +
-
"type the input text into the command line");
-
return;
-
}
-
// get the execution environment
-
final StreamExecutionEnvironment env = StreamExecutionEnvironment.getExecutionEnvironment();
-
// get input data by connecting to the socket
-
DataStream<String> text = env.socketTextStream(hostname, port, "\n");
-
// parse the data, group it, window it, and aggregate the counts
-
DataStream<WordWithCount> windowCounts = text
-
.flatMap(new FlatMapFunction<String, WordWithCount>() {
-
public void flatMap(String value, Collector<WordWithCount> out) {
-
for (String word : value.split("\s")) {
-
out.collect(new WordWithCount(word, 1L));
-
} }})
-
.keyBy("word")
-
.timeWindow(Time.seconds(5))
-
.reduce(new ReduceFunction<WordWithCount>() {
-
public WordWithCount reduce(WordWithCount a, WordWithCount b) {
-
return new WordWithCount(a.word, a.count + b.count);
-
}});
-
// print the results with a single thread, rather than in parallel
-
windowCounts.print().setParallelism(1);
-
env.execute("Socket Window WordCount");
}
/**
-
* Data type for words with count.
-
*/
public static class WordWithCount {
-
public String word;
-
public long count;
-
public WordWithCount() {}
-
public WordWithCount(String word, long count) {
-
this.word = word;
-
this.count = count;
-
}
-
-
public String toString() {
-
return word + " : " + count;
-
}
}
}
上面demo实现了从启动参数中获取ip和端口,然后连接从输入流接收文本信息,然后统计文本里单词出现的次数。因为要打成可运行的jar,所以,还需要引入maven的jar打包插件,如下:
-
<plugins>
-
<plugin>
-
<groupId>org.apache.maven.plugins</groupId>
-
<artifactId>maven-shade-plugin</artifactId>
-
<version>1.2.1</version>
-
<executions>
-
<execution>
-
<phase>package</phase>
-
<goals>
-
<goal>shade</goal>
-
</goals>
-
<configuration>
-
<transformers>
-
<transformer implementation="org.apache.maven.plugins.shade.resource.ManifestResourceTransformer">
-
<mainClass>com.kl.SocketWindowWordCount</mainClass>
-
</transformer>
-
</transformers>
-
</configuration>
-
</execution>
-
</executions>
-
</plugin>
-
</plugins>
mainClass标签中就是你的main方法所在类全类名。然后mvn install就可以打出一个可运行的jar包了。
第三步:Netcat监听端口,等待连接
从上面贴的地址下载Netcat后,是一个压缩包,有些安全软件可能会报病毒,请忽略就好了。然后解压文件目录如下:
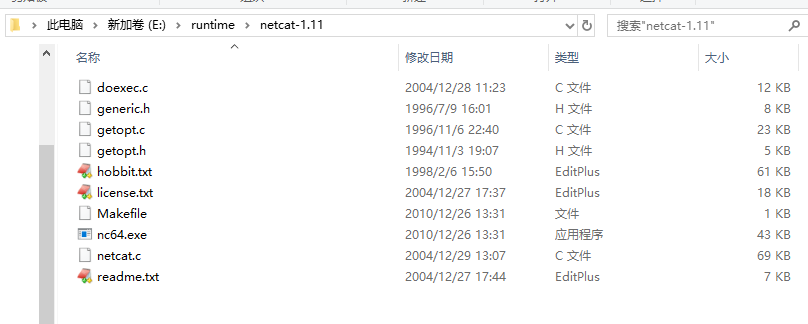
进入到这个目录,然后执行: nc64.exe -l -p 9000。相当于打开了9000端口,并监听了入站信息。最后实现的效果就是从这个窗口中输入的数据,回车后会发送Apache Flink中我们提交的job中处理输出,所以这里的9000端口,要和我们等下启动job的启动参数端口一致。
第四步:提交job运行
运行job有两种方式:可以通过Flink.bat运行,也可以通过web控制台运行。
命令行运行:
flink run E:flinkWorkingspceflinkdemo argetfinlk-demo-1.0-SNAPSHOT.jar --port 9000
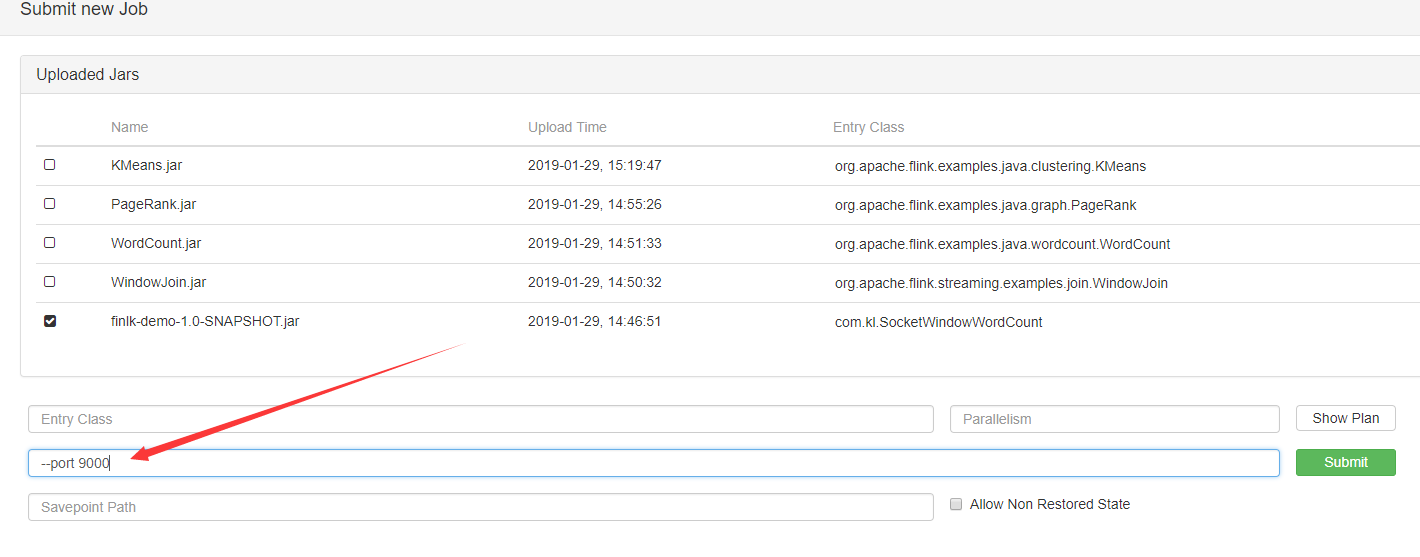
web控制台运行:

如上图,点击Add New后选择你的jar包然后上传,上传成功就会在列表里列出来。然后选中你上传的jar。就会出现如下图的输入框,可以输入你的启动参数,然后点击submit提交就可以了
第五步:验证效果
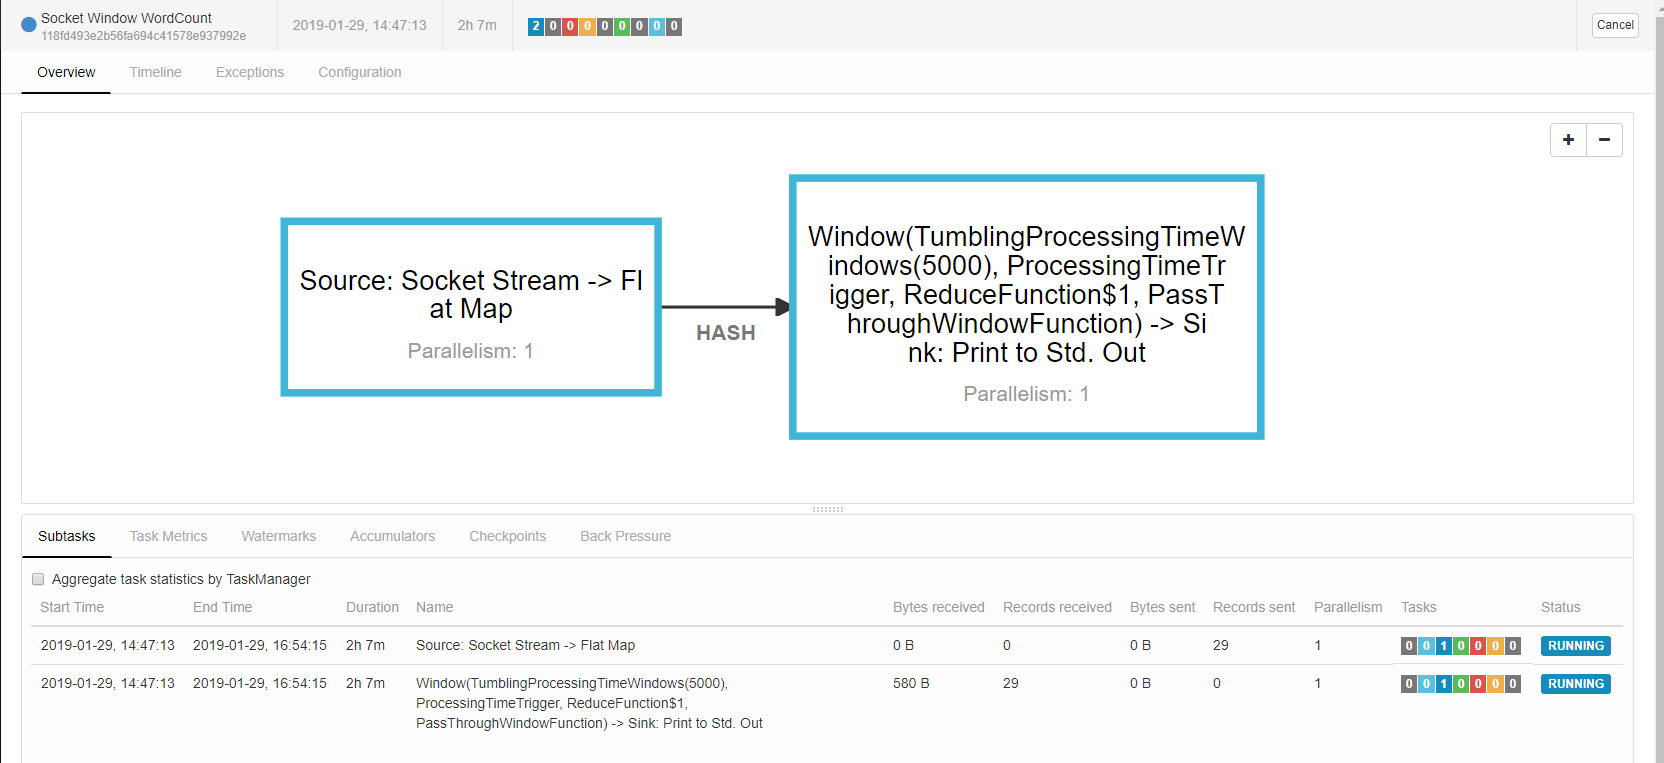
提交后如果没有问题,job的详情页面如下:
这个时候我们从Netcat的监听的黑窗口中敲入一些长文本,就会在Flink的job里统计输出出来如:
