1. 在 config/index.js 配置文件中配置proxyTable
'use strict'
// Template version: 1.3.1
// see http://vuejs-templates.github.io/webpack for documentation.

const path = require('path')

module.exports = {
  dev: {

    // Paths
    assetsSubDirectory: 'static',
    assetsPublicPath: '/',
    proxyTable: {
      '/apis': {
        // 测试环境
        target: 'http://www.thenewstep.cn/',  // 接口域名
        changeOrigin: true,  //是否跨域
        pathRewrite: {
            '^/apis': ''   //需要rewrite重写的,
        }
    }
    },

    // Various Dev Server settings
    host: 'localhost', // can be overwritten by process.env.HOST
    port: 8080, // can be overwritten by process.env.PORT, if port is in use, a free one will be determined
    autoOpenBrowser: false,
    errorOverlay: true,
    notifyOnErrors: true,
    poll: false, // https://webpack.js.org/configuration/dev-server/#devserver-watchoptions-


    /**
     * Source Maps
     */

    // https://webpack.js.org/configuration/devtool/#development
    devtool: 'cheap-module-eval-source-map',

    // If you have problems debugging vue-files in devtools,
    // set this to false - it *may* help
    // https://vue-loader.vuejs.org/en/options.html#cachebusting
    cacheBusting: true,

    cssSourceMap: true
  },

  build: {
    // Template for index.html
    index: path.resolve(__dirname, '../dist/index.html'),

    // Paths
    assetsRoot: path.resolve(__dirname, '../dist'),
    assetsSubDirectory: 'static',
    assetsPublicPath: '/',

    /**
     * Source Maps
     */

    productionSourceMap: true,
    // https://webpack.js.org/configuration/devtool/#production
    devtool: '#source-map',

    // Gzip off by default as many popular static hosts such as
    // Surge or Netlify already gzip all static assets for you.
    // Before setting to `true`, make sure to:
    // npm install --save-dev compression-webpack-plugin
    productionGzip: false,
    productionGzipExtensions: ['js', 'css'],

    // Run the build command with an extra argument to
    // View the bundle analyzer report after build finishes:
    // `npm run build --report`
    // Set to `true` or `false` to always turn it on or off
    bundleAnalyzerReport: process.env.npm_config_report
  }
}
2. fetch实现跨域请求
在根组件App.vue里面发送请求
// 1. 模板:html结构 有且只有一个根标签
<template>
  <div id="app">
     <!-- 使用路由实现跳转 注意:to里面写的是路由的名字 -->
     <ul>
       <li><router-link to="/">home</router-link></li>
       <li><router-link to="/Users">Users</router-link></li>
     </ul>
     <!-- 进入首页默认加载的路由 -->
    <router-view></router-view>
  </div>
</template>

//2. 行为:处理逻辑
<script>


export default {
  name: 'App',//组件App.vue的名字
  data () {
    return {

    }
  },
  //实现跨域请求
  created(){
    //fetch实现跨域请求
    fetch("/apis/test/testToken.php",{
      method:"POST",
      headers:{
        token:"f4c902c9ae5a2a9d8f84868ad064e706"

      },
      body:JSON.stringify({username:"lgs",password:"123"})
    }).then(result=>{
      // console.log(result)
      //解析数据
      return result.json()
    }).then(data =>{
      //打印数据
      console.log(data);
    })

  }
}
</script>

//3. 样式:解决样式
<style scoped>
h1
{
  color:purple;
}
</style>
响应结果:

3. axios实现跨域请求
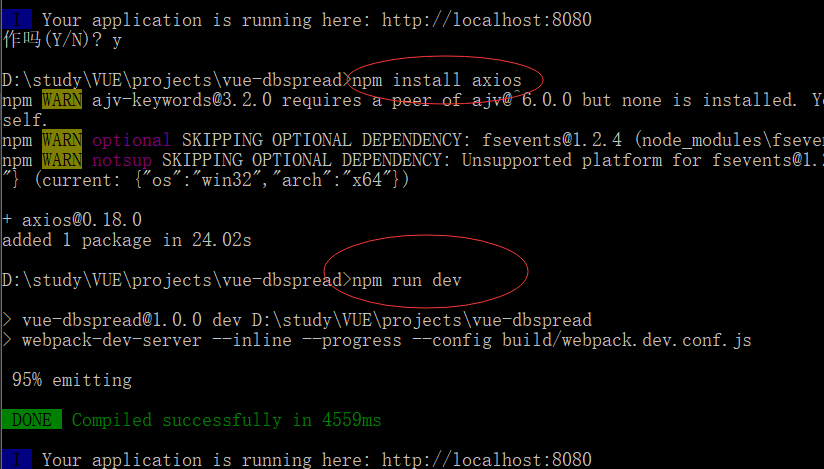
3.1 停止项目,安装axiosnpm install axios,然后重启项目npm run dev
3.2 在main.js里面引入axios,配置全局使用axios,设置token和请求头
// The Vue build version to load with the `import` command
// (runtime-only or standalone) has been set in webpack.base.conf with an alias.
import Vue from 'vue' //导入vue
import VueRouter from 'vue-router' //引入路由
import VueResource from 'vue-resource' //引入vue-resource
import axios from 'axios' //引入axios
import App from './App' //导入根组件App.vue
import Users from './components/Users'//导入组件Users.vue
import Home from './components/Home'//导入组件Users.vue

//全局使用axios
Vue.prototype.$axios = axios
//设置token
axios.defaults.headers.common['token'] = "f4c902c9ae5a2a9d8f84868ad064e706"
//设置请求头
axios.defaults.headers.post["Content-type"] = "application/json"

Vue.config.productionTip = false
//引入路由后使用路由,这样就可以在任何组件中使用路由了
Vue.use(VueRouter)
//引入vue-resource后使用vue-resource,这样就可以在任何组件中使用http了
Vue.use(VueResource)
//配置路由
const router = new VueRouter(
  {
    routes : [
      //配置路由跳转到Home这个组件
      {path:"/",component:Home},
      //配置路由跳转到Users.vue这个组件
      {path:"/Users",component:Users}
    ],
    //去掉地址栏的"/#/"
    mode : "history"
  }
)


/* eslint-disable no-new */
new Vue({ //实例化一个vue对象
  router,//使用路由
  el: '#app', //index.html的根元素app
  components: { App },//注册根组件App.vue才能使用
  template: '<App/>'//VUE模板使用,可以是组件、html标签等
})
3.2 在根组件App.vue里面发送请求
// 1. 模板:html结构 有且只有一个根标签
<template>
  <div id="app">
     <!-- 使用路由实现跳转 注意:to里面写的是路由的名字 -->
     <ul>
       <li><router-link to="/">home</router-link></li>
       <li><router-link to="/Users">Users</router-link></li>
     </ul>
     <!-- 进入首页默认加载的路由 -->
    <router-view></router-view>
  </div>
</template>

//2. 行为:处理逻辑
<script>


export default {
  name: 'App',//组件App.vue的名字
  data () {
    return {

    }
  },
  //实现跨域请求
  created(){
    //fetch实现跨域请求
    // fetch("/apis/test/testToken.php",{
    //   method:"POST",
    //   headers:{
    //     token:"f4c902c9ae5a2a9d8f84868ad064e706"

    //   },
    //   body:JSON.stringify({username:"lgs",password:"123"})
    // }).then(result=>{
    //   // console.log(result)
    //   //解析数据
    //   return result.json()
    // }).then(data =>{
    //   //打印数据
    //   console.log(data);
    // })

    //axios实现跨域请求
    this.$axios.post("/apis/test/testToken.php",{
      username:"lgs",password:"123"
      }).then(data=>{
        console.log(data)
      })

  }
}
</script>

//3. 样式:解决样式
<style scoped>
h1
{
  color:purple;
}
</style>
响应结果:
