内容概述
本系列“vue项目中使用bpmn-xxxx”分为七篇,均为自己使用过程中用到的实例,手工原创,目前陆续更新中。主要包括vue项目中bpmn使用实例、应用技巧、基本知识点总结和需要注意事项,具有一定的参考价值,需要的朋友可以参考一下。如果转载或通过爬虫直接爬的,格式特别丑,请来原创看:我是作者原文
前情提要
vue项目中的用到流程图bpmn,而bpmn-js官方的文档是英文的,也没有找到api文档。所以只能在使用过程中,自己不断爬坑填坑了。
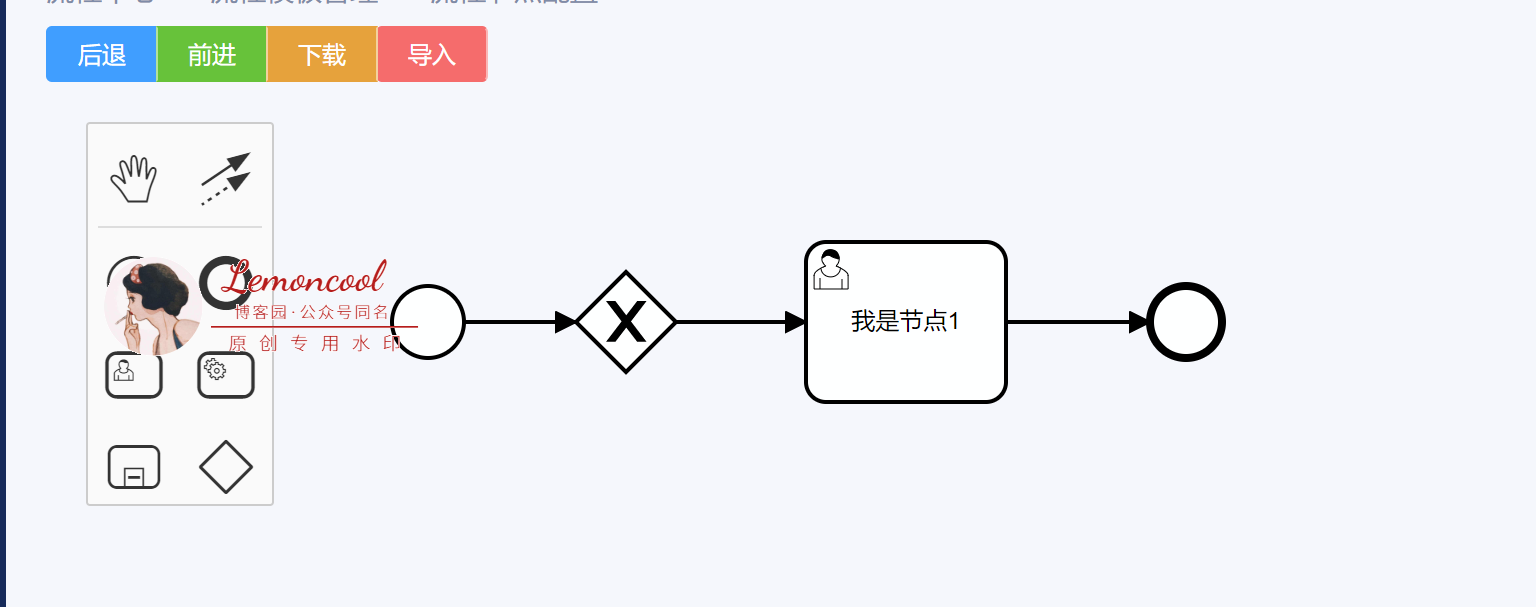
首先,看一眼效果图

1.安装bpmn-js
npm install bpmn-js --save
2.在main.js中引入样式
import 'bpmn-js/dist/assets/diagram-js.css';
import 'bpmn-js/dist/assets/bpmn-font/css/bpmn-embedded.css';
3.vue页面引入并使用bpmn
import BpmnModeler from 'bpmn-js/lib/Modeler';
import CustomPaletteProvider from './customPalette';
import camundaExtension from './resources/camunda';
4.基本操作:前进、回退、bpmn文件导入、导出

<template>
    <div class="containerBox">
        <el-button-group>
            <el-button type="primary" size="mini" @click="handleUndo">后退</el-button>
            <el-button type="success" size="mini" @click="handleRedo">前进</el-button>
            <el-button type="warning" size="mini" @click="handleDownload">下载</el-button>
            <el-upload
                    style="display: inline-block;"
                    :file-list="fileList"
                    class="upload-demo"
                    action=""
                    :auto-upload="false"
                    :show-file-list="false"
                    :http-request="httpRequest"
                    :on-change="handleOnchangeFile"
                    :on-remove="handleRemove"
                    :before-remove="beforeRemove"
            >
                <el-button type="danger" size="mini">导入</el-button>
            </el-upload>
        </el-button-group>
        <div id="container"></div>
    </div>
</template>
<script>
    import BpmnModeler from 'bpmn-js/lib/Modeler';
    import CustomPaletteProvider from './customPalette';
    import camundaExtension from './resources/camunda';

    export default {
        name: 'index',
        data() {
            return {
                containerEl: null,
                bpmnModeler: null,
                fileList: []
            };
        },
        mounted() {
            this.containerEl = document.getElementById('container');
            this.bpmnModeler = new BpmnModeler({
                container: this.containerEl,
                moddleExtensions: {camunda: camundaExtension},
                additionalModules: [CustomPaletteProvider]
            });
            this.create();
        },
        methods: {
            create() {
                this.bpmnModeler.createDiagram(() => {
                    this.bpmnModeler.get('canvas').zoom('fit-viewport');
                });
            },
            handleRemove(file) {
                for (let i = 0; i < this.fileList.length; i++) {
                    if (file.name === this.fileList[i].name) {
                        this.fileList.splice(i, 1);
                    }
                }
            },
            beforeRemove(file) {
                return this.$confirm(`确定移除 ${file.name}?`);
            },
            // 后退
            handleUndo() {
                this.bpmnModeler.get('commandStack').undo();
            },
            // 前进
            handleRedo() {
                this.bpmnModeler.get('commandStack').redo();
            },
            handleDownload() {
                this.bpmnModeler.saveXML({format: true}, (err, data) => {
                    const dataTrack = 'bpmn';
                    const a = document.createElement('a');
                    const name = `diagram.${dataTrack}`;
                    a.setAttribute(
                        'href',
                        `data:application/bpmn20-xml;charset=UTF-8,${encodeURIComponent(data)}`
                    );
                    a.setAttribute('target', '_blank');
                    a.setAttribute('dataTrack', `diagram:download-${dataTrack}`);
                    a.setAttribute('download', name);
                    document.body.appendChild(a);
                    a.click();
                    document.body.removeChild(a);
                });
            },
            handleOnchangeFile(file) {
                const reader = new FileReader();
                let data = '';
                reader.readAsText(file.raw);
                reader.onload = (event) => {
                    data = event.target.result;
                    this.bpmnModeler.importXML(data, (err) => {
                        if (err) {
                            this.$message.info('导入失败');
                        } else {
                            this.$message.success('导入成功');
                        }
                    });
                };
            }
        }
    }
</script>
<style lang="scss">
    .containerBox {
        height: calc(100vh - 220px);
        position: relative;
        #container {
            height: calc(100% - 50px);
        }
    }
</style>
5.后续
步骤4代码中,有2个import,是我在后面会讲到的,代码没有摘干净就传过来了。感谢 @baogege 发现提醒。
import CustomPaletteProvider from './customPalette';
import camundaExtension from './resources/camunda';
这两句引入的含义:第一个文件 customPalette 是自定义的左侧工具栏,如果不需要自定义,可直接把引入去掉,不影响。如果需要自定义,在我的博客这系列的第五篇里讲到了如何自定义platter,可以借鉴一下。第二个文件是定义各个元素拥有的属性配置。我放在了附件中(点我!我是camunda文件),小伙伴们自己下载一下,下载后改一下后缀,改成.json,(因为上传时,.json格式不支持上传,所以我把后缀改成js传的)。
最近在用这个bpmn组件画图,遇到了很多知识点,例如预览、更新节点名字、更新节点颜色、点击xml获取节点 id、根据id获取元素实例,后续慢慢整理~
想获取完整源码或有问题,欢迎大家关注我的公粽号,扫下面二维码或微信搜“前端便利贴”,即可获取~
