1、SSM整合步骤:
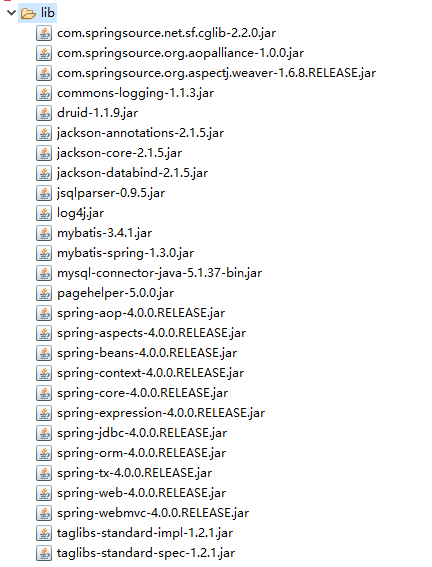
1、导入jar(27个)
spring:
springMVC:
mybatis:
第三方支持:log4j,pageHelper,AspectJ,jackson,jstl
1、导入jar(27个)
spring:
springMVC:
mybatis:
第三方支持:log4j,pageHelper,AspectJ,jackson,jstl
2、搭建springMVC
(1)web.xml:
DispatcherServlet
HiddenHttpMethodFilter
CharacterEncodingFilter
(1)web.xml:
DispatcherServlet
HiddenHttpMethodFilter
CharacterEncodingFilter
<!-- spring编码过滤器 -->
  <filter>
      <filter-name>CharacterEncodingFilter</filter-name>
      <filter-class>org.springframework.web.filter.CharacterEncodingFilter</filter-class>
      <init-param>
          <param-name>encoding</param-name>
          <param-value>UTF-8</param-value>
      </init-param>
  </filter>
  <filter-mapping>
      <filter-name>CharacterEncodingFilter</filter-name>
      <url-pattern>/*</url-pattern>
  </filter-mapping>

  <!-- REST请求方式处理 -->
  <filter>
      <filter-name>HiddenHttpMethodFilter</filter-name>
      <filter-class>org.springframework.web.filter.HiddenHttpMethodFilter</filter-class>
  </filter>
  <filter-mapping>
      <filter-name>HiddenHttpMethodFilter</filter-name>
      <url-pattern>/*</url-pattern>
  </filter-mapping>

  <!-- springMVC核心控制器DispatcherServlet -->
  <servlet>
      <servlet-name>DispatcherServlet</servlet-name>
      <servlet-class>org.springframework.web.servlet.DispatcherServlet</servlet-class>
      <init-param>
          <param-name>contextConfigLocation</param-name>
          <param-value>classpath:springMVC.xml</param-value>
      </init-param>
      <load-on-startup>1</load-on-startup>
  </servlet>
  <servlet-mapping>
      <servlet-name>DispatcherServlet</servlet-name>
      <url-pattern>/</url-pattern>
  </servlet-mapping>
(2)springMVC.xml:
扫描控制层组件视图解析器
Default Servlet
MVC驱动
可选:MultipartResolver,拦截器
<?xml version="1.0" encoding="UTF-8"?>
<beans xmlns="http://www.springframework.org/schema/beans"
    xmlns:xsi="http://www.w3.org/2001/XMLSchema-instance"
    xmlns:context="http://www.springframework.org/schema/context"
    xmlns:mvc="http://www.springframework.org/schema/mvc"
    xsi:schemaLocation="http://www.springframework.org/schema/mvc http://www.springframework.org/schema/mvc/spring-mvc-4.0.xsd
        http://www.springframework.org/schema/beans http://www.springframework.org/schema/beans/spring-beans.xsd
        http://www.springframework.org/schema/context http://www.springframework.org/schema/context/spring-context-4.0.xsd">

    <!-- 扫描控制层组件 -->
    <context:component-scan base-package="com.atguigu.ssm.controller"></context:component-scan>

    <!-- 配置视图解析器 -->
    <bean class="org.springframework.web.servlet.view.InternalResourceViewResolver">
        <property name="prefix" value="/WEB-INF/view/"></property>
        <property name="suffix" value=".jsp"></property>
    </bean>

    <!-- 默认的servlet -->
    <mvc:default-servlet-handler/>

    <!-- MVC驱动 -->
    <mvc:annotation-driven />

</beans>
3、整合springMVC和spring
(1)web.xml:
ContextLoaderListener
context-param (自定义spring.xml文件位置)
ContextLoaderListener
context-param (自定义spring.xml文件位置)
  <!-- 配置spring监听器 -->
  <listener>
      <listener-class>org.springframework.web.context.ContextLoaderListener</listener-class>
  </listener>

  <!-- 自定义spring配置文件的位置和名称 -->
  <context-param>
      <param-name>contextConfigLocation</param-name>
      <param-value>classpath:spring.xml</param-value>
  </context-param>
(2)spring.xml:
扫描组件(排除控制层)<!-- 扫描组件 --> <context:component-scan base-package="com.atguigu.ssm" > <context:exclude-filter type="annotation" expression="org.springframework.stereotype.Controller"/> </context:component-scan>
4、搭建mybatis:
核心配置文件:mybatis-config.xml (数据源,资源文件,事务管理,设置别名,映射文件路径,都可以交由Spring管理)<?xml version="1.0" encoding="UTF-8" ?> <!DOCTYPE configuration PUBLIC "-//mybatis.org//DTD Config 3.0//EN" "http://mybatis.org/dtd/mybatis-3-config.dtd"> <configuration> <settings> <!-- 将下划线映射成驼峰,user_name映射为userName --> <setting name="mapUnderscoreToCamelCase" value="true"/> <!-- 开启延迟加载 --> <setting name="lazyLoadingEnabled" value="true"/> <!-- 是否查询所有数据 --> <setting name="aggressiveLazyLoading" value="false"/> <!-- 是否开启二级缓存 --> <setting name="cacheEnabled" value="true"/> </settings> <plugins> <plugin interceptor="com.github.pagehelper.PageInterceptor"></plugin> </plugins> </configuration>
mapper接口和mapper映射文件
5、spring整合mybatisspring.xml:
properties资源文件的引入
DataSource数据源的配置
事务管理器
开启事务驱动
SqlSessionFactoryBean:管理SqlSession
MapperScannerConfigurer
    <!-- 引入资源文件 -->
    <context:property-placeholder location="classpath:jdbc.properties"/>

    <!-- 数据源 -->
    <bean id="dataSource" class="com.alibaba.druid.pool.DruidDataSource">
        <property name="driverClassName" value="${jdbc.driver}"></property>
        <property name="url" value="${jdbc.url}"></property>
        <property name="username" value="${jdbc.username}"></property>
        <property name="password" value="${jdbc.password}"></property>
    </bean>

    <!-- 声明事务管理器 -->
    <bean id="transactionManager" class="org.springframework.jdbc.datasource.DataSourceTransactionManager">
        <property name="dataSource" ref="dataSource"></property>
    </bean>

    <!-- 开启事务注解驱动 -->
    <tx:annotation-driven transaction-manager="transactionManager"/>

    <!-- 管理mybatis操作数据库的会话对象SqlSession -->
    <bean class="org.mybatis.spring.SqlSessionFactoryBean">
        <!-- 设置mybatis核心配置文件的路径 -->
        <property name="configLocation" value="classpath:mybatis-config.xml"></property>
        <!-- 设置数据源 -->
        <property name="dataSource" ref="dataSource"></property>
        <!-- 设置类型别名 -->
        <property name="typeAliasesPackage" value="com.atguigu.ssm.bean"></property>
        <!-- 设置映射文件的路径 -->
        <property name="mapperLocations" value="classpath:com/atguigu/ssm/mapper/*.xml"></property>
    </bean>

    <!-- 在所设置的包下,将所有的接口生成动态代理实现类,并由spring容器管理 -->
    <bean class="org.mybatis.spring.mapper.MapperScannerConfigurer">
        <property name="basePackage" value="com.atguigu.ssm.mapper"></property>
    </bean>
6、REST CRUD
查询+分页修改(form)