常用的绘图函数:cv2.line(),cv2.circle(),cv2.rectangle(),cv2.ellipse(),cv2.putText()
常用函数需要设置如下参数:
- img:想要绘制图形的那幅图像
- color:形状的颜色。以RGB为例,需要传入一个元祖,例如:(255,0,0),代表蓝色。对于灰度图只需要传入灰度值。
- thickness:线条的前足惜。如果给一个闭合图形设置为-1,那么这个图形就会被填充。默认值是1.
- lintype:线条的类型。
1.画线
import numpy as np
import cv2
#创建一个图像作为背景图,size:512*512,channel:3
img = np.zeros((512, 512, 3), np.uint8)
#画一条厚度为5px的对角蓝线
cv2.line(img,(0,0),(511,511),(255,0,0),5)

#显示并回收资源
cv2.imshow('draw',img)
cv2.waitKey(0)
cv2.destroyAllWindows()
2.画矩形:需要传递矩形的左上角和右下角两个点坐标
import numpy as np
import cv2

#创建一个图像作为背景图,size:512*512,channel:3
img = np.zeros((512, 512, 3), np.uint8)

#画矩形
img = cv2.rectangle(img,(384,0),(510, 218),(0,255 , 0),3)

#显示并回收资源
cv2.imshow('draw',img)
cv2.waitKey(0)
cv2.destroyAllWindows()
3.画圆:需要给出中心坐标和半径
import numpy as np
import cv2

#创建一个图像作为背景图,size:512*512,channel:3
img = np.zeros((512, 512, 3), np.uint8)

#画圆
img = cv2.circle(img,(477, 63), 63, (0,0, 255), -1)

#显示并回收资源
cv2.imshow('draw',img)
cv2.waitKey(0)
cv2.destroyAllWindows()
4.画椭圆:画椭圆需要多传递几个参数。首先是中心点坐标,然后是长短轴的长度,之后是椭圆逆时针旋转的角度angle,然后是startAngle和endAngle分别代表椭圆开始和结束的角度(该角度是沿长轴顺时针旋转的角度,这里给两个角度因为它可以画椭圆弧,而不仅仅是满的椭圆),比如当给参数stratAngle和endAngle分别传递0和360,表示画一个满的椭圆。更多细节,可查看cv2.ellipse()的函数文档.下面的例子绘制半个椭圆。
import numpy as np
import cv2

#创建一个图像作为背景图,size:512*512,channel:3
img = np.zeros((512, 512, 3), np.uint8)

#画椭圆
img = cv2.ellipse(img, (256,256), (100,50), 0, 0, 180, 255, -1)

#显示并回收资源
cv2.imshow('draw',img)
cv2.waitKey(0)
cv2.destroyAllWindows()
5.画多边形:
画多边形,需要指点每个顶点的坐标。用这些点的坐标构建一个大小等于
行数X1X2 的数组,行数就是点的数目。这个数组的数据类型必须为int32。
这里画一个黄色的具有四个顶点的多边形。
import numpy as np
import cv2

#创建一个图像作为背景图,size:512*512,channel:3
img = np.zeros((512, 512, 3), np.uint8)

#画多边形
pts = np.array([[10, 5], [20, 30], [70,40 ], [50, 10]], np.int32)
pts = pts.reshape((-1, 1, 2))
img = cv2.polylines(img, [pts], True, (0, 255, 255))

#显示并回收资源
cv2.imshow('draw',img)
cv2.waitKey(0)
cv2.destroyAllWindows()
注意:
1.如果第三个参数设为False,只会得到顶点依次相连的图形(首尾不连),而不会得到所有顶点封闭连接的图形。
2.cv2.polylines()可以被用来同时画多条线,只需要同时创建多个线段,传入函数中,它将独立的画出所有线,这比重复为每条线调用cv2.line()更快更好。
6.同时画多条线
import numpy as np
import cv2

#创建一个图像作为背景图,size:512*512,channel:3
img = np.zeros((512, 512, 3), np.uint8)

#画多条线
line1 = np.array([[100, 50], [200, 300]], np.int32)
line2 = np.array([[120, 60], [250, 350]], np.int32)
line3 = np.array([[180, 80], [100, 380]], np.int32)
img = cv2.polylines(img,[line1, line2, line3], False, (0, 255, 255))
#显示并回收资源
cv2.imshow('draw',img)
cv2.waitKey(0)
cv2.destroyAllWindows()
添加文本
在画布中添加文本,需要制定以下几个参数:
- Text: 想要输出到图像上的文本
- Position:输出位置的坐标
- Font type:字体,可以cv2.putText()函数文档查看支持的字体
- Font Scale:指定字体大小
-
文字的一般属性如颜色,粗细,线条的类型等。为了更好看一点推荐使用
linetype=cv2.LINE_AA。
1.输出文字
import numpy as np
import cv2

#创建一个图像作为背景图,size:512*512,channel:3
img = np.zeros((512, 512, 3), np.uint8)

#输出文字
font = cv2.FONT_HERSHEY_SIMPLEX
cv2.putText(img,'OpenCV',(10, 500), font, 4, (255, 255, 255), 2, cv2.LINE_AA)
#显示并回收资源
cv2.imshow('draw',img)
cv2.waitKey(0)
cv2.destroyAllWindows()
2.小示例:
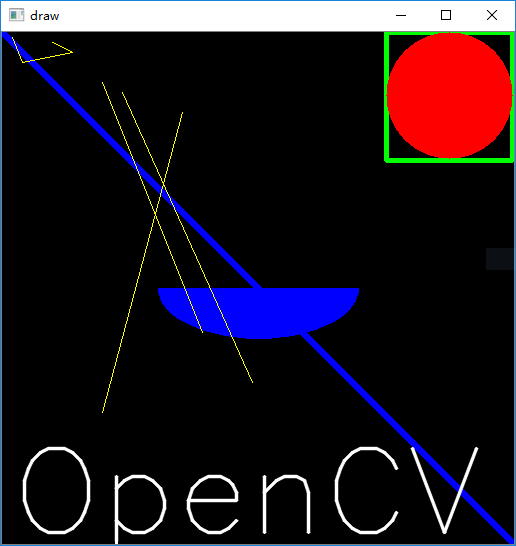
# -*- coding: utf-8 -*-
# @File    : 3_draw.py
# @Time    : 2018/5/23 17:41
# @Author  : hyfine
# @Contact : foreverfruit@126.com
# @Desc    : draw functions

import numpy as np
import cv2

# 创建一个图像作为背景图,size:512*512,channel:3
img = np.zeros((512, 512, 3), np.uint8)

# 1.画蓝色对角线
img = cv2.line(img, (0, 0), (511, 511), (255, 0, 0), 5)
# 2.画矩形
img = cv2.rectangle(img, (384, 0), (510, 128), (0, 255, 0), 3)
# 3.画圆
img = cv2.circle(img, (447, 63), 63, (0, 0, 255), -1)
# 4.画椭圆
img = cv2.ellipse(img, (256, 256), (100, 50), 0, 0, 180, 255, -1)
# 5.画多边形
pts = np.array([[10, 5], [20, 30], [70, 20], [50, 10]], np.int32)
# pts = pts.reshape((-1,1,2))
# print(pts.shape)
img = cv2.polylines(img, [pts], False, (0, 255, 255))

# 6.polylines同时画多条线
line1 = np.array([[100, 50], [200, 300]], np.int32)
line2 = np.array([[120, 60], [250, 350]], np.int32)
line3 = np.array([[180, 80], [100, 380]], np.int32)
img = cv2.polylines(img, [line1, line2, line3], False, (0, 255, 255))

# 7.输出文字
font = cv2.FONT_HERSHEY_SIMPLEX
cv2.putText(img,'OpenCV',(10,500), font, 4,(255,255,255),2,cv2.LINE_AA)

# 显示并回收资源
cv2.imshow('draw', img)
cv2.waitKey(0)
cv2.destroyAllWindows()
效果如图所示:
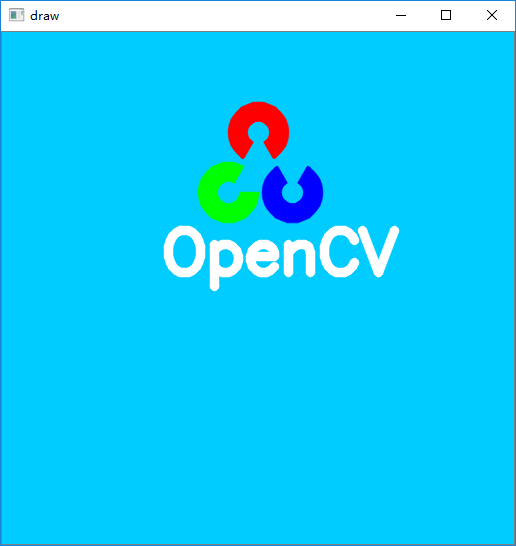
3.利用所学函数,画出opencv logo
import numpy as np
import cv2

#创建一个蓝色的背景
img = np.zeros((512, 512, 3), np.uint8)
#三个通道分别复制,opencv通道顺序是BGR
img[:, :, 0] = np.ones([512, 512], np.uint8) * 255
img[:, :, 1] = np.ones([512, 512], np.uint8) * 204
img[:, :, 2] = np.ones([512, 512], np.uint8) * 0

#画出三个带缺口的圆,坐标随意计算,半径为30.缺口角度为60
img = cv2.ellipse(img, (256, 100), (30, 30), 120, 0, 300, (0, 0, 255), -1, cv2.LINE_AA)
img = cv2.circle(img, (256, 100), 10, (255, 204, 0), -1, cv2.LINE_AA)

#画左下角的绿色
img = cv2.ellipse(img, (226, 160), (30, 30), 0, 0, 300, (0, 255, 0), -1, cv2.LINE_AA)
img = cv2.circle(img, (226, 160), 10, (255, 204, 0), -1, cv2.LINE_AA)

#画右下角的蓝色
img = cv2.ellipse(img, (290, 160), (30, 30), -60, 0, 300, (255, 0,0), -1, cv2.LINE_AA)
img = cv2.circle(img, (290, 160), 10, (255, 204, 0), -1, cv2.LINE_AA)

#画文字
font = cv2.FONT_HERSHEY_SIMPLEX
cv2.putText(img, 'OpenCV', (160, 240), font, 2, (255, 255, 255), 8, cv2.LINE_AA)

#显示并回收资源
cv2.imshow('draw', img)
cv2.waitKey(0)
cv2.destroyAllWindows()
效果如图所示: