特征
-
创建独立的Spring应用程序
-
直接嵌入Tomcat,Jetty或Undertow(无需部署WAR文件)
-
提供固定的“入门”依赖项以简化构建配置
-
尽可能自动配置Spring和第三方库
-
提供生产就绪功能,例如指标,运行状况检查和外部化配置
-
绝对没有代码生成,也不需要XML配置
快速入门
(1)新建空项目New Project
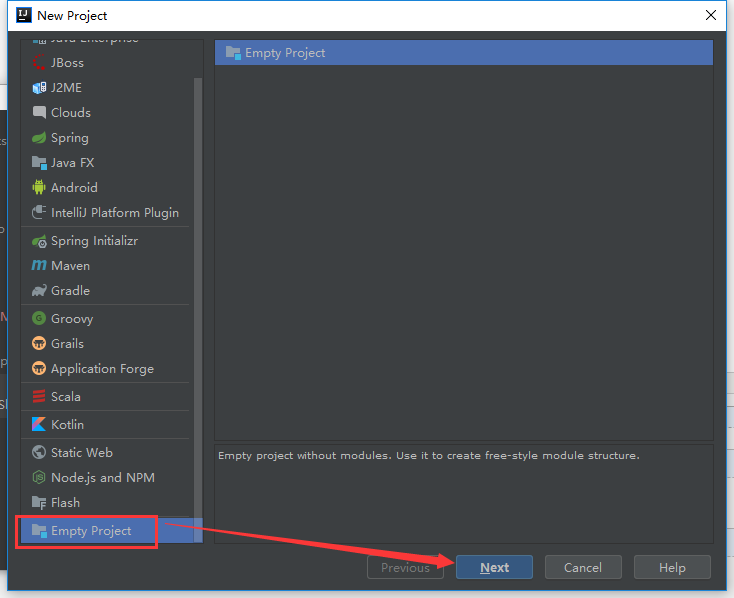
==》命名项目名称,并选择要保存的目录
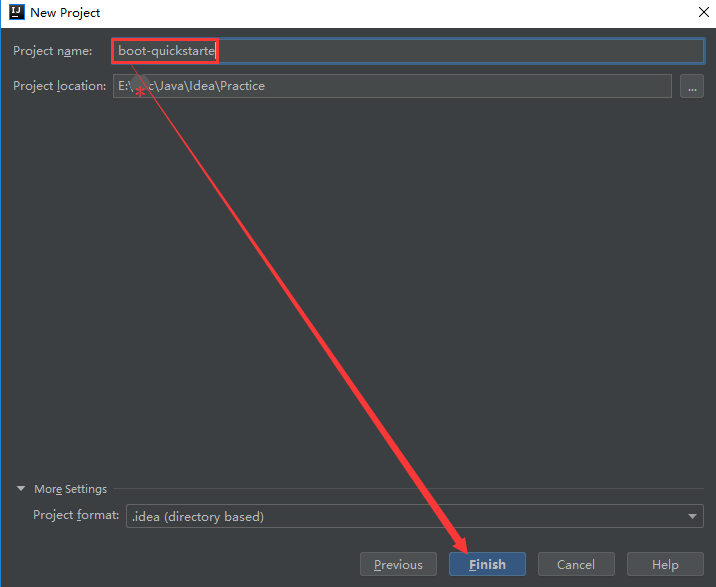
剩余步骤默认不用更改,直接ok即可。到此空白项目创建完成。
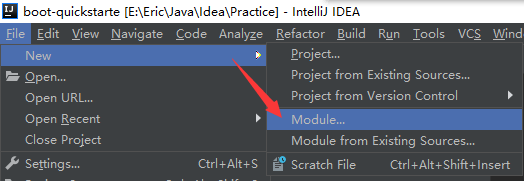
接下来在空白项目上建立模块(module)
(2)创建模块
==》创建modules --> Maven --> 选择SDK --> Create from archetype --> org.apache.maven.archetypes

==>命名GroupId,ArtifactId

==》配置仓库
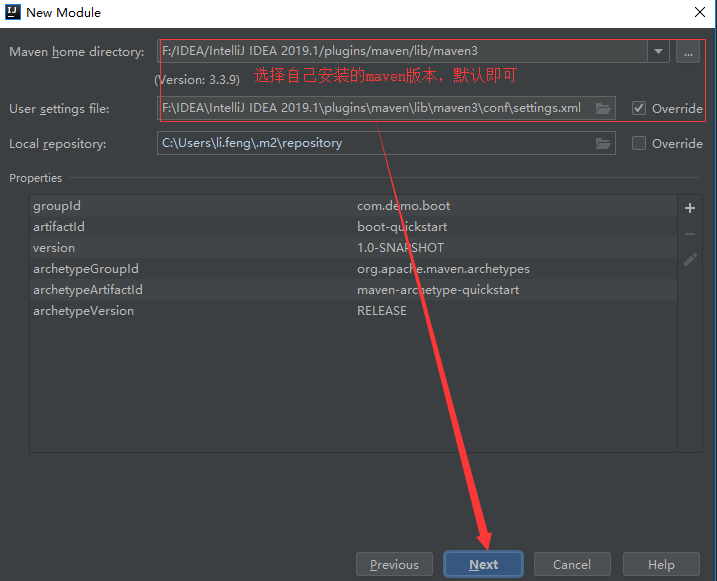
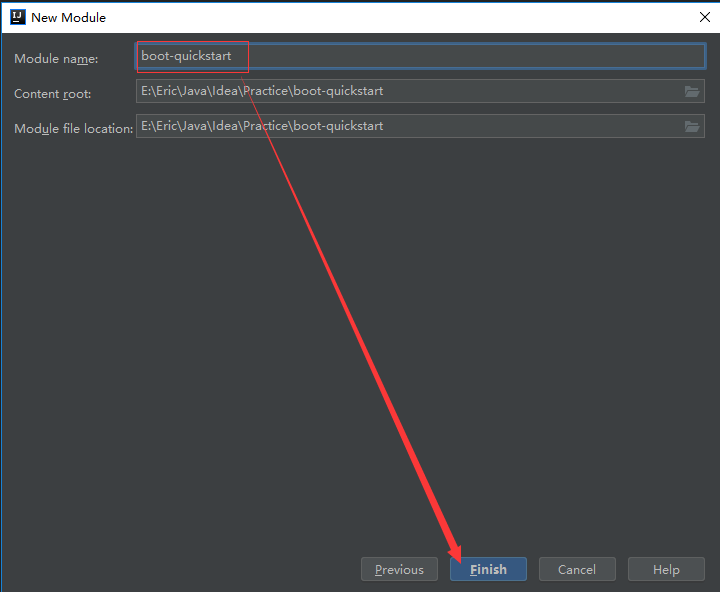
==》命名模块名字,最终完成模块的创建
注:创建时,屏幕右下角提示如下,选择Enable Auto-Import即可

到此。模块创建完成
(3)配置项目配置文件(pom.xml)
1 <parent>
2     <groupId>org.springframework.boot</groupId>
3     <artifactId>spring-boot-starter-parent</artifactId>
4     <version>2.1.5.RELEASE</version>
5 </parent>
1 <dependency>
2     <groupId>org.springframework.boot</groupId>
3     <artifactId>spring-boot-starter-web</artifactId>
4 </dependency>

(4)提供应用程序入口
 1 package com.demo.boot;
 2
 3 import org.springframework.boot.SpringApplication;
 4 import org.springframework.boot.autoconfigure.SpringBootApplication;
 5 import org.springframework.context.ConfigurableApplicationContext;
 6
 7 /**
 8  * Hello world!
 9  */
10 @SpringBootApplication
11 public class App {
12     public static void main(String[] args) {
13         ConfigurableApplicationContext context = SpringApplication.run(App.class, args);
14     }
15 }
(5)类的管理调用
==》pom.xml文件 添加类的依赖 spring-context和pring-boot-starter-web
 1    <dependencies>
 2         <dependency>
 3             <groupId>org.springframework</groupId>
 4             <artifactId>spring-context</artifactId>
 5             <version>5.1.7.RELEASE</version>
 6         </dependency>
 7
 8         <dependency>
 9             <groupId>org.springframework.boot</groupId>
10             <artifactId>spring-boot-starter-web</artifactId>
11         </dependency>
12     </dependencies>
==》创建类User.java
 1 package com.demo.boot;
 2
 3 import org.springframework.stereotype.Component;
 4
 5 /**
 6  * 使用@Component管理类
 7  */
 8 @Component//别名 -->默认为类名首字母小写
 9 public class User {
10
11     @Override
12     public String toString() {
13         return "com.demo.boot.User:" + super.toString();
14     }
15 }
==>创建UserConfig类
 1 package com.demo.boot;
 2
 3 import org.springframework.boot.SpringBootConfiguration;
 4 import org.springframework.context.annotation.Bean;
 5
 6 /**
 7  * 通过@Configuration注解把User类交给Spring容器管理
 8  */
 9 @SpringBootConfiguration
10 public class UserConfig {
11     @Bean("createUser")默认别名,是方法名称
12     public User createUser() {
13         return new User();
14     }
15 }
==》应用程序入口
 1 package com.demo.boot;
 2
 3 import org.springframework.boot.autoconfigure.SpringBootApplication;
 4 import org.springframework.context.annotation.AnnotationConfigApplicationContext;
 5
 6 /**
 7  * Hello world!
 8  */
 9 @SpringBootApplication//@SpringBootApplication=@Configuration+@ComponentScan+@EnableAutoConfiguration
10 public class App {
11     public static void main(String[] args) {
12         //ConfigurableApplicationContext context = SpringApplication.run(App.class, args);
13         AnnotationConfigApplicationContext context = new AnnotationConfigApplicationContext("com.demo.boot");
14         User user = context.getBean("user", User.class);//别名为类名首字母小写
15         User user1 = context.getBean("createUser", User.class);//类别名为方法名
16         UserConfig userConfig = context.getBean(UserConfig.class);//类别名为方法名
17         System.out.print(user + "," + user1 + "," + userConfig);//实际通过springCGLIB代理类动态调用自定义方法(createUser)创建类实例
18         //输出:com.demo.boot.User:com.demo.boot.User@4c15e7fd,com.demo.boot.User:com.demo.boot.User@23986957,com.demo.boot.UserConfig$$EnhancerBySpringCGLIB$$72899f9e@23f7d05d
19         //context.close();
20     }
21 }