1.Spring管理事务配置案例:
方式1:编码式(了解):
1.将核心事务管理器配置到spring容器,在applicationContext中配置如下代码:
    <!-- 事务核心管理器,封装了所有事务操作. 依赖于连接池 -->
    <bean name="transactionManager" class="org.springframework.jdbc.datasource.DataSourceTransactionManager">
        <property name="dataSource" ref="dataSource"></property>
    </bean>
2.配置TransactionTemplate模板,在applicationContext中配置如下代码:
   <!--事务模板对象-->
    <bean class="org.springframework.transaction.support.TransactionTemplate">
        <property name="transactionManager" ref="transactionManager"></property>
    </bean>
3.将事务模板注入Service
    <!-- 3.Service-->
    <bean name="accountService" class="com.yyb.service.AccountServiceImpl">
        <property name="ad" ref="accountDao"></property>
        <property name="tt" ref="transactionTemplate"></property>
    </bean>
4.在Service中调用模板
package com.yyb.service;
import com.yyb.dao.AccountDao;
import org.springframework.transaction.TransactionStatus;
import org.springframework.transaction.support.TransactionCallbackWithoutResult;
import org.springframework.transaction.support.TransactionTemplate;

public class AccountServiceImpl implements AccountService {
    private AccountDao ad;
    private TransactionTemplate tt;

    //匿名内部类访问外部变量得加final
    @Override
    public void transfer(final Integer from,final Integer to, Double money) {
        tt.execute(new TransactionCallbackWithoutResult() {
            @Override
            protected void doInTransactionWithoutResult(TransactionStatus transactionStatus) {
                //减钱
                ad.decreaseMoney(from,money);
                //int i=1/0;
                //加钱
                ad.increaseMoney(to,money);
            }
        });
    }
    public void setAd(AccountDao ad) {
        this.ad = ad;
    }
    public void setTt(TransactionTemplate tt) {
        this.tt = tt;
    }
}
方式2:xml配置(aop)
简单理解就是把通知织入到目标对象中,形成一个代理对象。比如通知要进行事务管理,目标对象要进行业务处理。那么代理对象则把事务管理和业务处理合到了一起。SpringAOP给我们准备了一个事务通知,目标对象即我们的service。所以只需要配置一下就可以了。
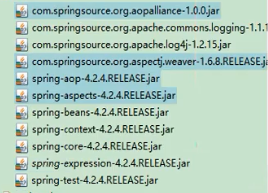
1、需要导包aop、aspect、aop联盟、weaving织入包
2.导入新的约束(tx)
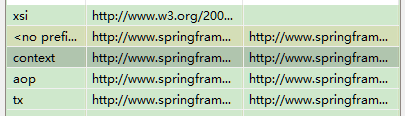
beans: 最基本约束;context:读取properties配置约束;aop:配置aop约束;tx:配置事务通知约束
3.配置通知和配置将通知织入目标:
<?xml version="1.0" encoding="UTF-8"?>
<beans xmlns="http://www.springframework.org/schema/beans"
xmlns:xsi="http://www.w3.org/2001/XMLSchema-instance" xmlns:aop="http://www.springframework.org/schema/aop"
xmlns:context="http://www.springframework.org/schema/context" xmlns:tx="http://www.springframework.org/schema/tx"
xsi:schemaLocation="http://www.springframework.org/schema/beans
http://www.springframework.org/schema/beans/spring-beans.xsd
http://www.springframework.org/schema/aop
http://www.springframework.org/schema/aop/spring-aop.xsd
http://www.springframework.org/schema/context
http://www.springframework.org/schema/context/spring-context.xsd
http://www.springframework.org/schema/tx
http://www.springframework.org/schema/tx/spring-tx.xsd">


<!-- 指定spring读取db.properties配置 -->
<context:property-placeholder location="classpath:db.properties" />

<!-- 1.将连接池放入spring容器 -->
<bean name="dataSource" class="com.mchange.v2.c3p0.ComboPooledDataSource" >
<property name="jdbcUrl" value="${jdbc.jdbcUrl}" ></property>
<property name="driverClass" value="${jdbc.driverClass}" ></property>
<property name="user" value="${jdbc.user}" ></property>
<property name="password" value="${jdbc.password}" ></property>
</bean>

<!--2.将JDBCTemplate放入spring容器-->
<!--<bean name="jdbcTemplate" class="org.springframework.jdbc.core.JdbcTemplate" >-->
<!--<property name="dataSource" ref="dataSource" ></property>-->
<!--</bean>-->

<!-- 3.将UserDao放入spring容器 -->
<bean name="userDao" class="cn.itcast.a_jdbctemplate.UserDaoImpl" >
<!-- <property name="jt" ref="jdbcTemplate" ></property> --> <!-- 如果 UserDaoImpl继承了JdbcDaoSupport,就不需要在生产一个dataSource的bean-->
<property name="dataSource" ref="dataSource" ></property>
</bean>

<!-- 2.Dao-->
<bean name="accountDao" class="com.yyb.dao.AccountDaoImpl">
<property name="dataSource" ref="dataSource"></property>
</bean>
<!-- 3.Service-->
<bean name="accountService" class="com.yyb.service.AccountServiceImpl">
<property name="ad" ref="accountDao"></property>
</bean>

<!-- 事务核心管理器,封装了所有事务操作. 依赖于连接池 -->
<bean name="transactionManager" class="org.springframework.jdbc.datasource.DataSourceTransactionManager">
<property name="dataSource" ref="dataSource"></property>
</bean>

<!-- 配置事务通知 -->
<tx:advice id="txAdvice" transaction-manager="transactionManager" >
<tx:attributes>
<!-- 以方法为单位,指定方法应用什么事务属性:isolation:隔离级别 propagation:传播行为 read-only:是否只读-->
<tx:method name="transfer" isolation="DEFAULT" propagation="REQUIRED" read-only="false"/>
<!--上面的方式只适用单个方法,当我们业务有很多个方法都要操作事务时,则要配置很多个,可以使用下面的通配符配置方式-->
<tx:method name="save*" isolation="REPEATABLE_READ" propagation="REQUIRED" read-only="false" />
<tx:method name="persist*" isolation="REPEATABLE_READ" propagation="REQUIRED" read-only="false" />
<tx:method name="update*" isolation="REPEATABLE_READ" propagation="REQUIRED" read-only="false" />
<tx:method name="modify*" isolation="REPEATABLE_READ" propagation="REQUIRED" read-only="false" />
<tx:method name="delete*" isolation="REPEATABLE_READ" propagation="REQUIRED" read-only="false" />
<tx:method name="remove*" isolation="REPEATABLE_READ" propagation="REQUIRED" read-only="false" />
<tx:method name="get*" isolation="REPEATABLE_READ" propagation="REQUIRED" read-only="true" />
<tx:method name="find*" isolation="REPEATABLE_READ" propagation="REQUIRED" read-only="true" />
</tx:attributes>
</tx:advice>

<!--配置织入-->
<aop:config>
<aop:pointcut id="txPc" expression="execution(* com.yyb.service..*(..))"/>
<!--配置切面-->
<aop:advisor pointcut-ref="txPc" advice-ref="txAdvice" />
</aop:config>

<!-- 开启事务注解驱动-->
<tx:annotation-driven transaction-manager="transactionManager" />
</beans>
方式3:注解配置(aop):
1.导包(同上)
2.导入新的约束(tx),同上
3.开启注解管理事务
<?xml version="1.0" encoding="UTF-8"?>
<beans xmlns:xsi="http://www.w3.org/2001/XMLSchema-instance" xmlns="http://www.springframework.org/schema/beans"
       xmlns:context="http://www.springframework.org/schema/context"
       xmlns:aop="http://www.springframework.org/schema/aop" xmlns:tx="http://www.springframework.org/schema/tx"
       xsi:schemaLocation="http://www.springframework.org/schema/beans http://www.springframework.org/schema/beans/spring-beans-4.2.xsd http://www.springframework.org/schema/context http://www.springframework.org/schema/context/spring-context-4.2.xsd http://www.springframework.org/schema/aop http://www.springframework.org/schema/aop/spring-aop-4.2.xsd http://www.springframework.org/schema/tx http://www.springframework.org/schema/tx/spring-tx-4.2.xsd ">

    <!-- 指定spring读取db.properties配置 -->
    <context:property-placeholder location="classpath:db.properties"/>

    <!-- 事务核心管理器,封装了所有事务操作. 依赖于连接池 -->
    <bean name="transactionManager" class="org.springframework.jdbc.datasource.DataSourceTransactionManager">
        <property name="dataSource" ref="dataSource"></property>
    </bean>
    <!--开启使用注解管理aop事务-->
    <tx:annotation-driven/>
    <!-- 1.连接池 -->
    <bean name="dataSource" class="com.mchange.v2.c3p0.ComboPooledDataSource">
        <property name="jdbcUrl" value="${jdbc.jdbcUrl}"></property>
        <property name="driverClass" value="${jdbc.driverClass}"></property>
        <property name="user" value="${jdbc.user}"></property>
        <property name="password" value="${jdbc.password}"></property>
    </bean>
    <!-- 2.Dao-->
    <bean name="accountDao" class="com.yyb.dao.AccountDaoImpl">
        <property name="dataSource" ref="dataSource"></property>
    </bean>
    <!-- 3.Service-->
    <bean name="accountService" class="com.yyb.service.AccountServiceImpl">
        <property name="ad" ref="accountDao"></property>
    </bean>

</beans>
4.使用注解
    @Transactional(isolation = Isolation.REPEATABLE_READ,propagation = Propagation.REQUIRED,readOnly = false)
    public void transfer(Integer from,Integer to, Double money) {
在方法上加注解,如果方法太多,嫌麻烦的话,可以在类上加,如果某个方法不适应,再在方法上写一份即可。

package com.yyb.service;

import com.yyb.dao.AccountDao;
import org.springframework.transaction.annotation.Isolation;
import org.springframework.transaction.annotation.Propagation;
import org.springframework.transaction.annotation.Transactional;

@Transactional(isolation = Isolation.REPEATABLE_READ,propagation = Propagation.REQUIRED,readOnly = false)
public class AccountServiceImpl implements AccountService {
    private AccountDao ad;

    @Override
    @Transactional(isolation = Isolation.DEFAULT,propagation = Propagation.REQUIRED,readOnly = false)
    public void transfer(Integer from,Integer to, Double money) {
        //减钱
        ad.decreaseMoney(from,money);
        //int i=1/0;
        //加钱
        ad.increaseMoney(to,money);
    }
    public void setAd(AccountDao ad) {
        this.ad = ad;
    }
}