Apache Solr是一个开放式搜索企业搜索软件。您将学习如何在CentOS 8上安装Apache Solr Server。
什么是Solr?
Solr(发音为“ solar”)是来自Apache Lucene项目的用Java编写的开源企业搜索平台。Solr可以在Apache License 2.0下使用。
Solr的主要功能包括全文搜索,命中突出显示,多面搜索,实时索引,动态集群,数据库集成,NoSQL功能和丰富的文档(例如Word,PDF)处理。提供分布式搜索和索引复制。
Solr旨在实现可伸缩性和容错能力。Solr被广泛用于企业搜索和分析用例,并拥有活跃的开发社区和常规版本。
Solr作为独立的全文本搜索服务器运行。它以Lucene Java搜索库为核心进行全文索引和搜索,并具有类似REST的HTTP / XML和JSON API,可从大多数流行的编程语言使用。Solr的外部配置使它可以针对多种类型的应用程序进行量身定制,而无需使用Java编码,并且它具有插件架构来支持更高级的自定义。
Solr为许多世界上最大的互联网站点提供搜索和导航功能。
环境规格
- CPU :3.4 GHz(2核)
- 内存:2 GB
- 储存空间:20 GB
- 作业系统-:CentOS 8.2
- 主机名:solrserver.lianglab.cn
- IP地址-192.168.6.200/24
第一步:更新CentOS 8软件包
使用ssh客户端以root用户身份与solrserver.lianglab.cn连接。
【1】通过使用dnf命令,更新Linux服务器中的软件包。
[root@rsyncserver ~]# hostnamectl set-hostname solrserver.lianglab.cn
[root@solrserver ~]# dnf update -y
08:12:06 PM PKT.
Dependencies resolved.
Nothing to do.
Complete!
【2】验证Linux操作系统和内核版本。
[root@solrserver ~]# uname -r
4.18.0-193.28.1.el8_2.x86_64
[root@solrserver ~]# cat /etc/redhat-release
CentOS Linux release 8.2.2004 (Core)
第二步:Linux服务器上安装OpenJDK
Apache Solr用Java编程语言编写,因此它需要Java Development Kit(JDK)8或更高版本。
OpenJDK在标准yum存储库中可用,并且可以轻松安装
我们在Linux服务器上安装OpenJDK 11。
[root@solrserver ~]# dnf install -y java-11-openjdk
Last metadata expiration check: 0:56:26 ago on Thu 24 Dec 2020 09:38:40 PM CST.
Dependencies resolved.
=============================================================================================================
 Package                        Architecture Version                                   Repository       Size
=============================================================================================================
Installing:
 java-11-openjdk                x86_64       1:11.0.9.11-0.el8_2                       AppStream       251 k
Installing dependencies:
 copy-jdk-configs               noarch       3.7-1.el8                                 AppStream        27 k
 java-11-openjdk-headless       x86_64       1:11.0.9.11-0.el8_2
---------------------省略部分----------------------
Installed:
  copy-jdk-configs-3.7-1.el8.noarch
  java-11-openjdk-1:11.0.9.11-0.el8_2.x86_64
  java-11-openjdk-headless-1:11.0.9.11-0.el8_2.x86_64
  javapackages-filesystem-5.3.0-1.module_el8.0.0+11+5b8c10bd.noarch
  lksctp-tools-1.0.18-3.el8.x86_64
  ttmkfdir-3.0.9-54.el8.x86_64
  tzdata-java-2020d-1.el8.noarch
  xorg-x11-fonts-Type1-7.5-19.el8.noarch

Complete!
[root@solrserver ~]#
成功安装后,请验证Java版本。
[root@solrserver ~]# java -version
openjdk version "11.0.9" 2020-10-20 LTS
OpenJDK Runtime Environment 18.9 (build 11.0.9+11-LTS)
OpenJDK 64-Bit Server VM 18.9 (build 11.0.9+11-LTS, mixed mode, sharing)
[root@solrserver ~]#
OpenJDK已安装在Linux服务器上。
第三步:CentOS服务器上安装Apache Solr
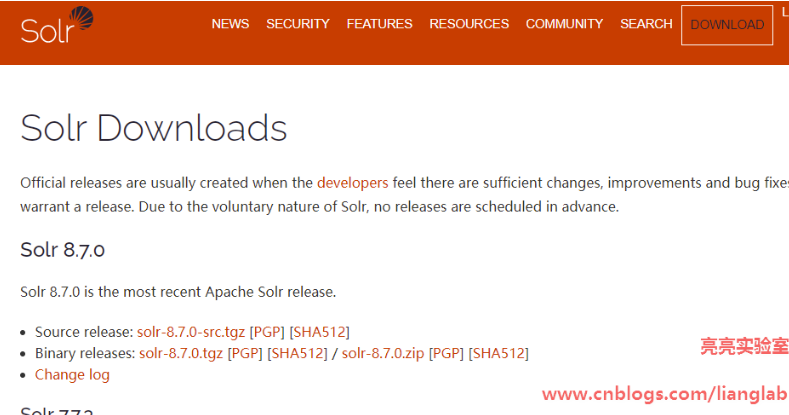
【1】您可以从Github或其官方网站下载Apache Solr。

【2】从Solr下载页面复制所需版本的Apache Solr的URL,然后使用wget命令从复制的URL下载Solr。
[root@solrserver ~]#  cd /tmp
[root@solrserver tmp]# wget https://downloads.apache.org/lucene/solr/8.7.0/solr-8.7.0.tgz
--2020-12-24 22:38:28--  https://downloads.apache.org/lucene/solr/8.7.0/solr-8.7.0.tgz
Connecting to 192.168.6.175:3128... connected.
Proxy request sent, awaiting response... 200 OK
【3】如下所示从下载的tar包中提取Solr安装脚本。
[root@solrserver tmp]# ls
hsperfdata_root
solr-8.7.0.tgz
[root@solrserver tmp]# tar xf solr-8.7.0.tgz solr-8.7.0/bin/install_solr_service.sh --strip-components=2
[root@solrserver tmp]# ls
hsperfdata_root
install_solr_service.sh
solr-8.7.0.tgz
[root@solrserver tmp]#
【4】使用提取的安装脚本在您的Linux服务器上安装Apache Solr。
[root@solrserver tmp]# ./install_solr_service.sh solr-8.7.0.tgz
id: ‘solr’: no such user
Creating new user: solr

Extracting solr-8.7.0.tgz to /opt


Installing symlink /opt/solr -> /opt/solr-8.7.0 ...


Installing /etc/init.d/solr script ...


Installing /etc/default/solr.in.sh ...

Service solr installed.
Customize Solr startup configuration in /etc/default/solr.in.sh
Waiting up to 180 seconds to see Solr running on port 8983 [-]
Started Solr server on port 8983 (pid=94325). Happy searching!

Found 1 Solr nodes:

Solr process 94325 running on port 8983
{
  "solr_home":"/var/solr/data",
  "version":"8.7.0 2dc63e901c60cda27ef3b744bc554f1481b3b067 - atrisharma - 2020-10-29 19:39:16",
  "startTime":"2020-12-24T14:52:42.122Z",
  "uptime":"0 days, 0 hours, 0 minutes, 10 seconds",
  "memory":"85.8 MB (%16.8) of 512 MB"}

[root@solrserver tmp]# netstat -anptl| grep 8983
tcp        0      0 0.0.0.0:8983            0.0.0.0:*               LISTEN      94325/java
[root@solrserver tmp]# ps -ef | grep 94325
solr       94325       1  8 22:52 ?        00:00:07 java -server -Xms512m -Xmx512m -XX:+UseG1GC -XX:+PerfDisableSharedMem -XX:+ParallelRefProcEnabled -XX:MaxGCPauseMillis=250 -XX:+UseLargePages -XX:+AlwaysPreTouch -XX:+ExplicitGCInvokesConcurrent -Xlog:gc*:file=/var/solr/logs/solr_gc.log:time,uptime:filecount=9,filesize=20M -Dsolr.jetty.inetaccess.includes= -Dsolr.jetty.inetaccess.excludes= -Dsolr.log.dir=/var/solr/logs -Djetty.port=8983 -DSTOP.PORT=7983 -DSTOP.KEY=solrrocks -Duser.timezone=UTC -XX:-OmitStackTraceInFastThrow -Djetty.home=/opt/solr/server -Dsolr.solr.home=/var/solr/data -Dsolr.data.home= -Dsolr.install.dir=/opt/solr -Dsolr.default.confdir=/opt/solr/server/solr/configsets/_default/conf -Dlog4j.configurationFile=/var/solr/log4j2.xml -Xss256k -Dsolr.jetty.https.port=8983 -Dsolr.log.muteconsole -XX:OnOutOfMemoryError=/opt/solr/bin/oom_solr.sh 8983 /var/solr/logs -jar start.jar --module=http
root       94574   93094  0 22:54 pts/1    00:00:00 grep --color=auto 94325
[root@solrserver tmp]#


#如果有遇到类似于这个报错 请安装losf软件包

Installing /etc/default/solr.in.sh ...

Service solr installed.
Customize Solr startup configuration in /etc/default/solr.in.sh
*** [WARN] *** Your open file limit is currently 1024.
 It should be set to 65000 to avoid operational disruption.
 If you no longer wish to see this warning, set SOLR_ULIMIT_CHECKS to false in your profile or solr.in.sh
*** [WARN] ***  Your Max Processes Limit is currently 3674.
 It should be set to 65000 to avoid operational disruption.
 If you no longer wish to see this warning, set SOLR_ULIMIT_CHECKS to false in your profile or solr.in.sh
NOTE: Please install lsof as this script needs it to determine if Solr is listening on port 8983.
【5】根据Apache Solr的要求安装lsof软件包。
[root@solrserver tmp]# dnf install -y lsof
Last metadata expiration check: 1:07:30 ago on Sun 15 Nov 2020 08:12:06 PM PKT.
Dependencies resolved.
================================================================================
 Package        Architecture     Version                 Repository        Size
================================================================================
Installing:
 lsof           x86_64           4.91-2.el8              BaseOS           253 k

Transaction Summary
================================================================================
Install  1 Package

Total download size: 253 k
Installed size: 630 k
Downloading Packages:
lsof-4.91-2.el8.x86_64.rpm                      114 kB/s | 253 kB     00:02
--------------------------------------------------------------------------------
Total                                            76 kB/s | 253 kB     00:03
Running transaction check
Transaction check succeeded.
Running transaction test
Transaction test succeeded.
Running transaction
  Preparing        :                                                        1/1
  Installing       : lsof-4.91-2.el8.x86_64                                 1/1
  Running scriptlet: lsof-4.91-2.el8.x86_64                                 1/1
  Verifying        : lsof-4.91-2.el8.x86_64                                 1/1

Installed:
  lsof-4.91-2.el8.x86_64

Complete!
【6】使用以下Linux命令启用Apache Solr服务。
[root@solrserver tmp]# systemctl enable solr
solr.service is not a native service, redirecting to systemd-sysv-install.
Executing: /usr/lib/systemd/systemd-sysv-install enable solr
【7】验证Solr服务是否正在默认端口8983上运行。
[root@solrserver tmp]# netstat -anptl| grep 8983
tcp        0      0 0.0.0.0:8983            0.0.0.0:*               LISTEN      94325/java
[root@solrserver tmp]# ss -tulpn | grep 8983
tcp     LISTEN   0        50               0.0.0.0:8983           0.0.0.0:*      users:(("java",pid=94325,fd=153))
在Apache Solr启动期间纠正有关文件和进程限制的警告。您需要按照Apache Solr的要求定义安全限制。
【8】在vim编辑器中打开limits.conf文件。
[root@solrserver tmp]# vi /etc/security/limits.d/solr.conf
并在此文件中添加以下指令。
solr   soft   nofile   65536
solr   hard   nofile   65536
solr   soft   nproc    65536
solr   hard   nproc    65536
【9】使用旧版服务命令重新启动Solr服务并查看solr服务状态。
[root@solrserver tmp]# service solr restart
Sending stop command to Solr running on port 8983 ... waiting up to 180 seconds to allow Jetty process 94325 to stop gracefully.
Waiting up to 180 seconds to see Solr running on port 8983 [|]
Started Solr server on port 8983 (pid=95305). Happy searching!


[root@solrserver tmp]# service solr status

Found 1 Solr nodes:

Solr process 95305 running on port 8983
{
  "solr_home":"/var/solr/data",
  "version":"8.7.0 2dc63e901c60cda27ef3b744bc554f1481b3b067 - atrisharma - 2020-10-29 19:39:16",
  "startTime":"2020-12-24T14:59:08.493Z",
  "uptime":"0 days, 0 hours, 0 minutes, 52 seconds",
  "memory":"121.7 MB (%23.8) of 512 MB"}
【10】Apache Solr使用默认网络端口8983/tcp。因此,您需要在Linux防火墙中允许该端口。
[root@solrserver tmp]# firewall-cmd --permanent --add-port=8983/tcp
success
[root@solrserver tmp]#  firewall-cmd --reload
success
【11】在Apache Solr服务器中创建一个测试集合。
[root@solrserver tmp]# su - solr -c "/opt/solr/bin/solr create -c lianglabtest -n data_driven_schema_configs"

Created new core 'lianglabtest'
[root@solrserver tmp]#
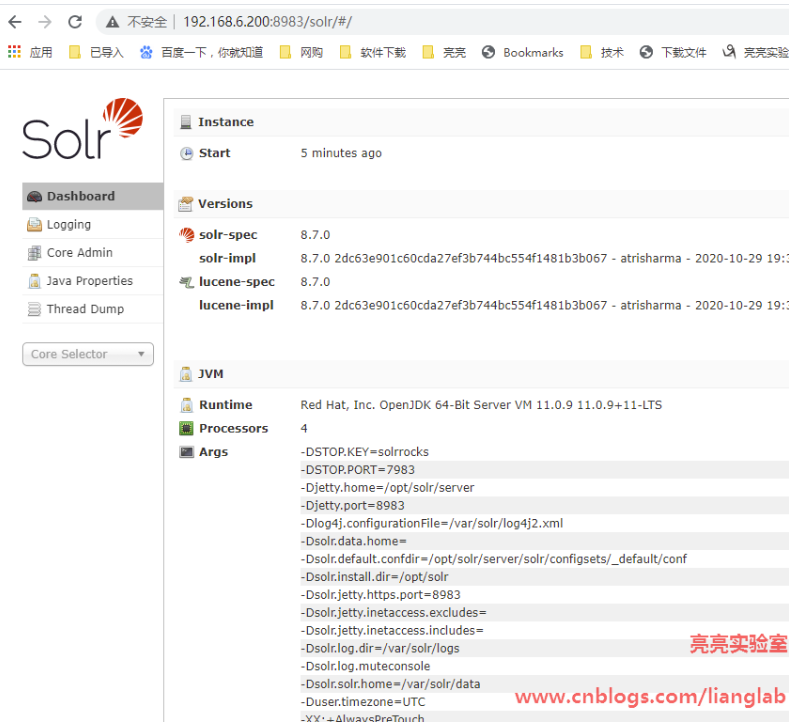
【12】在客户端浏览器中打开URL http://192.168.6.200:8983/solr/。

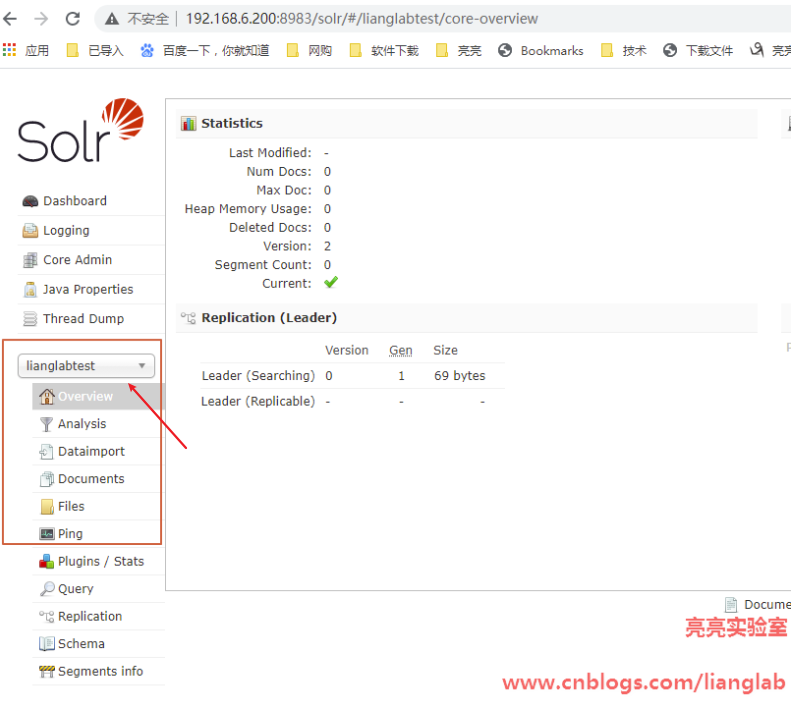
【14】您现在位于Apache Solr Web UI的仪表板上。您可以通过从左侧窗格的下拉框中选择最近创建的集合来检查它。

这是我们本文章的结尾。您已经学会了如何在CentOS 8.2安装Apache Solr,如果在阅读中遇到问题请及时留言,如果感觉文章对您有帮助请与朋友分享文章。