Spring Boot允许使用propertities文件、yaml文件或者命令行参数作为外部配置。
命令行参数配置
Spring Boot可以基于jar包运行,打成jar包的程序可以直接通过下面的命令运行:
java -jar xx.jar
可以通以下命令修改Tomcat端口号:
java -jar xx.jar --server.port=9090
常规属性配置
在Spring Boot里,我们只需要在application.properties定义属性,直接使用@Value注入即可。
(1)application.properties属性
blog.author = 佛大Java程序员
blog.subject = Spring Boot --外部配置的属性注入
(2)修改入口类
@RestController
@SpringBootApplication
public class PropertiesdemoApplication {

    @Value("${blog.author}")
    private String blogAuthor;
    @Value("${blog.subject}")
    private String blogSubject;

    /**
     * 常规属性配置
     * 注意路径/properties
     * @return
     */
    @RequestMapping("/properties")
    String index(){
        return "blog author is:" + blogAuthor + " and blog subject is:" + blogSubject;
    }

    public static void main(String[] args) {
        SpringApplication.run(PropertiesdemoApplication.class, args);
    }

}
(3)运行,浏览器访问http://localhost:8080/properties/

类型安全的配置
类型安全一句话理解:可以批量将属性注入对象中的方法。
基于系统配置文件
(1)application.properties属性
blog.author = 佛大Java程序员
blog.subject = Spring Boot --外部配置的属性注入
(2) 类型安全的Bean
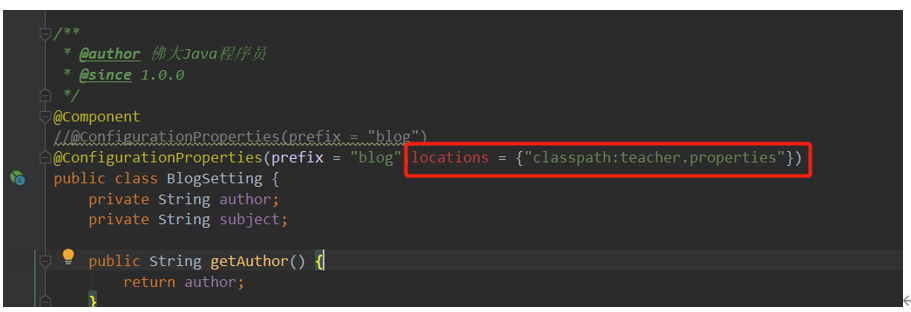
/**
 * @author 佛大Java程序员
 * @since 1.0.0
 */
@Component
@ConfigurationProperties(prefix = "blog")
public class BlogSetting {
private String author;private String subject;

    public String getAuthor() {
        return author;
    }

    public void setAuthor(String author) {
        this.author = author;
    }

    public String getSubject() {
        return subject;
    }

    public void setSubject(String subject) {
        this.subject = subject;
    }
}
注解解释
@ConfigurationProperties加载properties文件内的配置,通过prefix属性指定properties的配置的前缀。
(3)入口类
@RestController
@SpringBootApplication
public class PropertiesdemoApplication {

   @Autowired
   private BlogSetting blogSetting;

    /**
     * 类型安全的配置 -- 系统属性文件
     * 注意请求路径/ConfigurationProperties
     * @return
     */
   @RequestMapping("/ConfigurationProperties")
   String index0(){
       return "blog author is:" + blogSetting.getAuthor() + " and blog subject is:" + blogSetting.getSubject();
   }

    public static void main(String[] args) {
        SpringApplication.run(PropertiesdemoApplication.class, args);
    }

}
注解说明:使用@Autowires直接注入该配置。
(4) 运行
浏览器访问 -- http://localhost:8080/ConfigurationProperties

基于自定义配置文件
我们也可以新建一个自定义的properties文件,需要我们在安全类型Bean上添加@PropertySource来指定自定义的属性文件的位置。
(1) 添加自定义属性文件

customize.properties
article.author = 博客作者 -- 佛大Java程序员
article.subject = 博客主题 -- 外部配置的属性注入
(2) 类型安全的Bean
/**
 * @author 佛大Java程序员
 * @since 1.0.0
 */
@Component
@ConfigurationProperties(prefix = "article")
@PropertySource(value={"classpath:config/customize.properties"})
public class BlogSetting {

    private String author;
    private String subject;

    public String getAuthor() {
        return author;
    }

    public void setAuthor(String author) {
        this.author = author;
    }

    public String getSubject() {
        return subject;
    }

    public void setSubject(String subject) {
        this.subject = subject;
    }
}
注意:
@ConfigurationProperties(prefix = "article")
@PropertySource(value={"classpath:config/customize.properties"})
(3)入口类
@RestController
@SpringBootApplication
public class PropertiesdemoApplication {

    @Autowired
    private BlogSetting blogSetting;

    /**
     * 类型安全的配置 -- 自定义属性文件
     * 注意请求路径/customizeProperties
     * @return
     */
    @RequestMapping("/customizeProperties")
    String index1(){
        return "article author is:" + blogSetting.getAuthor() + " and article subject is:" + blogSetting.getSubject();
    }

    public static void main(String[] args) {
        SpringApplication.run(PropertiesdemoApplication.class, args);
    }

}
(4) 运行
浏览器输入 -- http://localhost:8080/customizeProperties/

补充说明:
(1) 在SpringBoot1.4之后取消了@ConfigurationProperties中的属性location,原本可以用来指定属性文件的位置,上面的例子是实现使用自定义配置属性的方法之一。
(2) 注意Spring Boot常规属性配置和Spring中的注入配置文件属性中的内容的区别
Spring环境下中需要使用@PropertySource指定文件地址,若使用@Value注入,则要配置一个PropertySourcePlaceholderConfigurer的Bean。注意@Value中使用的是的“$“不是”#“。
Spring Boot中只需要在application.properties定义属性,直接使用@Value注入即可。
常见面试题:
(1) 项目中用到了Spring Boot中的哪些注解?怎么用的?(蓝月亮1-3年)
(2)项目中怎么引入外部配置中的属性?(蓝月亮1-3年)
参考:
《Spring Boot实战》-- 汪云飞 编著