原文链接:https://css-tricks.com/using-fetch/。 本文介绍了Fetch基本使用方法及zlFetch库的使用
无论用JavaScript发送或获取信息,我们都会用到Ajax。Ajax不需要刷新页面就能发送和获取信息,能使网页实现异步更新。
几年前,初始化Ajax一般使用jQuery的ajax方法:
$.ajax('some-url', {
  success: (data) => { /* do something with the data */ },
  error: (err) => { /* do something when an error happens */}
});也可以不用jQuery,但不得不使用XMLHttpRequest,然而这是相当复杂
幸亏,浏览器现在支持Fetch API,可以无须其他库就能实现Ajax
浏览器支持
桌面浏览器

手机/平板电脑

所有主要的浏览器(除了Opera Mini和老的IE)都支持Fetch。针对不支持的,可以使用Fetch polyfill
Fetch获取数据
使用Fetch获取数据很容易。只需要Fetch你想获取资源。
假设我们想通过GitHub获取一个仓库,我们可以像下面这样使用:
fetch('https://api.github.com/users/chriscoyier/repos');Fetch会返回Promise,所以在获取资源后,可以使用.then方法做你想做的。
fetch('https://api.github.com/users/chriscoyier/repos')
.then(response => {/* do something */})如果这是你第一次遇见Fetch,也许惊讶于Fetch返回的response。如果console.log返回的response,会得到下列信息:
{
  body: ReadableStream
  bodyUsed: false
  headers: Headers
  ok : true
  redirected : false
  status : 200
  statusText : "OK"
  type : "cors"
  url : "http://some-website.com/some-url"
  __proto__ : Response
}可以看出Fetch返回的响应能告知请求的状态。从上面例子看出请求是成功的(ok是true,status是200),但是我们想获取的仓库名却不在这里。
显然,我们从GitHub请求的资源都存储在body中,作为一种可读的流。所以需要调用一个恰当方法将可读流转换为我们可以使用的数据。
Github返回的响应是JSON格式的,所以调用response.json方法来转换数据。
还有其他方法来处理不同类型的响应。如果请求一个XML格式文件,则调用response.text。如果请求图片,使用response.blob方法。
所有这些方法(response.json等等)返回另一个Promise,所以可以调用.then方法处理我们转换后的数据。
fetch('https://api.github.com/users/chriscoyier/repos')
  .then(response => response.json())
  .then(data => {
    // data就是我们请求的repos
    console.log(data)
  });
可以看出Fetch获取数据方法简短并且简单。
接下来,让我们看看如何使用Fetch发送数据。
Fetch发送数据
使用Fetch发送也很简单,只需要配置三个参数。
fetch('some-url', options);第一个参数是设置请求方法(如post、put或del),Fetch会自动设置方法为get。
第二个参数是设置头部。因为一般使用JSON数据格式,所以设置ContentType为application/json。
第三个参数是设置包含JSON内容的主体。因为JSON内容是必须的,所以当设置主体时会调用JSON.stringify。
实践中,post请求会像下面这样:
let content = {some: 'content'};

// The actual fetch request
fetch('some-url', {
  method: 'post',
  headers: {
    'Content-Type': 'application/json'
  },
  body: JSON.stringify(content)
})
// .then()...
Fetch处理异常
虽然希望Ajax响应成功,但是仍会有问题出现:
- 可能尝试获取不存在的资源
- 没有权限获取资源
- 输入参数有误
- 服务器抛出异常
- 服务器超时
- 服务器崩溃
- API更改
- ...
假设我们试图获取不存在错误,并了解如何处理错误。下面的例子我将chriscoyier拼错为chrissycoyier
// 获取chrissycoyier's repos 而不是 chriscoyier's repos
fetch('https://api.github.com/users/chrissycoyier/repos')为了处理此错误,我们需要使用catch方法。
也许我们会用下面这种方法:
fetch('https://api.github.com/users/chrissycoyier/repos')
  .then(response => response.json())
  .then(data => console.log('data is', data))
  .catch(error => console.log('error is', error));
然而却得到下面这样结果:
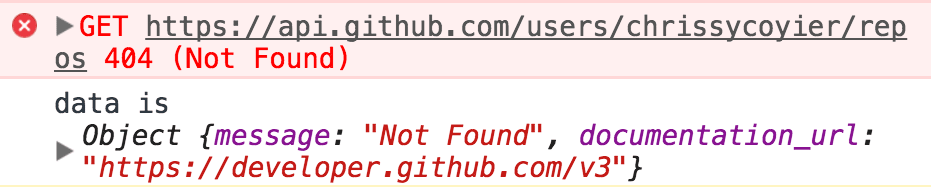
获取失败,但是第二个.then方法会执行。
如果console.log此次响应,会看出不同:
  {
  body: ReadableStream
  bodyUsed: true
  headers: Headers
  ok: false // Response is not ok
  redirected: false
  status: 404 // HTTP status is 404.
  statusText: "Not Found" // Request not found
  type: "cors"
  url: "https://api.github.com/users/chrissycoyier/repos"
}大部分是一样的,只有ok、status和statusText是不同的,正如所料,GitHub上没有发现chrissycoyier。
上面响应告诉我们Fetch不会关心AJAX是否成功,他只关心从服务器发送请求和接收响应,如果响应失败我们需要抛出异常。
因此,初始的then方法需要被重写,以至于如果响应成功会调用response.json。最简单方法是检查response是否为ok。
fetch('some-url')
  .then(response => {
    if (response.ok) {
      return response.json()
    } else {
      // Find some way to get to execute .catch()
    }
});一旦我们知道请求是不成功的,我可以throw异常或rejectPromise来调用catch。
// throwing an Error
else {
  throw new Error('something went wrong!')
}

// rejecting a Promise
else {
  return Promise.reject('something went wrong!')
}这里选择Promise.reject,是因为容易扩展。抛出异常方法也不错,但是无法扩展,唯一益处在于便于栈跟踪。
所以,到现在代码应该是这样的:
fetch('https://api.github.com/users/chrissycoyier/repos')
  .then(response => {
    if (response.ok) {
      return response.json()
    } else {
      return Promise.reject('something went wrong!')
    }
  })
  .then(data => console.log('data is', data))
  .catch(error => console.log('error is', error));
这样错误就会进入catch语句中。
但是rejectPromise时,只输出字符串不太好。这样不清楚哪里出错了,你肯定也不会想在异常时,输出下面这样:

让我们在看看响应:
  {
  body: ReadableStream
  bodyUsed: true
  headers: Headers
  ok: false // Response is not ok
  redirected: false
  status: 404 // HTTP status is 404.
  statusText: "Not Found" // Request not found
  type: "cors"
  url: "https://api.github.com/users/chrissycoyier/repos"
}在这个例子中,我们知道资源是不存在。所以我们可以返回404状态或Not Found原因短语,然而我们就知道如何处理。
为了在.catch中获取status或statusText,我们可以reject一个JavaScript对象:
fetch('some-url')
  .then(response => {
    if (response.ok) {
      return response.json()
    } else {
      return Promise.reject({
        status: response.status,
        statusText: response.statusText
      })
    }
  })
  .catch(error => {
    if (error.status === 404) {
      // do something about 404
    }
  })
上面的错误处理方法对于下面这些不需要解释的HTTP状态很适用。
- 401: Unauthorized
- 404: Not found
- 408: Connection timeout
- ...
但对于下面这些特定的错误不适用:
- 400:Bad request
例如,如果请求错误缺少必要的参数,就会返回400.
光在catch中告诉状态及原因短语并不足够。我们需要知道缺少什么参数。
所以服务器需要返回一个对象,告诉造成错误请求原因。如果使用Node和Express,会返回像下面这样的响应:
res.status(400).send({
  err: 'no first name'
})无法在最初的.then方法中reject,因为错误对象需要response.json来解析。
解决的方法是需要两个then方法。这样可以首先通过response.json读取,然后决定怎么处理。
fetch('some-error')
  .then(handleResponse)

function handleResponse(response) {
  return response.json()
    .then(json => {
      if (response.ok) {
        return json
      } else {
        return Promise.reject(json)
      }
    })
}首先我们调用response.json读取服务器发来的JSON数据,response.json返回Promise,所以可以链式调用.then方法。
在第一个.then中调用第二个.then,因为我们仍希望通过repsonse.ok判断响应是否成功。
如果想发送状态和原因短语,可以使用Object.assign()将二者结合为一个对象。
let error = Object.assign({}, json, {
  status: response.status,
  statusText: response.statusText
})
return Promise.reject(error)可以使用这样新的handleResponse函数,让数据能自动的进入.then和.catch中。
fetch('some-url')
  .then(handleResponse)
  .then(data => console.log(data))
  .catch(error => console.log(error))
处理其他响应类型
到现在,我们只处理JSON格式的响应,而返回JSON格式数据大约占90%。
至于其他的10%呢?
假设上面的例子返回的是XML格式的响应,也许会收到下面异常:

这是因为XML格式不是JSON格式,我们无法使用response.json,事实上,我们需要response.text,所以我们需要通过判断响应的头部来决定内容格式:
.then(response => {
  let contentType = response.headers.get('content-type')

  if (contentType.includes('application/json')) {
    return response.json()
    // ...
  }

  else if (contentType.includes('text/html')) {
    return response.text()
    // ...
  }

  else {
    // Handle other responses accordingly...
  }
});当我遇见这种问题时,我尝试使用ExpressJWT处理身份验证,我不知道可以发生JSON响应数据,所以我将XML格式设为默认。
这是我们到现在完整代码:
fetch('some-url')
  .then(handleResponse)
  .then(data => console.log(data))
  .then(error => console.log(error))

function handleResponse (response) {
  let contentType = response.headers.get('content-type')
  if (contentType.includes('application/json')) {
    return handleJSONResponse(response)
  } else if (contentType.includes('text/html')) {
    return handleTextResponse(response)
  } else {
    // Other response types as necessary. I haven't found a need for them yet though.
    throw new Error(`Sorry, content-type ${contentType} not supported`)
  }
}

function handleJSONResponse (response) {
  return response.json()
    .then(json => {
      if (response.ok) {
        return json
      } else {
        return Promise.reject(Object.assign({}, json, {
          status: response.status,
          statusText: response.statusText
        }))
      }
    })
}
function handleTextResponse (response) {
  return response.text()
    .then(text => {
      if (response.ok) {
        return json
      } else {
        return Promise.reject({
          status: response.status,
          statusText: response.statusText,
          err: text
        })
      }
    })
}
介绍zlFetch
zlFetch库就是上例中handleResponse函数,所以可以不用生成此函数,不需要担心响应来处理数据和错误。
典型的zlfetch像下面这样:
zlFetch('some-url', options)
  .then(data => console.log(data))
  .catch(error => console.log(error));
使用之前,需要安装zlFetch
npm install zl-fetch --save接着,需要引入到你的代码中,如果你需要polyfill,确保加入zlFetch之前引入它。
 // Polyfills (if needed)
require('isomorphic-fetch') // or whatwg-fetch or node-fetch if you prefer

// ES6 Imports
import zlFetch from 'zl-fetch';

// CommonJS Imports
const zlFetch = require('zl-fetch');
zlFetch还能无须转换成JSON格式就能发送JSON数据。
下面两个函数做了同样事情,zlFetch加入Content-type然后将内容转换为JSON格式。
let content = {some: 'content'}

// Post request with fetch
fetch('some-url', {
  method: 'post',
  headers: {'Content-Type': 'application/json'}
  body: JSON.stringify(content)
});

// Post request with zlFetch
zlFetch('some-url', {
  method: 'post',
  body: content
});
zlFetch处理身份认证也很容易。
常用方法是在头部加入Authorization,其值设为Bearer your-token-here。如果你需要增加token选项,zlFetch会帮你创建此域。
所以,下面两种代码是一样的:
let token = 'someToken'
zlFetch('some-url', {
  headers: {
    Authorization: `Bearer ${token}`
  }
});

// Authentication with JSON Web Tokens with zlFetch
zlFetch('some-url', {token});
下面就是使用zlFetch来从GitHub上获取repos:
总结
Fetch是很好的方法,能发送和接收数据。不需要在编写XHR请求或依赖于jQuery。
尽管Fetch很好,但是其错误处理不是很直接。在处理之前,需要让错误信息进入到catch方法中。
使用zlFetch库,就不需要担心错误处理了。