目录:
1. 创建package.json
创建一个package.json文件,使用 npm init命令可以自动创建。(注:使用npm命令需先安装Node.js)
npm init
初始化的package.json:


{
  "name": "libing.webpack",
  "version": "1.0.0",
  "description": "",
  "main": "index.js",
  "scripts": {
    "test": "echo "Error: no test specified" && exit 1"
  },
  "author": "",
  "license": "ISC"
}
2. 安装webpack
全局安装:
npm install -g webpack
本地安装(安装到项目目录):
npm install -D webpack
npm install --save-dev webpack
npm install -S module_name:即 npm install module_name --save,写入dependencies。
npm install -D module_name:即 npm install module_name --save-dev,写入devDependencies。
npm install -g module_name:全局安装(命令行使用)
npm install module_name:本地安装(将安装包放在 ./node_modules)
dependencies与devDependencies区别:
◊ devDependencies中的插件:只用于开发环境,不用于生产环境。
◊ dependencies中的插件:需要发布到生产环境。
查看webpack安装版本:
# webpack全局安装
webpack --version
# webpack非全局安装
node_modules/.bin/webpack --version
安装webpack-cli:
npm install -D webpack-cli
npm install -D webpack webpack-cli
3. webpack.config.js
在项目的根目录下创建webpack.config.js,最基础的配置:
const path = require('path');

module.exports = {
    entry: './src/main.js',
    output: {
        path: path.resolve(__dirname, 'dist'),
        filename: 'bundle.js'
    }
};
其中,
entry:webpack入口起点,指示 webpack 应该使用哪个模块,来作为构建其内部依赖图的开始。
output:指示 webpack 在哪里输出所创建的 bundles,以及如何命名这些文件。
在package.json文件中添加:
"scripts": {
  "start": "webpack"
},
运行命令:
npm start
注:npm中start是一个特殊的脚本名称,在命令行中使用npm start就可以执行其对于的命令。
如果对应的脚本名称不是start,在命令行中运行需要npm run {script name},如:npm run build
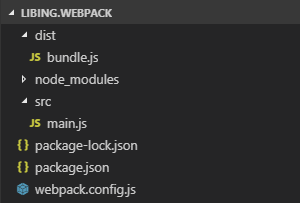
生成文件结构:
若不修改package.json,运行打包方式:
node_modules/.bin/webpack
4. webpack-dev-server
安装webpack-dev-server:
npm install -D webpack-dev-server
package.json增加:
"scripts": {
  "dev": "webpack-dev-server"
},
webpack.config.js:
var path = require('path');
var HtmlWebpackPlugin = require('html-webpack-plugin');

module.exports = {
  entry: './src/main.js',
  output: {
    path: path.resolve(__dirname, './dist'),
    filename: 'bundle.js'
  },
  devServer: {
    port: 9000,
    inline: true,
    open: true
  }
};
5. Plugins
5.1 html-webpack-plugin
html-webpack-plugin插件作用:
(1)创建HTML入口文件;
(2)为HTML文件添加引入的外部资源如script、link动态添加每次compile后的hash,防止引用缓存。
安装html-webpack-plugin:
npm install -D html-webpack-plugin
webpack.config.js:
var path = require('path');
var HtmlWebpackPlugin = require('html-webpack-plugin');

module.exports = {
  entry: './src/main.js',
  output: {
    path: path.resolve(__dirname, './dist'),
    filename: 'bundle.js'
  },
  plugins: [
    new HtmlWebpackPlugin() // 默认配置,创建一个HTML入口文件。
  ]
};
以上配置打包之后,会在dist文件夹中创建index.html入口文件。
<!DOCTYPE html>
<html>

<head>
  <meta charset="UTF-8">
  <title>Webpack App</title>
</head>

<body>
  <script type="text/javascript" src="bundle.js"></script>
</body>

</html>
html-webpack-plugin常用配置:
var path = require('path');
var HtmlWebpackPlugin = require('html-webpack-plugin');

module.exports = {
  output: {
    path: path.resolve(__dirname, './dist'),
    filename: 'bundle.js'
  },
  plugins: [
    new HtmlWebpackPlugin({
      title: 'Libing.Vue',
      minify: {
        removeComments: true, // 移除HTML中的注释
        collapseWhitespace: true, // 删除空白符与换行符
        removeRedundantAttributes: true, //删除多余的属性
      },
      template: 'index.html',
      inject: 'head'
    })
  ]
};
title:生成html文件的标题
template:指定的模板文件来生成特定的 html 文件
inject:注入选项。有四个选项值 true, body, head, false。
true:默认值,script标签位于html文件的 body 底部
body:script标签位于html文件的 body 底部(同 true)
head:script 标签位于 head 标签内
false:不插入生成的 js 文件,只是单纯的生成一个 html 文件
5.2 clean-webpack-plugin
安装clean-webpack-plugin:
npm install -D clean-webpack-plugin
webpack.config.js:
const {
  CleanWebpackPlugin
} = require('clean-webpack-plugin');
const path = require('path');

module.exports = {
  mode: 'production',
  entry: './src/main.js',
  output: {
    path: path.resolve(__dirname, './dist'),
    filename: 'bundle-[hash].js'
  },
  plugins: [
    new CleanWebpackPlugin()
  ]
};