User authentication in Django
https://docs.djangoproject.com/en/3.2/topics/auth/
django带有一个用户认证系统,能够处理 用户账户、组、许可、基于cookie的用户会话。
Django comes with a user authentication system. It handles user accounts, groups, permissions and cookie-based user sessions. This section of the documentation explains how the default implementation works out of the box, as well as how to extend and customize it to suit your project’s needs.
认证系统处理 认证 和 授权。
The Django authentication system handles both authentication and authorization. Briefly, authentication verifies a user is who they claim to be, and authorization determines what an authenticated user is allowed to do. Here the term authentication is used to refer to both tasks.
The auth system consists of:
- Users
- Permissions: Binary (yes/no) flags designating whether a user may perform a certain task.
- Groups: A generic way of applying labels and permissions to more than one user.
- A configurable password hashing system
- Forms and view tools for logging in users, or restricting content
- A pluggable backend system
认证接口
https://docs.djangoproject.com/en/3.2/topics/auth/default/#authenticating-users
仅仅验证 用户名和密码 的合法性
from django.contrib.auth import authenticate
user = authenticate(username='john', password='secret')
if user is not None:
    # A backend authenticated the credentials
else:
    # No backend authenticated the credentials
登录接口
https://docs.djangoproject.com/en/3.2/topics/auth/default/#how-to-log-a-user-in
登录接口,将用户记入session
from django.contrib.auth import authenticate, login

def my_view(request):
    username = request.POST['username']
    password = request.POST['password']
    user = authenticate(request, username=username, password=password)
    if user is not None:
        login(request, user)
        # Redirect to a success page.
        ...
    else:
        # Return an 'invalid login' error message.
        ...
登出接口
https://docs.djangoproject.com/en/3.2/topics/auth/default/#how-to-log-a-user-out
从session中销毁
from django.contrib.auth import logout

def logout_view(request):
    logout(request)
    # Redirect to a success page.
djoser
https://djoser.readthedocs.io/en/latest/introduction.html
django 提供的认证系统, 从函数层面提供接口,对于HTTP接口,还需要用户去封装。
对于普遍情况,登录逻辑是一致的, 所以djoser库直接提供了 restful HTTP接口。
REST implementation of Django authentication system. djoser library provides a set of Django Rest Framework views to handle basic actions such as registration, login, logout, password reset and account activation. It works with custom user model.
Instead of reusing Django code (e.g.
PasswordResetForm), we reimplemented few things to fit better into Single Page App architecture.Developed by SUNSCRAPERS with passion & patience.
Supported API
https://djoser.readthedocs.io/en/latest/getting_started.html
此库基于DRF.
Available endpoints
/users//users/me//users/confirm//users/resend_activation//users/set_password//users/reset_password//users/reset_password_confirm//users/set_username//users/reset_username//users/reset_username_confirm//token/login/(Token Based Authentication)/token/logout/(Token Based Authentication)/jwt/create/(JSON Web Token Authentication)/jwt/refresh/(JSON Web Token Authentication)/jwt/verify/(JSON Web Token Authentication)
djoser tutorial
https://saasitive.com/tutorial/token-based-authentication-django-rest-framework-djoser/#
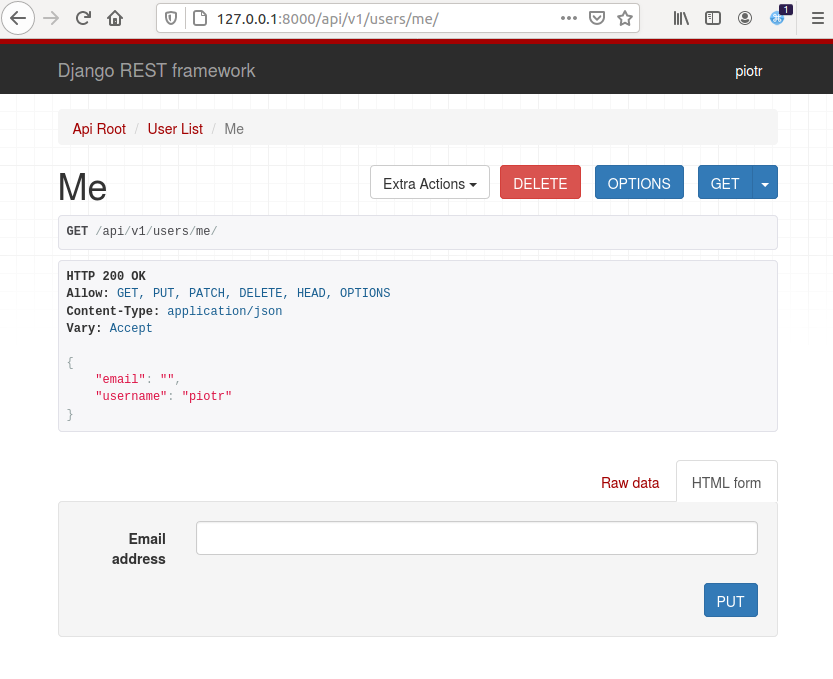
/users/- to signup a new user,/users/me/- to get user information,/token/login/- to get token,/token/logout/- to logout.
创建用户
It is expected because we don’t have any endpoint at
/. Please go to http://127.0.0.1:8000/api/v1/users:
Please fill the form at the bottom of the page and click
POST. This will create a new user. The email field is not required, you can leave it blank.

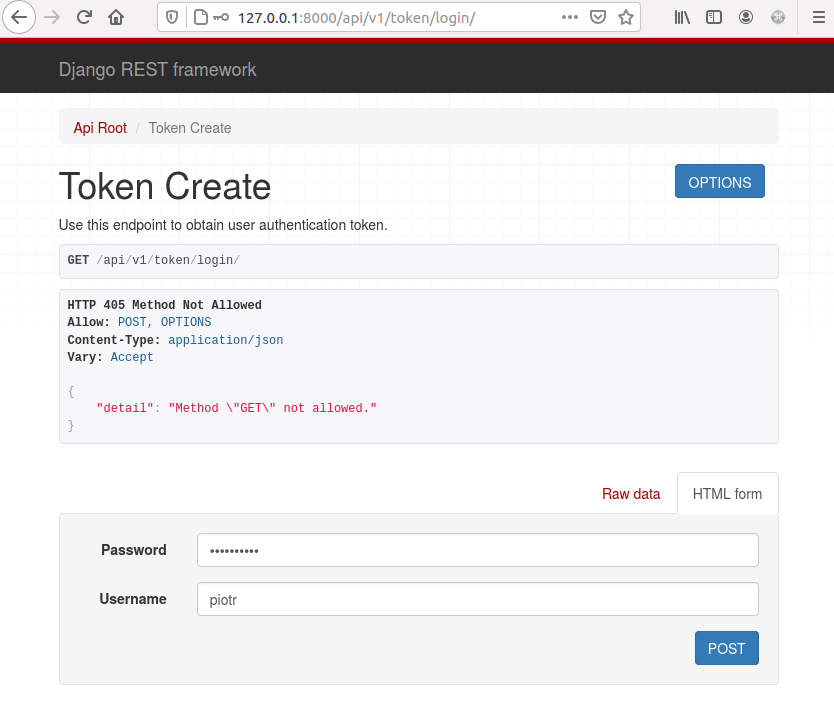
登录
Please change the url to http://127.0.0.1:8000/api/v1/token/login:
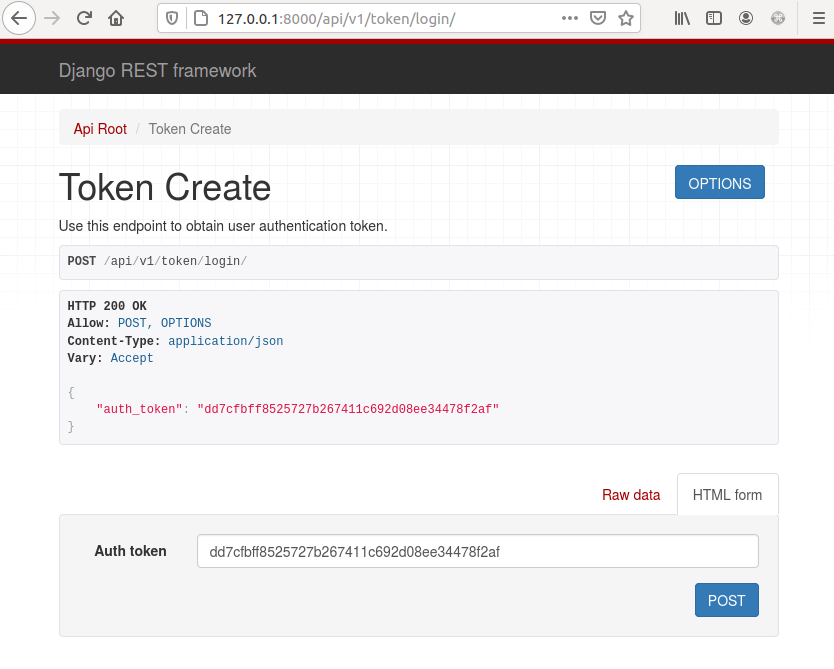
Please fill the form at the bottom and click
POST. You should see a screen like below:
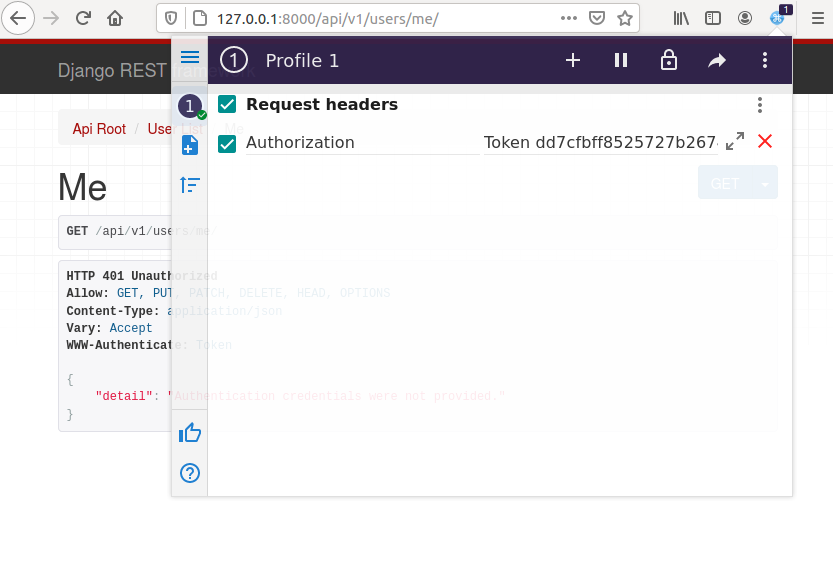
使用ModHeader添加 Authorization:Token xxxxxxxxxx 报文头
The browsable DRF API doesn’t support authorization with token, so there are 2 ways to enable it:
- add session based authentication for testing (I don’t like it),
- add free browser plugin to inject token in request’s header (that’s my option).
I’m using free ModHeader plugin. It is availble for many browsers (Chrome, Firefox, Opera, Edge).
Notice: You need to set a token in the form
Token dd7cfbff8525727b267411c692d08ee34478f2af- there is no colon here!After setting the token in the header please just refresh the website.
登出
Please go to http://127.0.0.1:8000/api/v1/token/logout to logout. You should click
POSTbutton to logout.