【旧博客转移 - 2015年12月6日 18:12】
今天用Shader做了一个复古荧幕效果,老电视机放映的感觉,写篇文章记录一下
原始图片:
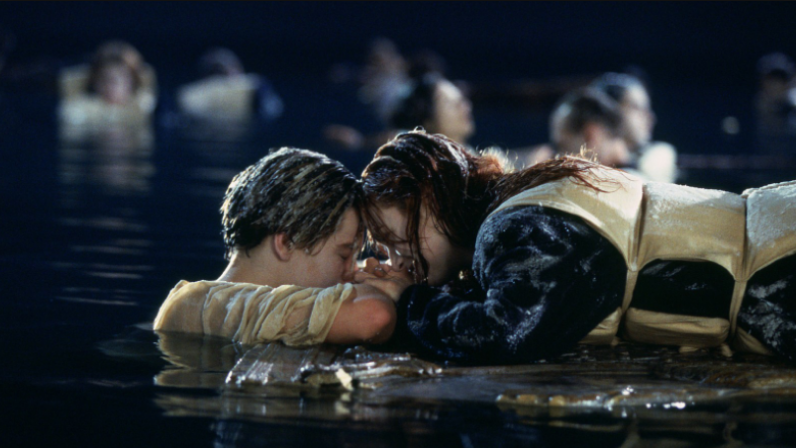
没错,这就是电影《泰坦尼克号》的剧照。船撞到冰山上翻了,气温非常低,男主角杰克,找到了一块木板,让女主角睡在上面保住了性命,自己被冻成冰块沉入海底,还是蛮感人的。
实现原理就是用到几张特效图,加入一些抖动效果
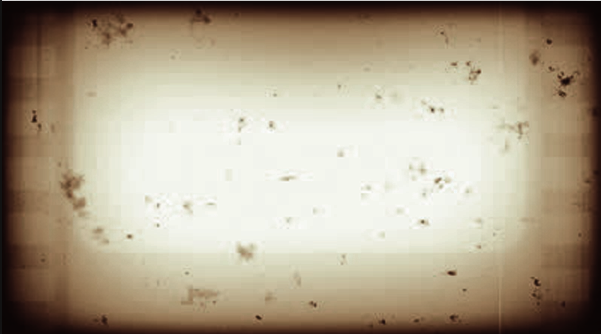
1.晕影图(Vignette effect)
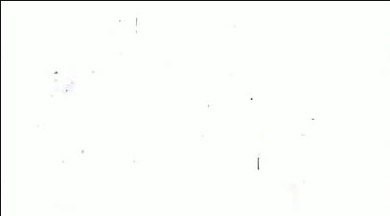
2.屏幕划痕Scratches和 灰尘污点Dust

Shader实现:
 half2 mainTexUV = half2(i.uv.x, i.uv.y+(_RandomValue*_SinTime.z * 0.005));
 fixed4 mainTex = tex2D(_MainTex, mainTexUV);
采样主纹理,UV值y加上了一个随机值,实现上下抖动的效果。
_SinTime是Unity内置的一个变量,用来获取一个-1到1范围的sin函数值
 half2 scratchesUV = half2(i.uv.x + (_RandomValue * _SinTime.z * _ScratchesXSpeed),
 i.uv.y + (_RandomValue * _Time.x * _ScratchesYSpeed));
 fixed4 scratchesTex = tex2D(_ScratchesTex, scratchesUV);
采样划痕纹理,这里的UV值,采用随机数乘以X,Y轴分别的速度,来实现屏幕随机位置的闪动效果,灰尘纹理也是一样的处理
 //转成YIQ色彩空间,取出亮度值
 fixed lum = dot(fixed3(0.299, 0.587, 0.114), mainTex.rgb);

 fixed4 finalColor = lum + lerp(_SepiaColor, _SepiaColor + fixed4(0.1f, 0.1f, 0.1f, 0.1f), _RandomValue);
这一步是把RGB颜色空间转换成YIQ颜色空间,YIQ色彩空间通常被电视系统所采用,在YIQ系统中,Y分量代表图像的亮度信息,I、Q两个分量则携带颜色信息,I分量代表从橙色到青色的颜色变化,而Q分量则代表从紫色到黄绿色的颜色变化。将彩色图像从RGB转换到YIQ色彩空间,可以把彩色图像中的亮度信息与色度信息分开,分别独立进行处理。
再加上一个棕褐色调_SepiaColor,这里用lerp函数做一个线性插值,实现明暗之间的渐变
fixed3 constantWhite = fixed3(1, 1, 1);

finalColor = lerp(finalColor, finalColor * vignetteTex, _VignetteAmount);
finalColor.rgb *= lerp(scratchesTex, constantWhite, _RandomValue);
finalColor.rgb *= lerp(dustTex, constantWhite, (_RandomValue * _SinTime.z));
finalColor = lerp(mainTex, finalColor, _EffectAmount);
最后把颜色汇总,用一些线性插值实现渐变,然后把颜色值相乘得到最后的结果。返回给fragment着色器输出,就可以得到上面的效果。
完整Shader:
Shader "lijia/OldEffect" {
 Properties {
 //原图
 _MainTex("MainTex", 2D) = "white" {}
 //晕影图
 _VignetteTex("VignetteTex", 2D) = "white" {}
 _VignetteAmount ("Vignette Opacity", Range(0, 1)) = 1
 //划痕
 _ScratchesTex("ScratchesTex", 2D) = "white" {}
 _ScratchesXSpeed("ScratchesXSpeed", float) = 100
 _ScratchesYSpeed("ScratchesYSpeed", float) = 100
 //灰尘
 _DustTex("DustTex", 2D) = "white" {}
 _DustXSpeed("_DustXSpeed", float) = 100
 _DustYSpeed("_DustYSpeed", float) = 100
 //老旧的褐色调
 _SepiaColor("_SepiaColor", Color) = (1, 1, 1, 1)

 _RandomValue("RandomValue", float) = 1.0
 _EffectAmount ("Old Film Effect Amount", Range(0, 1)) = 1
 }

 SubShader {
 Tags{"RenderType" = "Opaque"}
 Pass {
 CGPROGRAM
 #pragma vertex vert
 #pragma fragment frag

 #include "UnityCG.cginc"

 sampler2D _MainTex;
 float4 _MainTex_ST;

 sampler2D _VignetteTex;
 sampler2D _ScratchesTex;
 sampler2D _DustTex;

 float _EffectAmount;
 float _RandomValue;
 float _VignetteAmount;

 float _ScratchesXSpeed;
 float _ScratchesYSpeed;
 float _DustXSpeed;
 float _DustYSpeed;

 fixed4 _SepiaColor;

 struct v2f {
 float4 pos : SV_POSITION;
 float2 uv : TEXCOORD0;
 };

 v2f vert(appdata_base v)
 {
 v2f o;
 o.pos = mul(UNITY_MATRIX_MVP, v.vertex);
 o.uv = TRANSFORM_TEX(v.texcoord, _MainTex);
 return o;
 }

 fixed4 frag(v2f i): COLOR
 {
 //采样主纹理 uv.y值加上一些随机因素实现抖动的效果 _SinTime是Unity内置的变量 用来获取一个-1到1的正弦值
 half2 mainTexUV = half2(i.uv.x, i.uv.y+(_RandomValue*_SinTime.z * 0.005));
 fixed4 mainTex = tex2D(_MainTex, mainTexUV);

 fixed4 vignetteTex = tex2D(_VignetteTex, i.uv);

 half2 scratchesUV = half2(i.uv.x + (_RandomValue * _SinTime.z * _ScratchesXSpeed),
 i.uv.y + (_RandomValue * _Time.x * _ScratchesYSpeed));
 fixed4 scratchesTex = tex2D(_ScratchesTex, scratchesUV);

 half2 dustUV = half2(i.uv.x + (_RandomValue * _SinTime.z * _DustXSpeed),
 i.uv.y + (_Time.x * _DustYSpeed));
 fixed4 dustTex = tex2D(_DustTex, dustUV);

 //变成YIQ 值
 fixed lum = dot(fixed3(0.299, 0.587, 0.114), mainTex.rgb);

 fixed4 finalColor = lum + lerp(_SepiaColor, _SepiaColor + fixed4(0.1f, 0.1f, 0.1f, 0.1f), _RandomValue);

 fixed3 constantWhite = fixed3(1, 1, 1);

 finalColor = lerp(finalColor, finalColor * vignetteTex, _VignetteAmount);
 finalColor.rgb *= lerp(scratchesTex, constantWhite, _RandomValue);
 finalColor.rgb *= lerp(dustTex, constantWhite, (_RandomValue * _SinTime.z));
 finalColor = lerp(mainTex, finalColor, _EffectAmount);

 return finalColor;
 }

 ENDCG
 }
 }
 FallBack "Diffuse"
}
扩展:
上面讲的是基于一张原图做的处理,如果我们想实现在动态内容上加上这种老电影效果呢?比如游戏中播放剧情的时候,在屏幕上加上一个老电影特效,提高带入感。
这时我们可以用混合模式

官方文档的解释
Blend DstColor Zero是乘以Color缓冲区的颜色的,而这个特效刚好是用到乘法
分了两个Pass来实现
第一个Pass先处理色调
Pass {
Blend DstColor Zero
CGPROGRAM
#pragma vertex vert_img
#pragma fragment frag

#include "UnityCG.cginc"

fixed4 _SepiaColor;
float _RandomValue;

fixed4 frag(v2f_img i): COLOR
{
fixed4 color = fixed4(0.299, 0.587, 0.114, 1);
color = color + lerp(_SepiaColor, _SepiaColor + fixed4(0.1f, 0.1f, 0.1f, 0.1f), _RandomValue);
return color;
}
ENDCG
}
第二个Pass再把剩下的图片叠加上去,跟之前一样处理就行了。
fixed4 frag(v2f_img i): COLOR
{
fixed4 vignetteTex = tex2D(_VignetteTex, i.uv);

half2 scratchesUV = half2(i.uv.x + (_RandomValue * _SinTime.z * _ScratchesXSpeed),
i.uv.y + (_RandomValue * _Time.x * _ScratchesYSpeed));
fixed4 scratchesTex = tex2D(_ScratchesTex, scratchesUV);

half2 dustUV = half2(i.uv.x + (_RandomValue * _SinTime.z * _DustXSpeed),
i.uv.y + (_Time.x * _DustYSpeed));
fixed4 dustTex = tex2D(_DustTex, dustUV);

fixed3 constantWhite = fixed3(1, 1, 1);

fixed4 finalColor = fixed4(1, 1, 1, 1);//这里使用1,因为混合模式会乘Color缓冲的颜色
finalColor = lerp(finalColor, finalColor*vignetteTex, _RandomValue);
finalColor.rgb *= lerp(scratchesTex, constantWhite, _RandomValue);
finalColor.rgb *= lerp(dustTex, constantWhite, _RandomValue*_SinTime.z);
return finalColor;
}
感谢http://blog.csdn.net/candycat1992,读你的文章让我学到了很多知识