Walkthrough: Write your first client script
Ready to write your first client script to see things in action. Lets get started; we'll keep it simple.
Objective
After completing this walkthrough, you will know how to use your JavaScript code in model-driven apps, which involves the following steps at a high level:
- Write your JavaScript code to address a business issue
- Upload your JavaScript code as a web resource in model-driven apps
- Associate the JavaScript functions in the web resource to different client-side events in model-driven apps.
We will draw your attention to important facts during the walkthrough, and provide references to actual methods as appropriate.
Step 1: Write your custom JavaScript code
The first step is to identify the business issue you are trying to address using client scripting. Once you have identified it, you need to write your JavaScript code containing the custom business logic that addresses your business issue.
Model-driven apps do not provide a JavaScript editor. So, you can use an external authoring tool that provides features to specifically support editing JavaScript files, such as Notepad++, Visual Studio Code, or Microsoft Visual Studio.
You can review the complete sample code used in the walkthrough later in this topic.
Let's look at the code in detail:
Detailed code explanation
-
Define namespace: The code starts by defining a namespace for your custom script. As a best practice, you should always create namespaced JavaScript libraries to avoid having your functions overriden by functions in another library.
JavaScriptvar Sdk = window.Sdk || {};In this case, all the functions defined in this library can be used as
Sdk.[functionName]. -
Define global variables: The following section defines some global variables to be used in the script. Note that you now don't need to go through the form context to get the user name. Context information is now available globally using the Xrm.Utility.getGlobalContext method.
JavaScript// Define some global variables var myUniqueId = "_myUniqueId"; // Define an ID for the notification var currentUserName = Xrm.Utility.getGlobalContext().userSettings.userName; // get current user name var message = currentUserName + ": Your JavaScript code in action!"; -
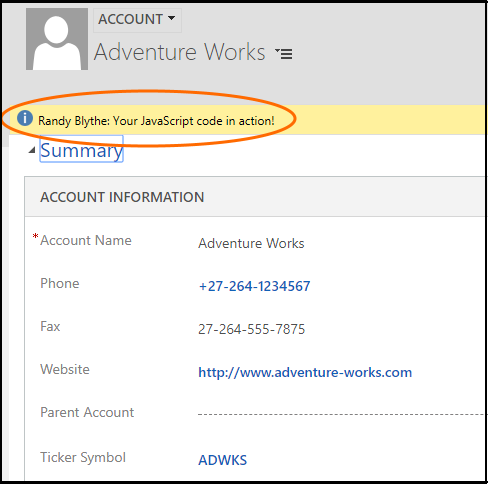
Code to execute on the OnLoad event: This section contains the code that will be executed when the account form loads. For example, when you create a new account record or when you open an existing account record.
The code uses the
executionContextobject to get theformContextobject. When we attach our code with the form event later, we will remember to select the option to pass the execution context to this function. Next, we display a form level notification using the setFormNotification method. Next, we use the setTimeOut method to delay the execution of the clearFormNotification method to clear the notification after 5 seconds.JavaScript// Code to run in the form OnLoad event this.formOnLoad = function (executionContext) { var formContext = executionContext.getFormContext(); // display the form level notification as an INFO formContext.ui.setFormNotification(message, "INFO", myUniqueId); // Wait for 5 seconds before clearing the notification window.setTimeout(function () { formContext.ui.clearFormNotification(myUniqueId); }, 5000); } -
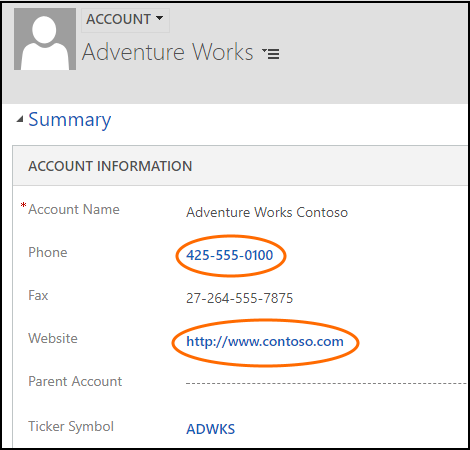
Code to execute on the OnChange event: Code in this section will be associated with the Account Name field in the account form so that it gets executed only when you change the account name value.
The code performs a case-insensitive search for "Contoso" in the account name, and if present, automatically sets values for some fields in the account form.
JavaScript// Code to run in the attribute OnChange event this.attributeOnChange = function (executionContext) { var formContext = executionContext.getFormContext(); // Automatically set some field values if the account name contains "Contoso" var accountName = formContext.getAttribute("name").getValue(); if (accountName.toLowerCase().search("contoso") != -1) { formContext.getAttribute("websiteurl").setValue("https://www.contoso.com"); formContext.getAttribute("telephone1").setValue("425-555-0100"); formContext.getAttribute("description").setValue("Website URL, Phone and Description set using custom script."); } } -
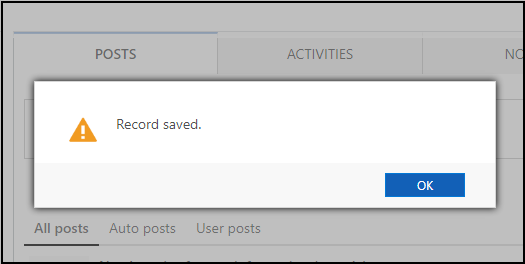
Code to execute on the OnSave event: The code in this section displays an alert dialog box using the openAlertDialog method. This dialog box displays a message with the OK button; user can close the alert by clicking OK.
Note that we are not passing in the execution context in this function as its not required to execute Xrm.Utility.* methods.
JavaScript// Code to run in the form OnSave event this.formOnSave = function () { // Display an alert dialog Xrm.Navigation.openAlertDialog({ text: "Record saved." }); }
Step 2: Add your JavaScript code in a Script web resource
Now that your code is ready, you want to associate it with events in model-driven apps. You use Script web resourcesin model-driven apps to upload the script to your model-driven apps instance, and then associate it with events.
- Navigate to your model-driven apps instance in browser, and go to Settings > Customizations.
- In the Customization area, choose Customize the System.
- In the solutions explorer, under Components, choose Web Resources.
- Choose New to create a web resource.
- In the new web resource dialog, specify the Name and Display Name for your web resource. For example: "mySampleScript.js" and "Sample: Walkthrough" Script.
- Select Script (JScript) from the Type drop-down list. You can either upload a file containing your JavaScript code by selecting Choose File, or select Text Editor and then paste your JavaScript code in the editor.
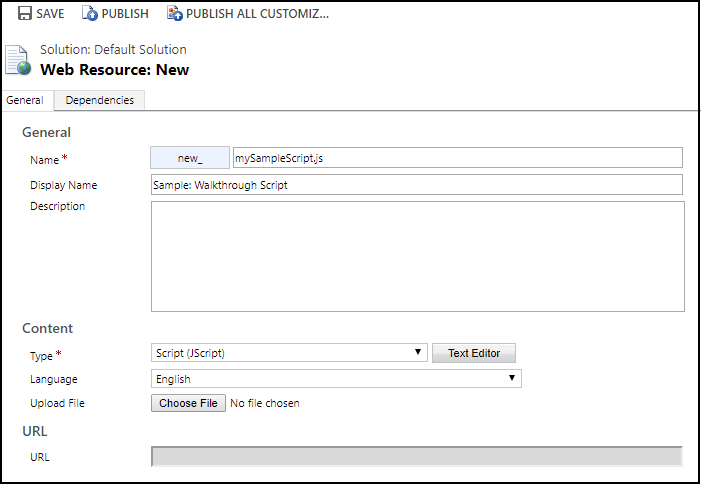
- Choose Save to create the web resource containing your JavaScript code.
- Choose Publish to publish your web resource.
Step 3: Associate Script web resource to a form
Associate the web resource containing your JavaScript code to model-driven apps forms to be able to associate functions in your code with events. As the JavaScript code in this walkthrough is targeted at the account record, we will associate the web resource with the account form.
-
Navigate to your model-driven apps instance in browser, and go to Sales > Accounts or Service > Accounts.
-
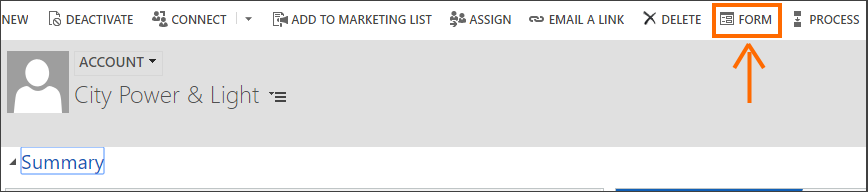
Open an account record, and select Form to open the form editor.
-
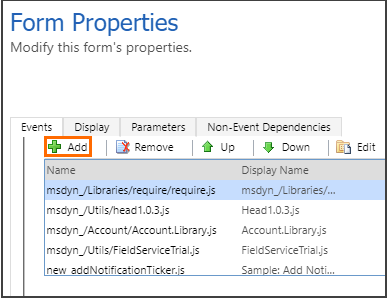
In the form editor, select Form Properties.
-
In the Form Properties dialog box, under the Events tab, click Add to search and add your web resource.
-
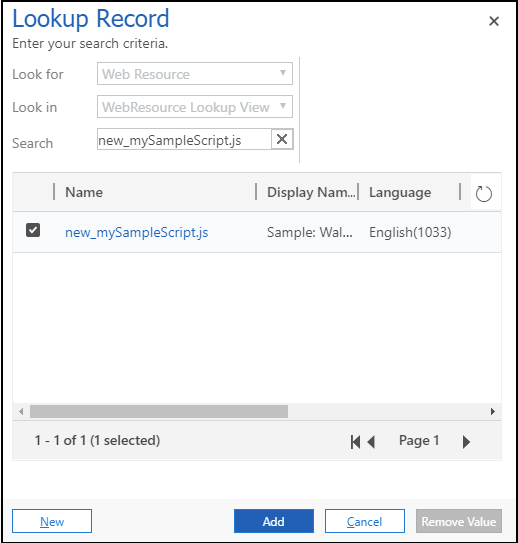
In the next dialog box, search for your web resource name, select it, and then click Add to add it as a JavaScript library for the account form.
This makes the web resource available to be selected under the Event Handlers section in the Form Propertiesdialog. Remember that we have three functions in our JavaScript code to be associated with appropriate events in the form.
-
Under the Event Handlers section, select Form as the control and OnLoad as the Event; click Add to add an event handler for the OnLoad event.

-
In the Handler Properties dialog box:
-
Select the name of your web resource from the Library drop-down list, and specify Sdk.formOnLoad in the Function field. The function name is [Namespace].[Function] from your JavaScript code.
-
Select Pass execution context as first parameter to pass in the execution context as a parameter to this function. If you review the function definition in the code, we are passing an executionContext object to our function definition, and selecting this option wires them up.

-
-
Click OK to return to the Form Properties dialog box.
-
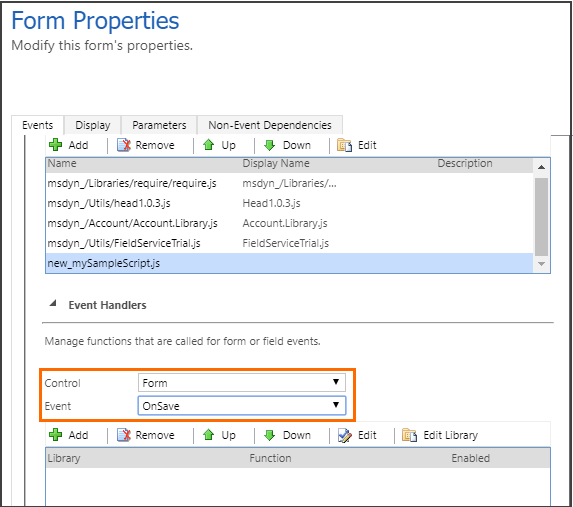
Under the Event Handlers section, select OnSave as the Event this time, and click Add to add an event handler for the Form OnSave event.
-
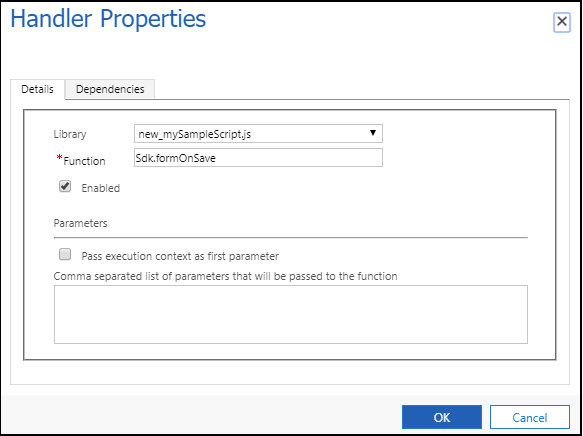
In the Handler Properties dialog box, select the name of your web resource from the Library drop-down list, and specify Sdk.formOnSave in the Function field. We won't pass the execution context to the function this time as the Sdk.formOnSave function code does not require it.
-
Click OK to return to the Form Properties dialog box.
-
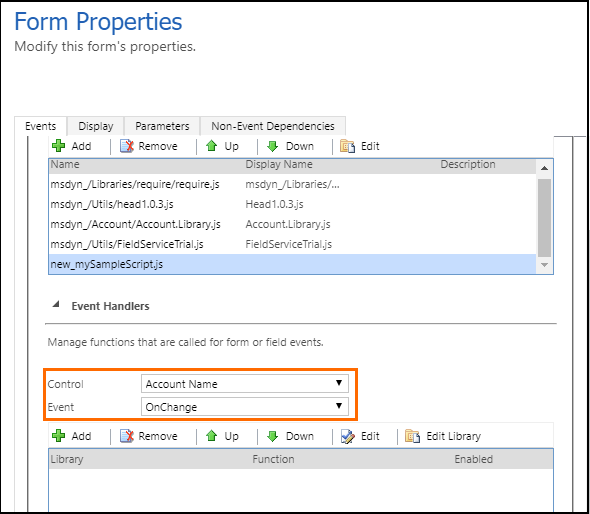
Under the Event Handlers section, select Account Name as the control and OnChange as the event; click Addto add an event handler for the OnChange event.
-
In the Handler Properties dialog box:
-
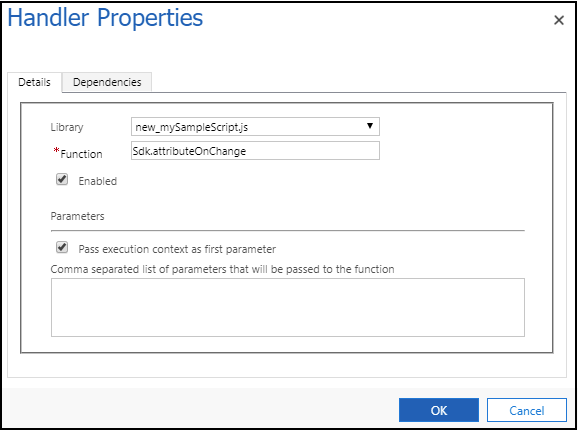
Select the name of your web resource from the Library drop-down list, and specify Sdk.attributeOnChange in the Function field.
-
Select Pass execution context as first parameter to pass in the execution context as a parameter to this function. If you review the function definition in the code, we are passing an executionContext object to our function definition, and selecting this option wires them up.
-
-
Click OK to return to the Form Properties dialog box.
-
Click OK in the Form Properties dialog box to return to the form editor.
-
Click Save to save the changes to the form.
-
Click Publish to publish the form changes.
Thats it! You have completed the steps to configure the account form to use custom business logic specified in your JavaScript code.
Test your JavaScript code
Its recommended that you refresh your browser for the changes to take effect in your model-driven apps instance. To test custom business logic you configured in this walkthrough:
-
Sign in to your model-driven apps instance.
-
Browse to Accounts, and try to open or create a new account. In this case, we will open an existing account to load the account form. You will see a notification containing your user name that will automatically disappear in 5 seconds.
-
Edit the account name to add "Contoso" in the name and move to the next field by pressing TAB. This will fire the OnChange event, and will automatically update the Phone, Website and Description fields with the value specified in the code.
-
Finally clicking Save will fire the OnSave event, and will display the alert dialog with a message that you configured in your code. Click OK to close the alert.
Complete sample code used in the walkthrough
// A namespace defined for the sample code
// As a best practice, you should always define
// a unique namespace for your libraries
var Sdk = window.Sdk || {};
(function () {
// Define some global variables
var myUniqueId = "_myUniqueId"; // Define an ID for the notification
var currentUserName = Xrm.Utility.getGlobalContext().userSettings.userName; // get current user name
var message = currentUserName + ": Your JavaScript code in action!";
// Code to run in the form OnLoad event
this.formOnLoad = function (executionContext) {
    var formContext = executionContext.getFormContext();

    // display the form level notification as an INFO
    formContext.ui.setFormNotification(message, "INFO", myUniqueId);

    // Wait for 5 seconds before clearing the notification
    window.setTimeout(function () { formContext.ui.clearFormNotification(myUniqueId); }, 5000);
}
// Code to run in the attribute OnChange event
this.attributeOnChange = function (executionContext) {
    var formContext = executionContext.getFormContext();

    // Automatically set some field values if the account name contains "Contoso"
    var accountName = formContext.getAttribute("name").getValue();
    if (accountName.toLowerCase().search("contoso") != -1) {
        formContext.getAttribute("websiteurl").setValue("https://www.contoso.com");
        formContext.getAttribute("telephone1").setValue("425-555-0100");
        formContext.getAttribute("description").setValue("Website URL, Phone and Description set using custom script.");
    }
}
// Code to run in the form OnSave event
this.formOnSave = function () {
    // Display an alert dialog
    Xrm.Navigation.openAlertDialog({ text: "Record saved." });
}
}).call(Sdk);