一.jenkins的安装配置
1.去官网下载war包,这种方式比较简单方便
java -jar jenkins.war --httpPort=49001
2.首次运行有一个key放在服务器上需要你填入才能进入,同时需要配置账号密码
3.如果没有被墙的话,最好把推荐的包都装上
manage jenkin-》plugin manager-》git,mavne,publish over ssh 这三个插件装上
因为整个流程最要就是用到这三个插件
git获取代码
maven自动构建
publish over ssh通过ssh传送文件以及ssh去运行脚本
------------------------------------------------------------------
advanced里面
http proxy onfiguration 什么都不要填,填了就会出错
如果被墙
uodate site 换成http://mirror.xmission.com/jenkins/updates/update-center.json
然后check now 看看行不行,之前是因为填了代理,所以一直不行
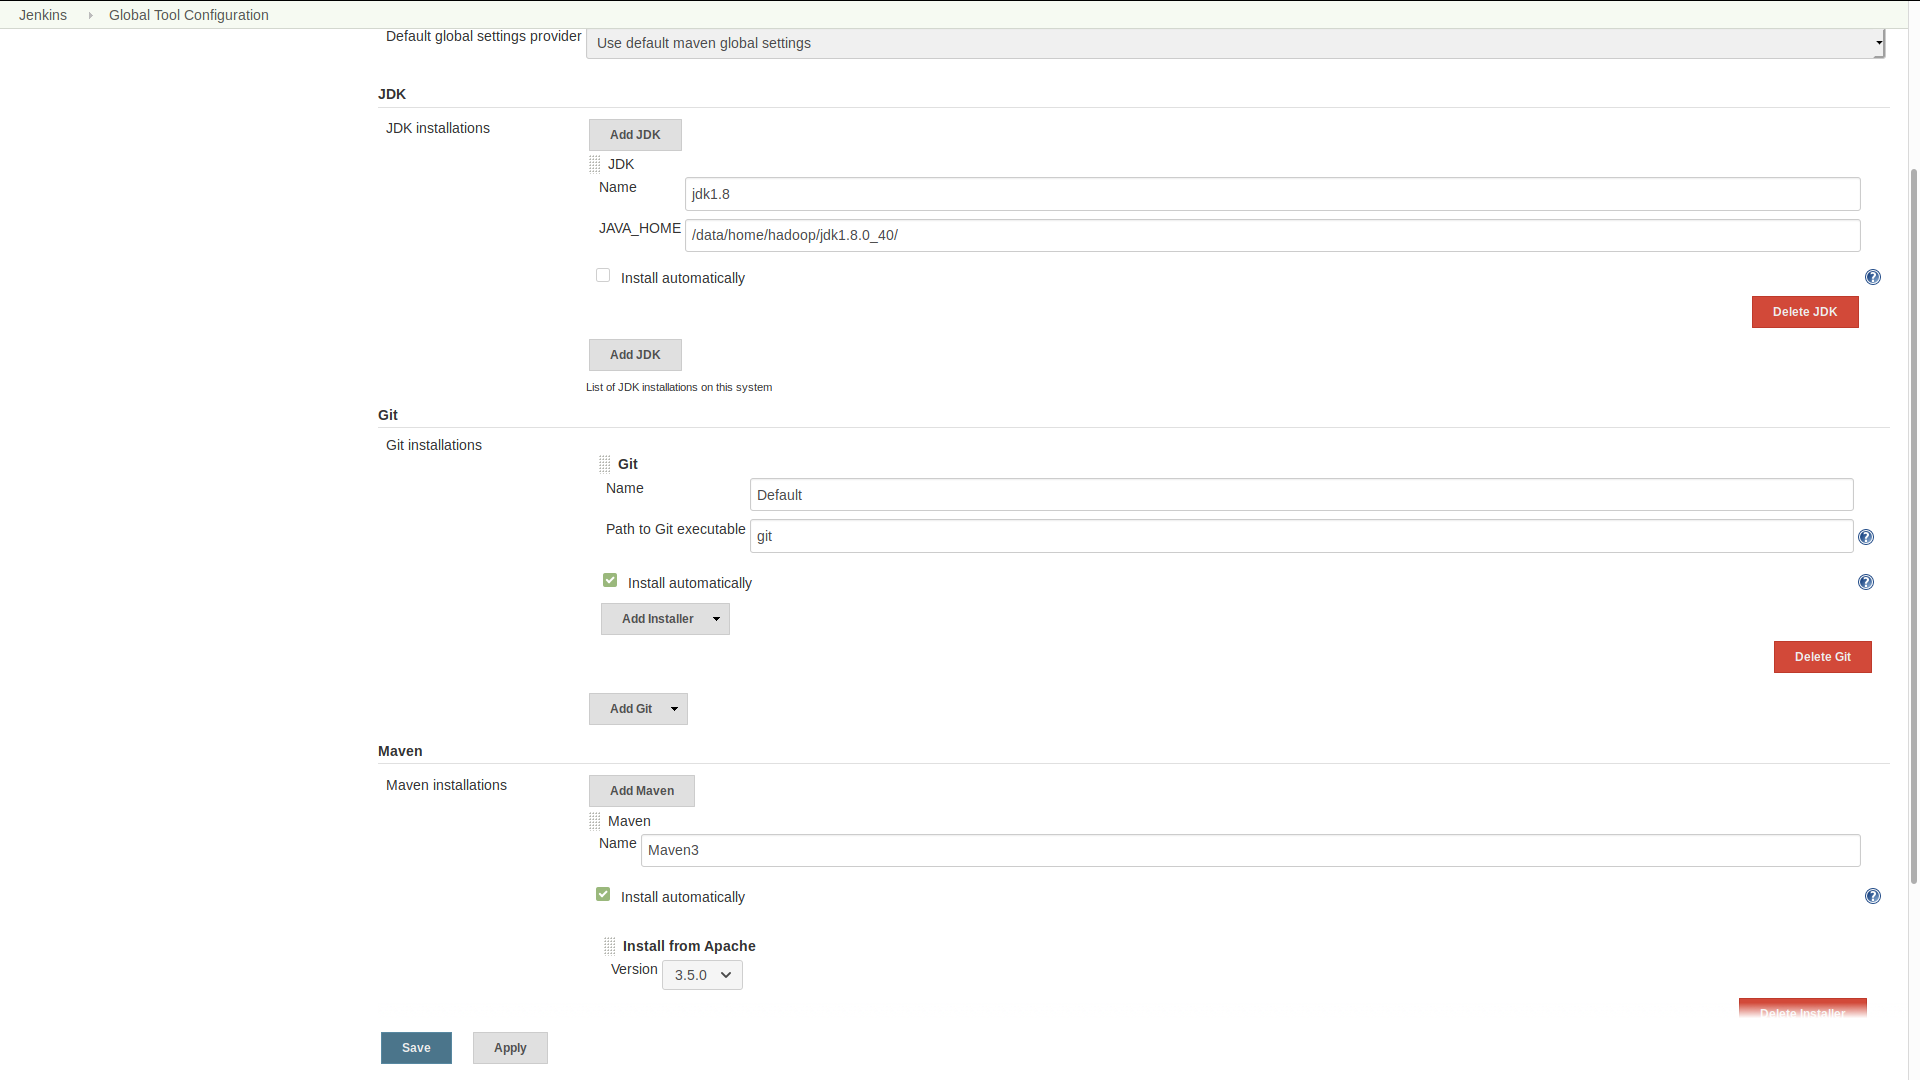
4 manage jenkin-》global tool configuration
jdk配本地的位置
maven和git就勾选自动安装就可以,然后save
5 configure system
填上git pluging github的的相关
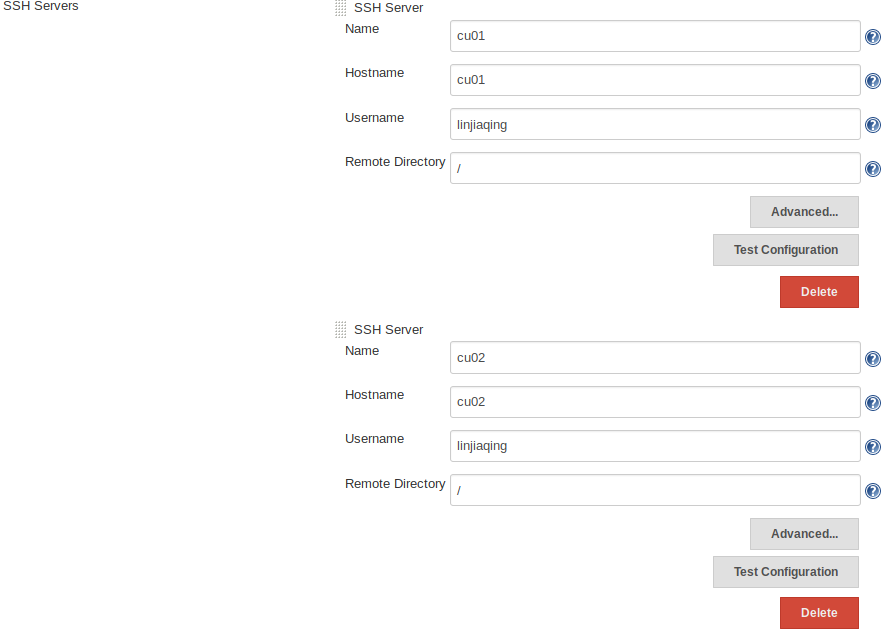
Publish over ssh
passphrase ssh时的密码,
或者不填这个填ssh的key
然后填ssh server,username是登上去的ssh账户哦, remote directory是远程主机可见的所有路径
二 新建项目
jenkintest
里面有一个module叫做client,除了.idea,gitignore,pom.xml,其他全都可以删掉。。idea只是为了维持目前的idea项目架构而已,git的时候也不需要
gitignore文件
### IntelliJ IDEA ###
.idea
*.iws
*.iml
*.ipr
*mvnw
*mvnw.cmd
*HELP.md
*.mvn
这样就把所有模块的都拿掉了
jenkin的pom.xml
1.打包方式用pom,默认不填的话是jar
<packaging>pom</packaging>
2. build的插件用maven而不是springboot
    <build>
        <plugins>
            <plugin>
                <groupId>org.apache.maven.plugins</groupId>
                <artifactId>maven-compiler-plugin</artifactId>
                <configuration>
                    <source>${java.version}</source>
                    <target>${java.version}</target>
                    <!--<encoding>${project.build.sourceEncoding}</encoding>-->
                </configuration>
            </plugin>
        </plugins>
    </build>
3. 模块名写上
  <modules>
        <module>client</module>
    </modules>
<?xml version="1.0" encoding="UTF-8"?>
<project xmlns="http://maven.apache.org/POM/4.0.0" xmlns:xsi="http://www.w3.org/2001/XMLSchema-instance"
    xsi:schemaLocation="http://maven.apache.org/POM/4.0.0 http://maven.apache.org/xsd/maven-4.0.0.xsd">
    <modelVersion>4.0.0</modelVersion>
    <parent>
        <groupId>org.springframework.boot</groupId>
        <artifactId>spring-boot-starter-parent</artifactId>
        <version>2.1.4.RELEASE</version>
        <relativePath/> <!-- lookup parent from repository -->
    </parent>
    <groupId>com.ljq</groupId>
    <artifactId>jenkintest</artifactId>
    <version>0.0.1-SNAPSHOT</version>
    <name>jenkinTest</name>
    <packaging>pom</packaging>
    <description>Demo project for Spring Boot</description>

    <properties>
        <java.version>1.8</java.version>
        <spring-cloud.version>Greenwich.SR1</spring-cloud.version>
    </properties>

    <dependencies>
        <dependency>
            <groupId>org.springframework.boot</groupId>
            <artifactId>spring-boot-starter-web</artifactId>
        </dependency>
        <dependency>
            <groupId>org.springframework.cloud</groupId>
            <artifactId>spring-cloud-starter-netflix-eureka-client</artifactId>
        </dependency>

        <dependency>
            <groupId>org.springframework.boot</groupId>
            <artifactId>spring-boot-starter-test</artifactId>
            <scope>test</scope>
        </dependency>
    </dependencies>

    <modules>
        <module>client</module>
    </modules>

    <dependencyManagement>
        <dependencies>
            <dependency>
                <groupId>org.springframework.cloud</groupId>
                <artifactId>spring-cloud-dependencies</artifactId>
                <version>${spring-cloud.version}</version>
                <type>pom</type>
                <scope>import</scope>
            </dependency>
        </dependencies>
    </dependencyManagement>

    <build>
        <plugins>
            <plugin>
                <groupId>org.apache.maven.plugins</groupId>
                <artifactId>maven-compiler-plugin</artifactId>
                <configuration>
                    <source>${java.version}</source>
                    <target>${java.version}</target>
                    <!--<encoding>${project.build.sourceEncoding}</encoding>-->
                </configuration>
            </plugin>
        </plugins>
    </build>

    <!--<build>-->
        <!--<plugins>-->
            <!--<plugin>-->
                <!--<groupId>org.springframework.boot</groupId>-->
                <!--<artifactId>spring-boot-maven-plugin</artifactId>-->
            <!--</plugin>-->
        <!--</plugins>-->
    <!--</build>-->

</project>
4.子模块里的把parent从springboot换成父模块即可,这样就可以把所有的依赖都写在父模块的pom中,更加方便
<parent>
   <groupId>com.ljq</groupId>
   <artifactId>jenkintest</artifactId>
   <version>0.0.1-SNAPSHOT</version>
   <relativePath>../</relativePath>
</parent>
5.这样子之后mvn clean package是生成所有的子模块的jar包,父模块并不会生成
三 jenkin新建item
选择maven project, 然后ok,然后就可以填写configure
在第一次build之前没有workspace,workspace是用来存git下来的文件并在本地进行构建,workspace也可以删除
1 source code management
选择git
填上仓库地址
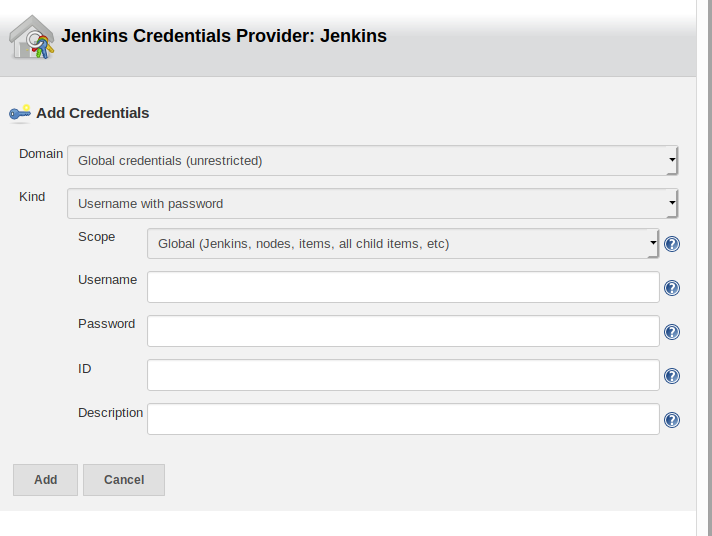
credentials -》 add jenkins 把 git的账号密码填上
credients就可以选择了,那个name ref什么的不用填写
2,。 build trigger
第一个选项是手动构建
第二个是利用url构建
Build periodically,定期构建
Poll SCM:定时检查源码变更(根据SCM软件的版本号),如果有更新就checkout最新code下来,然后执行构建动作
3.定时构建语法
* * * * *
(五颗星,中间用空格隔开)
第一颗*表示分钟,取值0~59
第二颗*表示小时,取值0~23
第三颗*表示一个月的第几天,取值1~31
第四颗*表示第几月,取值1~12
第五颗*表示一周中的第几天,取值0~7,其中0和7代表的都是周日
1.每30分钟构建一次:
H/30 * * * *
2.每2个小时构建一次
H H/2 * * *
3.每天早上8点构建一次
0 8 * * *
4.每天的8点,12点,22点,一天构建3次
0 8,12,22 * * *
(多个时间点,中间用逗号隔开)
4.build
跳过测试clean package -Dmaven.test.skip=True
5. 构建之后执行脚本
sourcefiles 就是你要传送的jar包,可以去workspace看位置
remove prefix 把sourcefile的前缀去掉,只剩jar包名字
remote directory: jar复制到远程机子上的位置
