环境:
CentOS7、python-3.5.3、Nignx 1.10.3 、Django 1.10.6、uWSGI 2.0.14
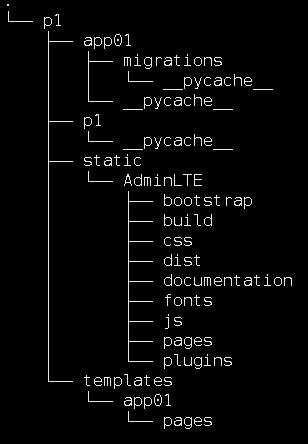
django项目目录:/var/webRoot/p1
项目结构:
基础包安装
yum install -y bind-utils traceroute wget man sudo ntp ntpdate screen patch make gcc gcc-c++ flex bison zip unzip ftp net-tools --skip-broken
关联动态库
# vi /etc/ld.so.conf 添加如下内容
include /etc/ld.so.conf.d/*.conf
/usr/local/lib
/usr/local/lib64
/lib
/lib64
/usr/lib
/usr/lib64
编辑完ld.so.conf,执行
# ldconfig
使动态库生效
安装pcre
下载最新的pcre包
http://pcre.org/
#cd /usr/local/src
tar -zxvf pcre-8.40.tar.gz
cd pcre-8.40
./configure --enable-jit; make; make install
ldconfig
安装openssl
下载最新的openssl包
https://www.openssl.org/
cd /usr/local/src
tar -zxvf openssl-1.0.2k.tar.gz
cd openssl-1.0.2k
./config; make; make install
ldconfig
安装python
yum -y install sqlite-devel
下载XZ compressed source tarball Python-3.5.3.tar.xz 到 /usr/local/src
cd /usr/local/src; tar -Jxvf Python-3.5.3.tar.xz; cd Python-3.5.3;
./configure --prefix=/usr/local/python_3.5.3; make; make install
python -c "import ssl; print(ssl.OPENSSL_VERSION)" #打印python中ssl模块版本
添加环境变量
在 /etc/profile添加下面这行
export PATH=/usr/local/sbin:/usr/local/bin:/usr/sbin:/usr/bin:/root/bin:/usr/local/python_3.5.3/bin
重载环境变量 . /etc/profile
若想让 python3 成为默认的python
可以先查询 原来的python路径,然后把原来的路径做软链接指向新的python3路径即可,可直接向/bin做python3版本的链接 ln -s /usr/local/python_3.5.3/bin/python3.5
which python
修复pip3 list格式告警问题
mkdir ~/.pip

echo -en "[list]
format=columns" > ~/.pip/pip.conf
安装django
pip3 install django
安装uwsgi
pip3 install uwsgi
uwsgi --version # 可查看到uwsgi版本号
创建运行uwsgi的用户
useradd uwsgi -M -s /sbin/nologin
id uwsgi
uid=1005(uwsgi) gid=1005(uwsgi) groups=1005(uwsgi)
测试
uwsgi --http :8000 --chdir /var/webRoot/project/ --wsgi-file project/wsgi.py
curl http://127.0.0.1:8000 可以测试浏览页面
uwsgi 配置
mkdir /etc/uwsgi
vi /etc/uwsgi/uwsgi9090.ini
[uwsgi]
socket = 127.0.0.1:9090
chdir = /var/webRoot/p1/
wsgi-file = p1/wsgi.py
;virtualenv = /opt/pyevn27/ ;虚拟环境的路径
uid = 1005 ;指定运行的用户,指定运行的用户与组,root用户不用指定uid与gid
gid = 1005
master=True
vacuum=True
processes=5
max-requests=10000
pidfile = /var/run/uwsgi9090.pid
daemonize = /var/log/uwsgi/uwsgi9090.log
注意:
/var/webRoot/p1/目录及 /var/webRoot/p1/db.sqlite3 所属者与所属组应与上面的 用户与组对应
可参考https://docs.djangoproject.com/en/1.10/howto/deployment/wsgi/uwsgi/
uwsgi启动脚本:
Emperor模式
uWSGI的Epreror模式可以用来管理机器上部署的uwsgi服务,在这种模式下,会有一个特殊的进程对其它部署的服务进行监视。我们将所有配置文件(ini或xml文件)统一放到一个文件夹(如:/etc/uwsgi)中,然后启动Emperor模式:
uwsgi --emperor /etc/uwsgi
用systemd管理uwsgi服务
新建 /etc/systemd/system/uwsgi.service 文件,内容如下
[Unit]
Description=uWSGI Emperor
After=syslog.target

[Service]
ExecStart=/usr/local/python_3.5.3/bin/uwsgi --emperor /etc/uwsgi
Restart=always
KillSignal=SIGQUIT
Type=notify
StandardError=syslog
NotifyAccess=all

[Install]
WantedBy=multi-user.target
systemctl enable uwsgi
systemctl start uwsgi
安装nginx
yum -y install zlib zlib-devel gd gd-devel --skip-broken
添加一个不能登录且没有主目录的用户Nginx
#useradd nginx -M -s /sbin/nologin
下载nginx 最新稳定版
cd /usr/local/src
tar -zxvf nginx-1.10.3.tar.gz; cd nginx-1.10.3
./configure --prefix=/usr/local/nginx --user=nginx --group=nginx --with-http_stub_status_module --with-http_ssl_module --with-pcre=/usr/local/src/pcre-8.40 --with-http_realip_module --with-http_image_filter_module --with-http_gzip_static_module --with-openssl=/usr/local/src/openssl-1.0.2k --with-openssl-opt="enable-tlsext" --with-stream --with-stream_ssl_module --with-http_v2_module
make; make install
nginx错误编译处理:
make[1]: *** [/usr/local/src/openssl-1.1.0e/.openssl/include/openssl/ssl.h] Error 255
原因: /usr/local/src/openssl-1.1.0e/.openssl路径不存在。
解决方法:打开 nginx解压源文件的下的 auto/lib/openssl/conf
CORE_INCS="$CORE_INCS $OPENSSL/.openssl/include"
CORE_DEPS="$CORE_DEPS $OPENSSL/.openssl/include/openssl/ssl.h"
CORE_LIBS="$CORE_LIBS $OPENSSL/.openssl/lib/libssl.a"
CORE_LIBS="$CORE_LIBS $OPENSSL/.openssl/lib/libcrypto.a"
CORE_LIBS="$CORE_LIBS $NGX_LIBDL"
修改成以下代码:
CORE_INCS="$CORE_INCS $OPENSSL/include"
CORE_DEPS="$CORE_DEPS $OPENSSL/include/openssl/ssl.h"
CORE_LIBS="$CORE_LIBS $OPENSSL/libssl.a"
CORE_LIBS="$CORE_LIBS $OPENSSL/libcrypto.a"
CORE_LIBS="$CORE_LIBS $NGX_LIBDL"
重新编译即可
添加ngxin到系统服务,设置nginx开启启动
vi /etc/rc.d/init.d/nginx #编辑启动文件添加下面内容
=======================================================
#!/bin/bash
# nginx Startup script for the Nginx HTTP Server
# it is v.0.0.2 version.
# chkconfig: - 85 15
# description: Nginx is a high-performance web and proxy server.
# It has a lot of features, but it's not for everyone.
# processname: nginx
# pidfile: /var/run/nginx.pid
# config: /usr/local/nginx/conf/nginx.conf
nginxd=/usr/local/nginx/sbin/nginx
nginx_config=/usr/local/nginx/conf/nginx.conf
nginx_pid=/usr/local/nginx/logs/nginx.pid
RETVAL=0
prog="nginx"
# Source function library.
. /etc/rc.d/init.d/functions
# Source networking configuration.
. /etc/sysconfig/network
# Check that networking is up.
[ "${NETWORKING}" = "no" ] && exit 0
[ -x $nginxd ] || exit 0
# Start nginx daemons functions.
start() {
if [ -e $nginx_pid ];then
echo "nginx already running...."
exit 1
fi
echo -n $"Starting $prog: "
daemon $nginxd -c ${nginx_config}
RETVAL=$?
echo
[ $RETVAL = 0 ] && touch /var/lock/subsys/nginx
return $RETVAL
}
# Stop nginx daemons functions.
stop() {
echo -n $"Stopping $prog: "
killproc $nginxd
RETVAL=$?
echo
[ $RETVAL = 0 ] && rm -f /var/lock/subsys/nginx /usr/local/nginx/logs/nginx.pid
}
reload() {
echo -n $"Reloading $prog: "
#kill -HUP `cat ${nginx_pid}`
killproc $nginxd -HUP
RETVAL=$?
echo
}
# See how we were called.
case "$1" in
start)
start
;;
stop)
stop
;;
reload)
reload
;;
restart)
stop
start
;;
status)
status $prog
RETVAL=$?
;;
*)
echo $"Usage: $prog {start|stop|restart|reload|status|help}"
exit 1
esac
exit $RETVAL
=======================================================
:wq! #保存退出
chmod 755 /etc/rc.d/init.d/nginx #赋予文件执行权限
chkconfig nginx on #设置开机启动
/etc/rc.d/init.d/nginx restart #重启
service nginx restart
CentOS 7 nginx启动脚本
vi /usr/lib/systemd/system/nginx.service #编辑启动文件添加下面内容
[Unit]
Description=nginx - high performance web server
Documentation=http://nginx.org/en/docs/
After=network.target remote-fs.target nss-lookup.target


[Service]
Type=forking
PIDFile=/usr/local/nginx/logs/nginx.pid
ExecStartPre=/usr/local/nginx/sbin/nginx -t -c /etc/nginx/nginx.conf
ExecStart=/usr/local/nginx/sbin/nginx -c /etc/nginx/nginx.conf
ExecReload=/bin/kill -s HUP $MAINPID
ExecStop=/bin/kill -s QUIT $MAINPID
PrivateTmp=true

[Install]
WantedBy=multi-user.target
systemctl enable nginx #设置开机启动
systemctl start nginx.service #启动
nginx配置
/usr/local/nginx/conf/conf.d/p1.conf
upstream control_cc_com {
    server 127.0.0.1:9090 weight=10 max_fails=0;
}

server {
    listen       8080;
    server_name  localhost;
    charset utf-8;
    access_log  logs/p1.log  main;

    location /static/system/ {
        alias /var/webRoot/p1/upload/system/;
    }


    location /static/user_image/ {
        alias /var/webRoot/p1/upload/user_image/;
    }

    location /static {
        alias /var/webRoot/p1/static;
    }

    location / {
        include uwsgi_params;
        uwsgi_pass control_cc_com;
    }
}
nginx.conf
user nginx nginx;
worker_processes auto;
worker_cpu_affinity auto;

error_log  logs/error.log notice;
pid        logs/nginx.pid;
worker_rlimit_nofile 65535;

events {
    use epoll;
    worker_connections 65535;
}


http {
    include       mime.types;
    default_type  application/octet-stream;
    log_format  main  '$http_x_forwarded_for`$remote_addr`$proxy_add_x_forwarded_for`[$time_local]`"$request"`'
                      '$status`$body_bytes_sent`"$http_referer"`'
                      '"$http_user_agent"`"$request_time"`'
                      '$http_x_request_id`$upstream_response_time`$upstream_addr`$upstream_connect_time`$upstream_status';

    log_format  access  '$remote_addr`[$time_local]`"$request"`'
                      '$status`$body_bytes_sent`"$http_referer"`'
                      '"$http_user_agent"`"$http_x_forwarded_for"`'
                      '$http_x_request_id`$upstream_response_time`$upstream_addr`$upstream_connect_time`$upstream_status';

#    proxy_ignore_client_abort on;
    proxy_headers_hash_max_size 2048;
    proxy_headers_hash_bucket_size 256;
    sendfile    on;
    tcp_nopush  on;
    tcp_nodelay on;
    keepalive_timeout 60;
    server_tokens off;

    gzip    on;
    gzip_min_length 1k;
    gzip_buffers    4 16k;
    gzip_http_version 1.1;
    gzip_comp_level 2;
    gzip_types  text/plain  application/x-javascript text/css application/xml;
    gzip_vary on;

    client_max_body_size 100m;
    client_body_buffer_size 128k;
    client_body_temp_path /dev/shm/client_body_temp;
    proxy_connect_timeout 600;
    proxy_read_timeout 600;
    proxy_send_timeout 600;
    proxy_buffer_size 16k;
    proxy_buffers 32 32k;
    proxy_busy_buffers_size 64k;
    proxy_temp_file_write_size 64k;
    proxy_temp_path /dev/shm/proxy_temp;

    include /etc/nginx/conf.d/*.conf;

}
django admin静态文件加载不了问题
在settings.py 添加下面设置
先把setttings中的 STATICFILES_DIRS 注释
STATIC_ROOT = os.path.join(BASE_DIR, "static")
STATICFILES_FINDERS = (
    "django.contrib.staticfiles.finders.FileSystemFinder",
    "django.contrib.staticfiles.finders.AppDirectoriesFinder"
)
cd /var/webRoot/p1
python3 manage.py collectstatic #复制 admin静态文件拷到当前目录 static目录
会生成 ./static/admin 目录,并把上面的配置删除或注释掉
时区设置,请注意大小写,到Linux生产系统时遇到这个问题。
TIME_ZONE = 'Asia/Shanghai'