一、使用自定义创建的json数据
1. 创建微信小程序项目后
在wxml文件中增加for循环
<block wx:for="{{posts_key}}" wx:for-item="item" wx:for-index="idx">
    <view class="post-container">
      <view class="post-author-date">
       <image class="post-author" src="{{item.avatar}}"></image>
        <text class="post-date">{{item.date}}</text>
     </view>
      <text class="post-title">{{item.title}}</text>
      <image class="post-image" src="{{item.imgSrc}}"></image>
      <text class="post-content">{{item.content}}</text>
      <view class="post-like">
       <image class="post-like-image" src="../../images/icon/chat.png"></image>
        <text class="post-like-font">{{item.collection}}</text>
        <image class="post-like-image" src="../../images/icon/view.png"></image>
        <text class="post-like-font">{{item.reading}}</text>
      </view>
   </view>
  </block>
posts_key的定义在js文件中
 onLoad: function (options) {
      //页面初始化 options为页面跳转所带来的参数
      var posts_content = [
        {
          date: "Sep 18 2017",
          title: "飞蟹1",
          imgSrc:"/images/post/crab.png",
          avatar:"/images/avatar/1.png",
          content:"现在的飞蟹正好吃。。。。。。",
           reading:"112",
          collection:"96",
        },
        {
          date: "Sep 18 2017",
          title: "飞蟹2",
          imgSrc: "/images/post/bl.png",
          avatar: "/images/avatar/2.png",
          content: "现在的飞蟹正好吃。。。。。。",
          reading: "112",
          collection: "96",
        }

      ]

      this.setData({
        posts_key: posts_content
      })
  },
对应的wxss文件
swiper{
   100%;
  height:600rpx;
}

swiper image{
  100%;
  height:600rpx;

}
.post-container{
  display: flex;
  flex-direction: column;
  margin-top: 20rpx;
  margin-bottom: 40rpx;
  background-color: #fff;
  border-bottom: 1px solid #ededed;
  border-top: 1px solid #ededed;
  padding-bottom: 5px;
}

.post-author-date{
 margin:10rpx 0 20rpx 10rpx;
}

.post-author{
  60rpx;
  height: 60rpx;
  vertical-align: middle;
}

.post-date{
  margin-left: 20rpx;
  vertical-align: middle;
  font-size: 26rpx;
}


.post-title{
   font-size:34rpx;
   font-weight: 600;
   color: #333;
   margin-bottom: 10px;
   margin-left:10px;
}

.post-image{
  margin-left: 16px;
  100%;
  height:340rpx;
  margin: auto 0;
  margin-bottom: 15px;
}

.post-content{
  color:#666;
  font-size: 28rpx;
  margin-bottom: 20rpx;
  margin-left:20rpx;
  letter-spacing: 2rpx;
  line-height: 40rpx;
}

.post-like{
  font-size: 13px;
  display: flex;
  flex-direction: row;
  line-height: 16px;
  margin-left: 10px;
}

.post-like-image{
  height: 16px;
   16px;
  margin-left: 8px;
  vertical-align: middle;
}

.post-like-font{
  vertical-align: middle;
  margin-right: 20px;
}
二、将数据改成到js文件中
创建data/posts-data.js文件
var posts_content = [
  {
    date: "Sep 18 2017",
    title: "飞蟹1",
    imgSrc: "/images/post/crab.png",
    avatar: "/images/avatar/1.png",
    content: "现在的飞蟹正好吃。。。。。。",
    reading: "112",
    collection: "96",
  },
  {
    date: "Sep 18 2017",
    title: "飞蟹2",
    imgSrc: "/images/post/bl.png",
    avatar: "/images/avatar/2.png",
    content: "现在的飞蟹正好吃。。。。。。",
    reading: "112",
    collection: "96",
  }

]

var name = "zhangsan"

module.exports = {
  postList:posts_content,
  exportName:name
}
在posts.js中引用posts-data.js文件
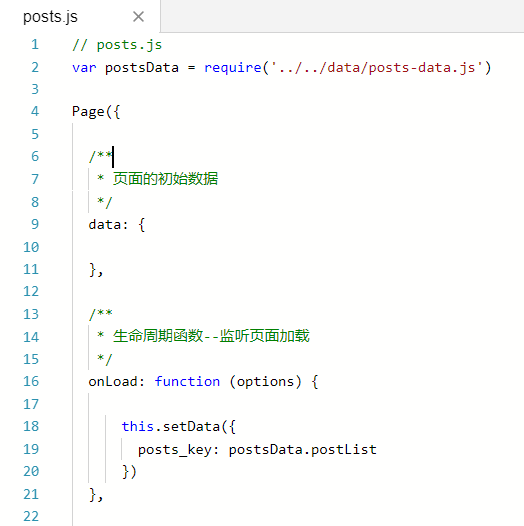
在onLoad函数里, 将data.posts_keys 赋值为postsData.postList
  onLoad: function (options) {
    this.data.posts_key = postsData.postList;

  },
最终效果是一致的。