-
1.创建Group,User,Project
创建一个组,组名为java
Group path http://192.168.56.11/java
Visibility Level:    #为权限级别,一般使用Private
Private
Internal
Public
创建一个PM的用户作为项目管理者并加入到java组内

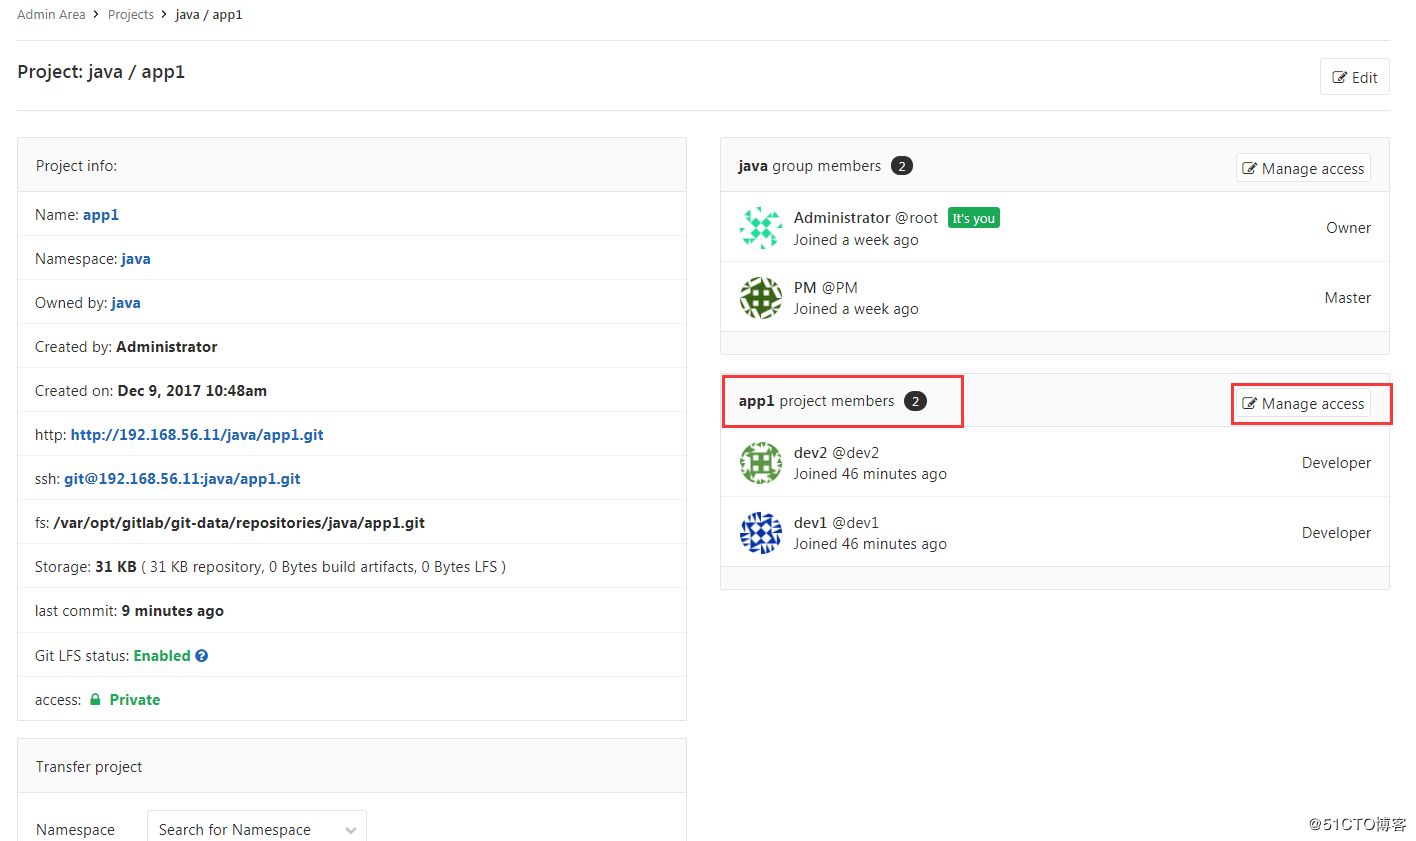
创建一个项目:

创建dev1和dev2的用户作为开发者,并加入到项目中

-
2.测试dev1,dev2拉取代码库
(1)生成ssh-key
[root@linux-node1 ~]# ssh-keygen
Generating public/private rsa key pair.
Enter file in which to save the key (/root/.ssh/id_rsa):
Created directory '/root/.ssh'.
Enter passphrase (empty for no passphrase):
Enter same passphrase again:
Your identification has been saved in /root/.ssh/id_rsa.
Your public key has been saved in /root/.ssh/id_rsa.pub.
The key fingerprint is:
SHA256:Hf3O9F7sS9N04cFUr3Awb/Wec28gTpHYyRZMCzLW9q0 root@linux-node1
The key's randomart image is:
+---[RSA 2048]----+
|        +..o=  .+|
|       . oo*.Oo.o|
|         .o.@.++o|
|         . o.*oo+|
|        S . o.=+=|
|           oE= =*|
|            . ooB|
|              .+o|
|               .+|
+----[SHA256]-----+
[root@linux-node1 ~]# cat .ssh/id_rsa.pub
ssh-rsa AAAAB3NzaC1yc2EAAAADAQABAAABAQDLDVIqTAvJtj8Uc+SvhcKOKuDtURt3YBxHo9enUkDjOWtSygLZI4hSrEsnvjHdnxeBGOgjPrxEfMMdNCno4pox7V/8bIU9LRVp2eeQFS+N+bSmbJlTKyODa0tabPwT7URYoiFI3giQamQdA0AwwPCPM/RcXwHJsw4q0O/2woCqNKq2tHaUFBqojd2KvqavzpB+4+AdKJSoabwLhE8dzfjIR/eHY31Y2C/+m9sU504v+R0GsAqr5uifi6Ct9eFvumI54BvHssIpZFZmADTT35b1aP0WSwZb2VEhXjaia8L6h/6ANn1NuHGgYZqNiYT6JILESKbrc7PyJOn9DfHKSMq9 root@linux-node1

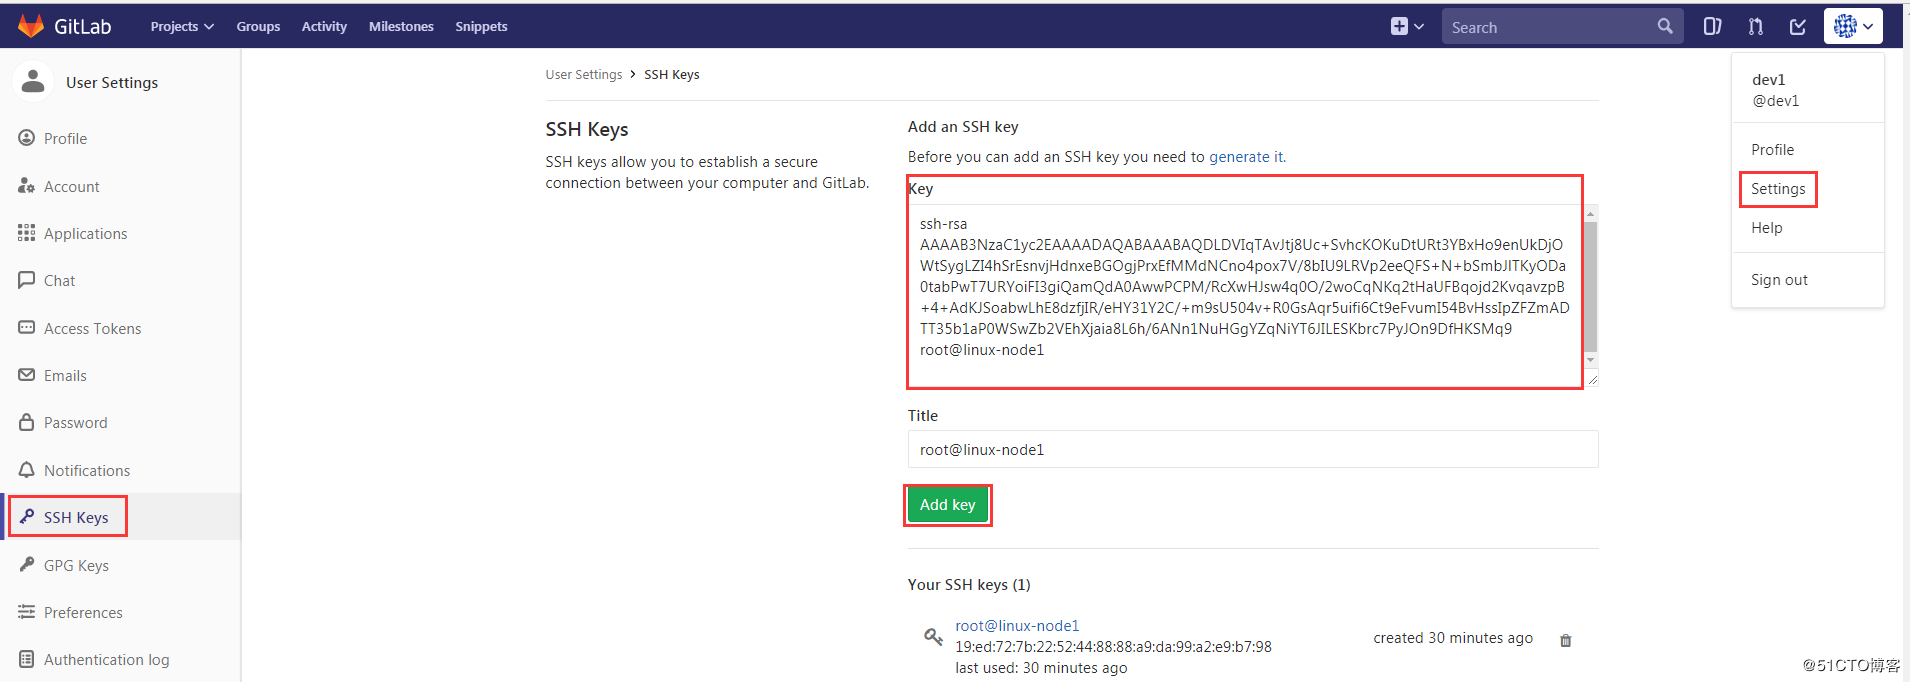
(2)将公钥(id_rsa.pub)放进dev1账户中
在admin账户下给dev1,dev2账户设置密码,然后使用dev1登录gitlab,做如下操作添加ssh-key:
测试是否能正常拉取代码库app1
[root@linux-node1 ~]# git clone git@192.168.56.11:java/app1.git
Cloning into 'app1'...
The authenticity of host '192.168.56.11 (192.168.56.11)' can't be established.
ECDSA key fingerprint is SHA256:p2lhKmsPQ6K+dWHHvbJg0GV+Ni9VM7vlViKrYsZLP1s.
ECDSA key fingerprint is MD5:22:14:1c:37:de:47:1c:4a:2f:88:b1:dc:e2:d0:02:17.
Are you sure you want to continue connecting (yes/no)? yes
Warning: Permanently added '192.168.56.11' (ECDSA) to the list of known hosts.
warning: You appear to have cloned an empty repository.
Checking connectivity... done.
[root@linux-node1 ~]# ll
total 6804
-rw-------.  1 root root     948 Dec  3 01:21 anaconda-ks.cfg
drwxr-xr-x   3 root root      17 Dec 20 15:00 app1
drwxr-xr-x  22 root root   24576 Dec  8 22:16 git-2.7.4
drwxr-xr-x   3 root root      65 Dec  9 01:23 test
-rw-r--r--   1 root root 6918037 Dec  8 22:09 v2.7.4.zip
[root@linux-node1 ~]# cd app1
[root@linux-node1 app1]# ll
total 4
-rw-r--r-- 1 root root 19 Dec 20 15:05 readme

到此,Linux环境下完成了gitlab的授权管理代码库。
下面以PM用户进行创建开发计划
开发一个官网V1.0版本,包含首页和新闻
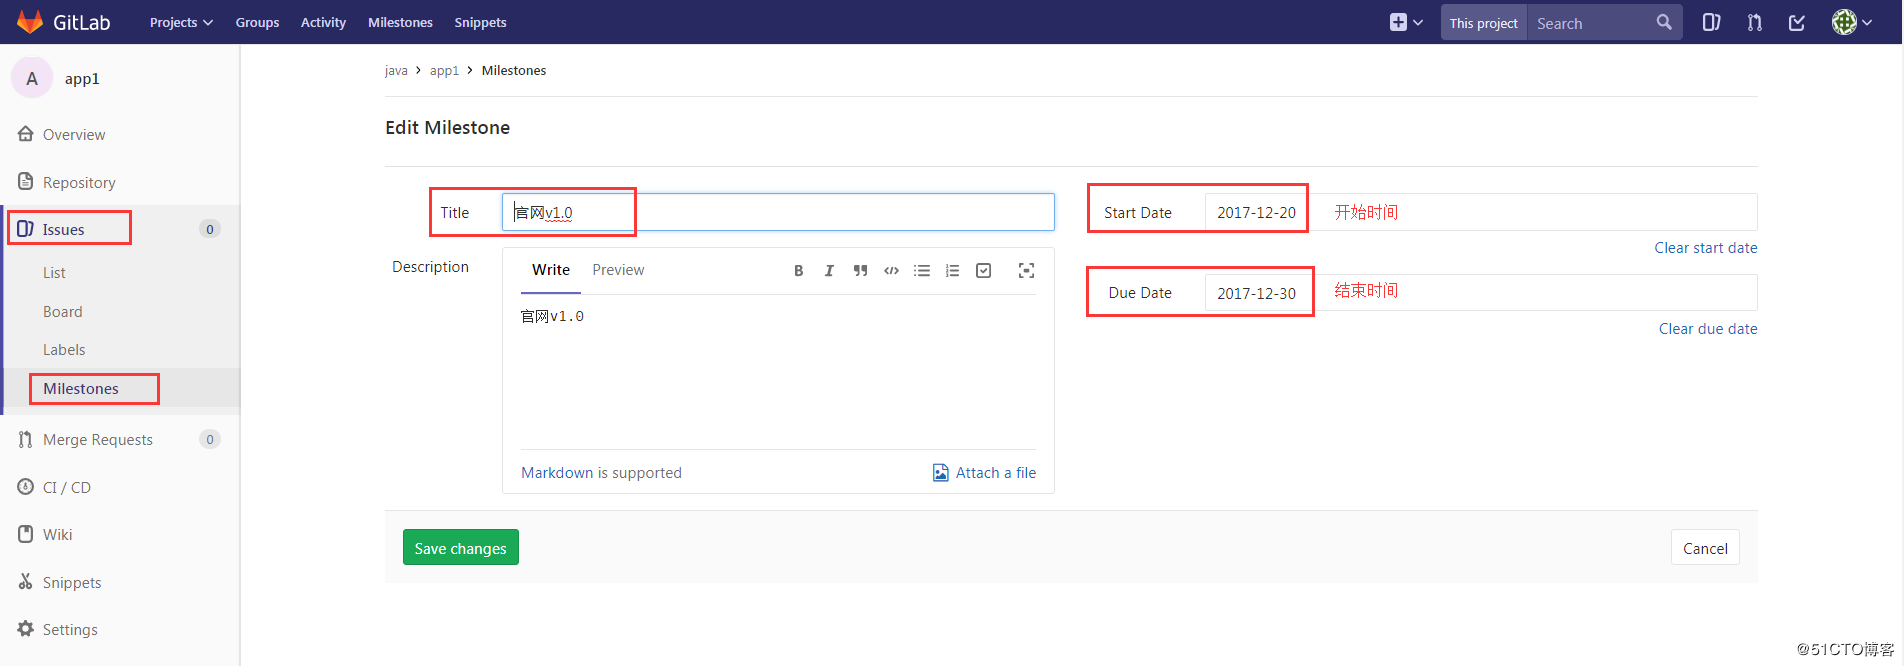
(1)创建里程碑(Milestone)

(2)依次把任务首页,新闻添加到里程碑,并进行任务分配给开发者

(3)使用dev1用户登录查看,会有任务提示,如图:

(4)dev1开发者收到任务,进行开发
[root@linux-node1 app1]# git checkout -b shouye    #创建首页分支
Switched to a new branch 'shouye'
[root@linux-node1 app1]# git status
On branch shouye
nothing to commit, working directory clean
[root@linux-node1 app1]# echo "<h1> welcome to www.123.com" > index.html    #进行开发
[root@linux-node1 app1]# ll
total 8
-rw-r--r-- 1 root root 28 Dec 20 15:50 index.html
-rw-r--r-- 1 root root 19 Dec 20 15:05 readme
[root@linux-node1 app1]# git add .
[root@linux-node1 app1]# git commit -m "shouye"    #开发完成,提交本地仓库
[shouye babdcb5] shouye
 1 file changed, 1 insertion(+)
 create mode 100644 index.html
[root@linux-node1 app1]# git push origin shouye    #提交到远程库
Counting objects: 3, done.
Compressing objects: 100% (2/2), done.
Writing objects: 100% (3/3), 292 bytes | 0 bytes/s, done.
Total 3 (delta 0), reused 0 (delta 0)
remote:
remote: To create a merge request for shouye, visit:
remote:   http://192.168.56.11/java/app1/merge_requests/new?merge_request%5Bsource_branch%5D=shouye
remote:
To git@192.168.56.11:java/app1.git
 * [new branch]      shouye -> shouye

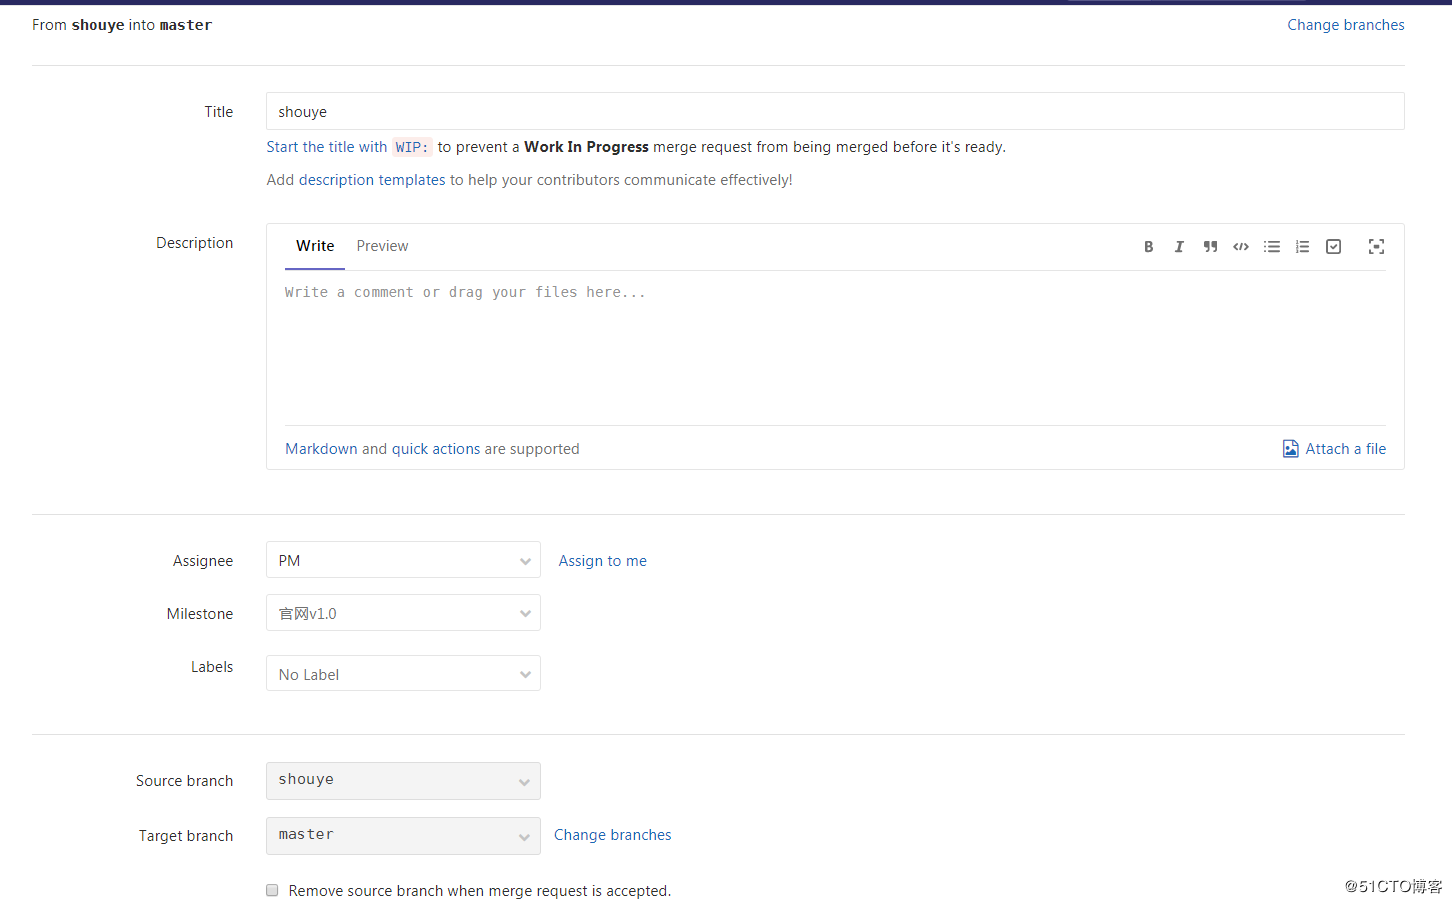
 可以看到有刚才创建的分支,点击"merge request"合并分支请求,之后PM用户登录处理合并请求。此时,一个功能的开发流程就完成。


总结:
-
PM在gitlab创建任务,分配给开发人员
-
开发人员领取任务后,在本地使用git clone拉取代码库
-
开发人员创建开发分支(git checkout -b dev),并进行开发
-
开发人员完成之后,提交到本地仓库(git commit )
-
开发人员在gitlab界面上申请分支合并请求(Merge request)
-
PM在gitlab上查看提交和代码修改情况,确认无误后,确认将开发人员的分支合并到主分支(master)
-
开发人员在gitlab上Mark done确认开发完成,并关闭issue。这一步在提×××并请求时可以通过描述中填写"close #1"等字样,可以直接关闭issue。