Hystrix断路器
1. Hystrix介绍
2.Hystrix降级

2.1添加 hystrix 起步依赖
<dependency>
	<groupId>org.springframework.cloud</groupId>
	<artifactId>spring-cloud-starter-netflix-hystrix</artifactId>
</dependency>
2.2 启用 hystrix 断路器
主程序添加 @EnableCircuitBreaker
启动断路器,断路器提供两个核心功能:
-
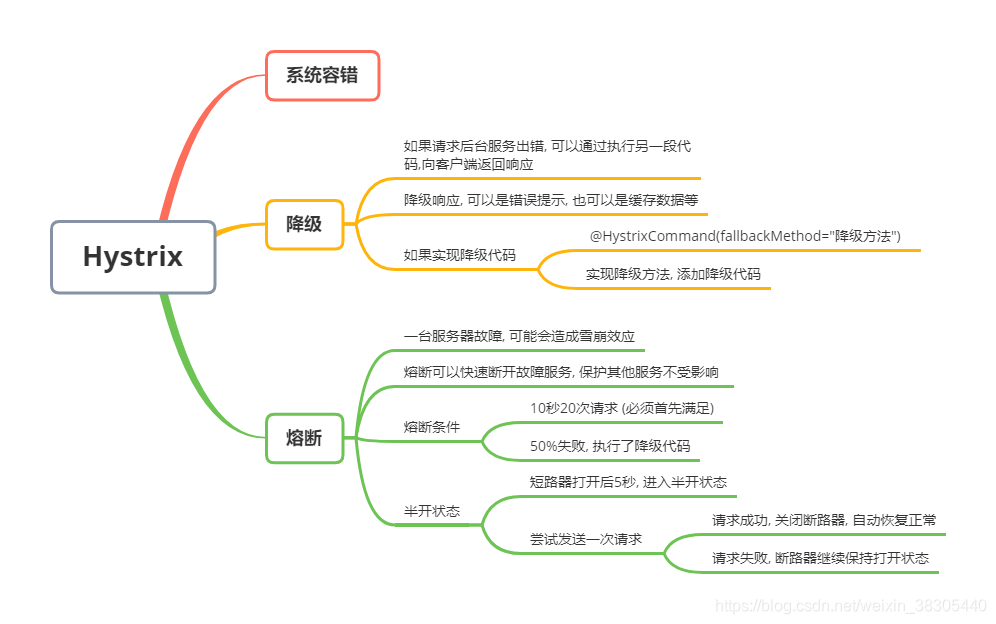
降级,超时、出错、不可到达时,对服务降级,返回错误提示信息或者是缓存数据
-
熔断,当服务压力过大,错误比例过多时,熔断所有请求,所有请求直接降级
-
可以使用
@SpringCloudApplication注解代替三个注解 -
//@EnableDiscoveryClient //可以省略
//@EnableCircuitBreaker
//@SpringBootApplication
@SpringCloudApplication //该注解可以代替以上三个注解
package cn.tedu.sp06;

import org.springframework.boot.SpringApplication;
import org.springframework.cloud.client.SpringCloudApplication;
import org.springframework.cloud.client.loadbalancer.LoadBalanced;
import org.springframework.context.annotation.Bean;
import org.springframework.http.client.SimpleClientHttpRequestFactory;
import org.springframework.web.client.RestTemplate;
//@EnableDiscoveryClient //可以省略
//@EnableCircuitBreaker
//@SpringBootApplication
@SpringCloudApplication //该注解可以代替以上三个注解
public class Sp06RibbonApplication {

    //创建 RestTemplate 实例,并存入 spring 容器
    @LoadBalanced //负载均衡注解
    @Bean
    public RestTemplate restTemplate(){
        //RestTemplate 中默认的 Factory 实例中,两个超时属性默认是 -1,
        //未启用超时,也不会触发重试
        SimpleClientHttpRequestFactory factory = new SimpleClientHttpRequestFactory();
        //设置连接后台服务器的超时时间
        factory.setConnectTimeout(1000);
        //接收后台响应的超时时间
        factory.setReadTimeout(1000);
        return  new RestTemplate(factory);
    }

    public static void main(String[] args) {
        SpringApplication.run(Sp06RibbonApplication.class, args);
    }

}
2.3添加降级方法
- 为每个方法添加降级方法,例如
getItems()添加降级方法getItemsFB() - 添加
@HystrixCommand注解,指定降级方法名
案例设置
package cn.tedu.sp06.controller;

@RestController
@Slf4j
public class RibbonController {
    @Autowired
    private RestTemplate restTemplate;
    //当调用后台服务失败,会跳转到指定的方法执行降级代码
    @HystrixCommand(fallbackMethod = "getItemsFB")//fallbackMethod 指定降级方法名称
    @GetMapping("/item-service/{orderId}")
    public JsonResult<List<Item>> getItems(@PathVariable String orderId){
        log.info("调用后台商品服务,查询订单商品列表");
        //将localhost:8001 改为item-service ribbon 可以从注册中心获取对象的地址
        //如果配置了多个地址,可以在地址之间来回轮询调用
        JsonResult jsonResult = restTemplate.getForObject("http://item-service/{1}", JsonResult.class, orderId);
        return  jsonResult;
    }
    //降级方法
    //降级方法的类型要和原方法保持一致,只是做方法名的修改以及方法体的修改
    public JsonResult<List<Item>> getItemsFB(String orderId){
        return  JsonResult.err().msg("获取订单商品列表失败,请稍后重试");
    }
}
2.4hystrix 超时设置
hystrix.command.default.execution.isolation.thread.timeoutInMilliseconds
hystrix等待超时后, 会执行降级代码, 快速向客户端返回降级结果, 默认超时时间是1000毫秒
为了测试 hystrix 降级,我们把 hystrix 等待超时设置得非常小(500毫秒)
此设置一般应大于 ribbon 的重试超时时长,例如 10 秒
application.yml文件的配置
#hystrix超时配置
# 和ribbon配合设置,应该超过ribbon总的超时时长
hystrix:
  command:
    default:
      execution:
        isolation:
          thread:
            timeoutInMilliseconds: 1000 # 1秒是默认配置
3.Hystrix熔断
3.1 Hystrix熔断介绍
整个链路达到一定的阈值,默认情况下,10秒内产生超过20次请求,则符合第一个条件。
满足第一个条件的情况下,如果请求的错误百分比大于阈值,则会打开断路器,默认为50%。
Hystrix的逻辑,先判断是否满足第一个条件,再判断第二个条件,如果两个条件都满足,则会开启断路器
断路器打开 5 秒后,会处于半开状态,会尝试转发请求,如果仍然失败,保持打开状态,如果成功,则关闭断路器
3.2熔断的条件:
条件一:10秒20次请求(首先满足条件一,若不满足条件一,则不判断条件二)
条件二: 50%的请求失败,执行了降级代码,则触发熔断
条件一和二都可以调节,默认是条件一二的配置
案例:
例如: 10秒18次请求,100%请求失败,是否可以触发熔断? 答案:不会
3.3半开状态
断路器打开5秒后,会进入半开状态
客户端请求时,会尝试发送一次调用,
如果成功,会自动关闭断路器,恢复正常
如果失败,就继续保持打开状态
3.3hystrix 配置
https://github.com/Netflix/Hystrix/wiki/Configuration
hystrix.command.default.execution.isolation.thread.timeoutInMilliseconds
请求超时时间,超时后触发失败降级hystrix.command.default.circuitBreaker.requestVolumeThreshold
10秒内请求数量,默认20,如果没有达到该数量,即使请求全部失败,也不会触发断路器打开hystrix.command.default.circuitBreaker.errorThresholdPercentage
失败请求百分比,达到该比例则触发断路器打开hystrix.command.default.circuitBreaker.sleepWindowInMilliseconds
断路器打开多长时间后,再次允许尝试访问(半开),仍失败则继续保持打开状态,如成功访问则关闭断路器,默认 5000
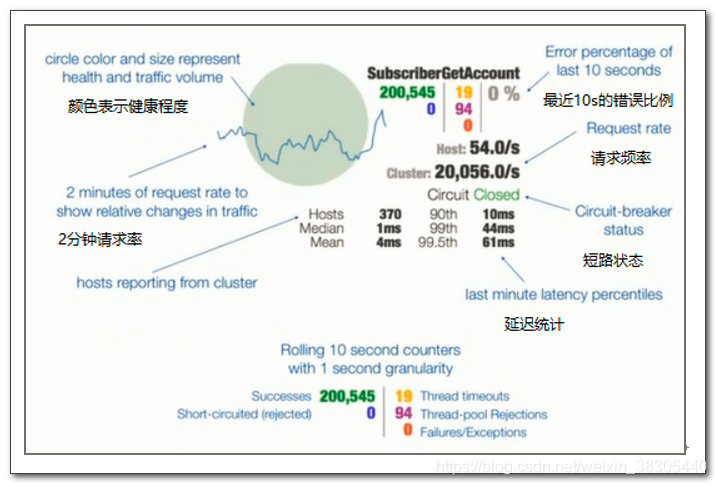
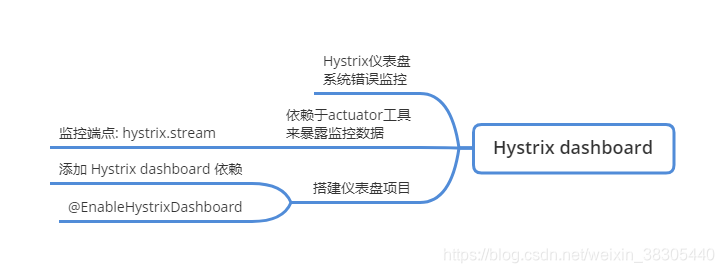
Hystrix Dashboard 断路器仪表盘
仪表盘对Hystrix降级和熔断的情况进行监控,用图表直观看到系统中的错误情况
1.暴露监控数据
使用actuator工具,暴露监控数据
actuator 是由springboot 提供的工具,可以暴露项目中的多种监控数据,例如:
- spring容器中的所有的对象
- spring mvc 中所有的映射路径
- 健康状态
- 环境变量
- .......
Hystrix就是利用actuator来暴露自己的降级和熔断健康
actuator 的使用

management.endpoints.web.exposure.include 配置选项,
可以指定端点名,来暴露监控端点
-
添加actuator依赖
<dependency> <groupId>org.springframework.boot</groupId> <artifactId>spring-boot-starter-actuator</artifactId> </dependency> -
配置暴露的监控端点
在application.yml中配置,并暴露
hystrix.stream监控端点- m.e.w.e.i="*" : 暴露所有的监控端点
- m.e.w.e.i=health : 暴露健康状态端点
- m.e.w.e.i=['health', 'mappings', 'beans'] :暴露多个监控端点
management:
  endpoints:
    web:
      exposure:
        include: "*"
访问 actuator 路径,查看监控端点

2.搭建仪表盘项目
仪表盘可以是一个完全独立的项目,可以不连接注册中心,不用注册,也不用发现其他服务
如何进行仪表盘的监控
在要监控的项目上,手动添加要监控的项目
- 新建项目,添加hystrix dashboard
- 添加主程序注解,
@EnableHystrixDashboard
Hystrix dashboard 仪表盘
pom.xml
使用<spring-cloud.version>Hoxton.SR7</spring-cloud.version>
<?xml version="1.0" encoding="UTF-8"?>
<project xmlns="http://maven.apache.org/POM/4.0.0" xmlns:xsi="http://www.w3.org/2001/XMLSchema-instance"
         xsi:schemaLocation="http://maven.apache.org/POM/4.0.0 https://maven.apache.org/xsd/maven-4.0.0.xsd">
    <modelVersion>4.0.0</modelVersion>
    <parent>
        <groupId>org.springframework.boot</groupId>
        <artifactId>spring-boot-starter-parent</artifactId>
        <version>2.3.3.RELEASE</version>
        <relativePath/> <!-- lookup parent from repository -->
    </parent>
    <groupId>cn.tedu</groupId>
    <artifactId>sp08-hystrix-dashboard</artifactId>
    <version>0.0.1-SNAPSHOT</version>
    <name>sp08-hystrix-dashboard</name>
    <description>Demo project for Spring Boot</description>

    <properties>
        <java.version>1.8</java.version>
        <spring-cloud.version>Hoxton.SR7</spring-cloud.version>
    </properties>

    <dependencies>
        <dependency>
            <groupId>org.springframework.cloud</groupId>
            <artifactId>spring-cloud-starter-netflix-hystrix-dashboard</artifactId>
        </dependency>

        <dependency>
            <groupId>org.springframework.boot</groupId>
            <artifactId>spring-boot-starter-test</artifactId>
            <scope>test</scope>
            <exclusions>
                <exclusion>
                    <groupId>org.junit.vintage</groupId>
                    <artifactId>junit-vintage-engine</artifactId>
                </exclusion>
            </exclusions>
        </dependency>
    </dependencies>

    <dependencyManagement>
        <dependencies>
            <dependency>
                <groupId>org.springframework.cloud</groupId>
                <artifactId>spring-cloud-dependencies</artifactId>
                <version>${spring-cloud.version}</version>
                <type>pom</type>
                <scope>import</scope>
            </dependency>
        </dependencies>
    </dependencyManagement>

    <build>
        <plugins>
            <plugin>
                <groupId>org.springframework.boot</groupId>
                <artifactId>spring-boot-maven-plugin</artifactId>
            </plugin>
        </plugins>
    </build>

</project>
设定application.yml
spring:
  application:
    name: hystrix-dashboard
server:
  port: 4001

hystrix:
  dashboard:
    proxy-stream-allow-list: "localhost"
主启动程序
添加beanServletRegistrationBean
package cn.tedu.sp08;

import com.netflix.hystrix.contrib.metrics.eventstream.HystrixMetricsStreamServlet;
import org.springframework.boot.SpringApplication;
import org.springframework.boot.autoconfigure.SpringBootApplication;
import org.springframework.boot.web.servlet.ServletRegistrationBean;
import org.springframework.cloud.netflix.hystrix.dashboard.EnableHystrixDashboard;
import org.springframework.context.annotation.Bean;

@EnableHystrixDashboard
@SpringBootApplication
public class Sp08HystrixDashboardApplication {

    public static void main(String[] args) {
        SpringApplication.run(Sp08HystrixDashboardApplication.class, args);
    }


    // 此配置是为了服务监控而配置,与服务容错本身无关,
    // ServletRegistrationBean因为springboot的默认路径不是"/hystrix.stream",
    // 只要在自己的项目里配置上下面的servlet就可以了
    @Bean
    public ServletRegistrationBean getServlet() {
        HystrixMetricsStreamServlet streamServlet = new HystrixMetricsStreamServlet();
        ServletRegistrationBean registrationBean = new ServletRegistrationBean(streamServlet);
        registrationBean.setLoadOnStartup(1);
        registrationBean.addUrlMappings("/hystrix.stream");
        registrationBean.setName("HystrixMetricsStreamServlet");
        return registrationBean;
    }
}
注意:如果使用SR4则不需要进行配置
访问 hystrix dashboard
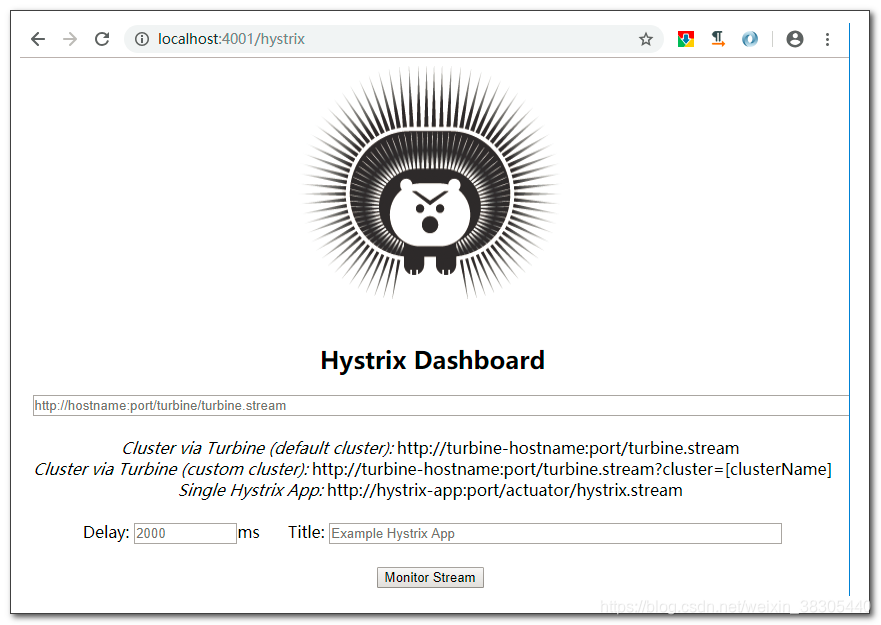
填入 hystrix 的监控端点,开启监控
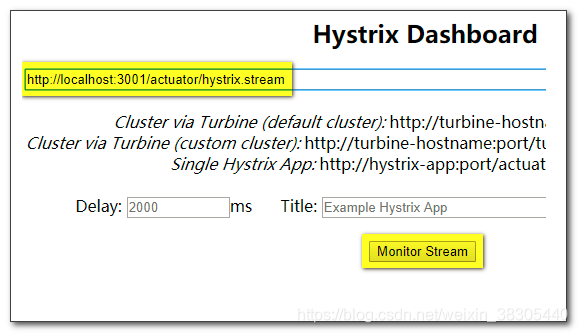
通过 hystrix 访问服务多次,观察监控信息