本文将详细介绍线性布局的各种xml属性。
xml属性
<?xml version="1.0" encoding="utf-8"?>
<LinearLayout xmlns:android="http://schemas.android.com/apk/res/android"
    android:layout_width="match_parent"
    android:layout_height="match_parent"
    android:orientation="vertical">
</LinearLayout>
①android:layout_width---->设置此布局的宽度,有三种模式:
fill_parent:充满屏幕(已过时,用下面的match_parent代替)
match_parent:充满屏幕(推荐)
wrap_content:包含组件,意思就是你的组件多大,那么就占多大的空间。
②android:layout_height---->设置此布局的高度,模式同上;
③android:orientation---->此属性设置此线性布局的方式,有两个参数:
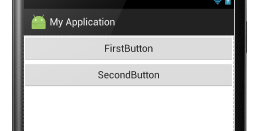
vertical:垂直布局:即子控件都在子控件的上下位置,例如
<LinearLayout xmlns:android="http://schemas.android.com/apk/res/android"
    android:layout_width="match_parent"
    android:layout_height="match_parent"
    android:orientation="vertical">            //这里选用垂直布局

    <Button
        android:layout_width="match_parent"        //宽度充满屏幕
        android:layout_height="wrap_content"        //高度包含组件
        android:text="FirstButton"
        android:id="@+id/button" />

    <Button
        android:layout_width="match_parent"
        android:layout_height="wrap_content"
        android:text="SecondButton"
        android:id="@+id/button2" />
</LinearLayout>
显示结果:
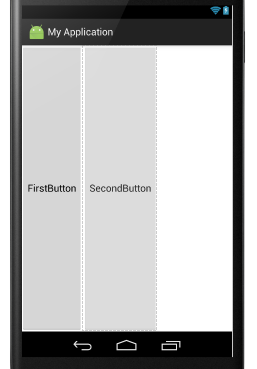
horizontal:水平布局:即子控件都在子控件的左右位置。例如:
<LinearLayout xmlns:android="http://schemas.android.com/apk/res/android"
    android:layout_width="match_parent"
    android:layout_height="match_parent"
    android:orientation="horizontal">      //这里设置为水平布局,

    <Button
        android:layout_width="wrap_content"      //宽度包含组件
        android:layout_height="match_parent"    //这里设置Button控件的高度充满屏幕
        android:text="FirstButton"
        android:id="@+id/button" />

    <Button
        android:layout_width="wrap_content"
        android:layout_height="match_parent"
        android:text="SecondButton"
        android:id="@+id/button2" />
</LinearLayout>
显示结果:
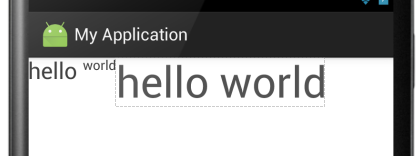
④android:baselineAligned---->此布局中的子控件是否基线对齐,其实就是设置在不在一条线上,他只有两个参数,true和false
false:若设置false,那么他里面的内容就不对齐。
true:若设置true,那么就对齐。 例如:
<LinearLayout xmlns:android="http://schemas.android.com/apk/res/android"
    android:layout_width="match_parent"
    android:layout_height="match_parent"
    android:baselineAligned="false"      //这里设置为false
    android:orientation="horizontal">

    <TextView
        android:layout_width="wrap_content"
        android:layout_height="wrap_content"
        android:text="hello "
        android:textSize="24sp"
         />
    <TextView
        android:layout_width="wrap_content"
        android:layout_height="wrap_content"
        android:text="world"
         />
    <TextView
        android:layout_width="wrap_content"
        android:layout_height="wrap_content"
        android:text="hello world"
        android:textSize="45sp"
        />
</LinearLayout>
显示结果:
当设置为true时:

结果一目了然。
⑤android:gravity:指定布局里面的子控件的位置,几个常用参数,可以接受两个参数中间用”|“分隔开
center:控件处于布局的中心位置。
left:控件位于布局的左边。
right:控件位于布局的右边。
center|left:控件位于布局的中左位置。(也可以用center_vertical,和这个同样的作用)
官方给出的属性:
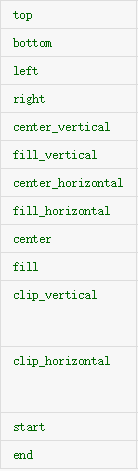
大家可以见明知义。例子:
<LinearLayout xmlns:android="http://schemas.android.com/apk/res/android"
    android:layout_width="match_parent"
    android:layout_height="match_parent"
    android:gravity="center|left"
    android:orientation="horizontal">

    <TextView
        android:layout_width="wrap_content"
        android:layout_height="wrap_content"
        android:text="hello "
        android:textSize="24sp"
         />
</LinearLayout>
显示结果为:
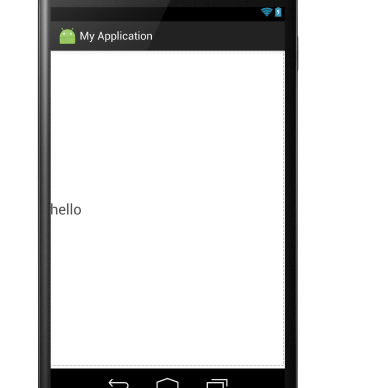
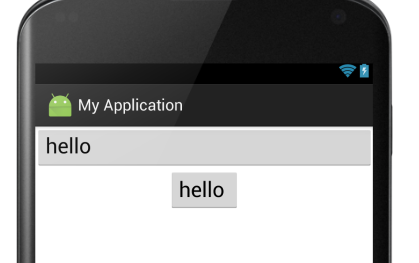
⑥android:layout_gravity:是指此子控件在布局中的位置。参数同上:
<LinearLayout xmlns:android="http://schemas.android.com/apk/res/android"
    android:layout_width="match_parent"
    android:layout_height="match_parent"
    android:orientation="vertical">

    <Button
        android:layout_width="match_parent"
        android:layout_height="wrap_content"
        android:text="hello "
        android:gravity="left"
        android:textSize="24sp"
         />
    <Button
        android:layout_width="wrap_content"
        android:layout_height="wrap_content"
        android:text="hello "
        android:textSize="24sp"
        android:layout_gravity="center"
        />
</LinearLayout>
显示结果:
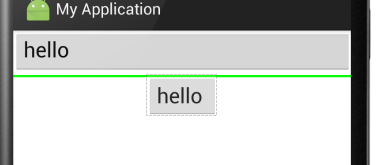
⑦android:divider:绘制子组件之间的分割线,参数可以是一个图片也可以是一个xml的shape标记,图片或者shape位于drawable下
android:showDividers:显示分割线的方式,有四种:
begging:在整体的上方添加
middle:在每个组件之间添加
end:在整体的下方添加
none:不显示
例如:
<LinearLayout xmlns:android="http://schemas.android.com/apk/res/android"
    android:layout_width="match_parent"
    android:layout_height="match_parent"
    android:divider="@drawable/shapee"      //这里引用的shapee为一个xml文件,代码在下面
    android:showDividers="middle"         //这里显示方法为在每个组件之间添加
    android:orientation="vertical">
shapee.xml文件
<?xml version="1.0" encoding="utf-8"?>
<shape xmlns:android="http://schemas.android.com/apk/res/android">
    <solid android:color="#00ff00" />         //此属性指定颜色
    <size android:height="5px" />            //分割线的高度
</shape>
效果如下:
⑧android:weightSum:设定子控件中weight中的总和,其实就是控制子控件与屏幕或者其他子控件的比例,个人感觉这个比较重要,对于布局有很好的作用。
例如一下代码:
<LinearLayout xmlns:android="http://schemas.android.com/apk/res/android"
    android:layout_width="match_parent"
    android:layout_height="match_parent"
    android:orientation="horizontal"                  //布局设置为水平布局
    android:weightSum="1"                        //设置子控件的weight总和为1
    >

    <Button
        android:layout_width="0dp"                  //这里设置为0是为了好计算,计算公式在下面介绍
        android:layout_height="wrap_content"
        android:layout_weight="0.5"                  //这里设置weight(权值)为0.5,也就是占用了一行的一半。
        android:text="hello "
        android:textSize="24sp"

         />
    <Button
        android:layout_width="0dp"
        android:layout_height="wrap_content"
        android:layout_weight="0.4"                    //这里是0.4,就是40%,还有1-0.5-0.4=0.1为空白
        android:text="hello "
        android:textSize="24sp"
        />
</LinearLayout>
显示结果:

计算公式: 此实例中Button的宽度计算:{ Button的width值+Button的weight*父控件width(这里是match_content,
如果父控件为200dp,那么这里就是200)/ weightSum的值 }