引言
当我们接到压测任务的时候,如果被测系统需要登录的时候,首先需要处理登录,然后再进行其他接口压测。
Taks属性使用
首先看一下官方文档:
Using the @task decorator to declare tasks is a convenience, and usually the best way to do it. However, it’s also possible to define the tasks of a User or TaskSet by setting the tasks attribute (using the @task decorator will actually just populate the tasks attribute).
The tasks attribute is either a list of Task, or a <Task : int> dict, where Task is either a python callable or a TaskSet class (more on that below). If the task is a normal python function they receive a single argument which is the User instance that is executing the task.
Here is an example of a User task declared as a normal python function:
from locust import User, constant

def my_task(l):
    pass

class MyUser(User):
    tasks = [my_task]
    wait_time = constant(1)
If the tasks attribute is specified as a list, each time a task is to be performed, it will be randomly chosen from the tasks attribute. If however, tasks is a dict - with callables as keys and ints as values - the task that is to be executed will be chosen at random but with the int as ratio. So with a tasks that looks like this:
{my_task: 3, another_task: 1}
my_task would be 3 times more likely to be executed than another_task.
Internally the above dict will actually be expanded into a list (and the tasks attribute is updated) that looks like this:
[my_task, my_task, my_task, another_task]
and then Python’s random.choice() is used pick tasks from the list.
上面总结出来就是:如果随机权重,就用列表,如果指定权重,就用字段。
官方案例
普通写法
from locust import TaskSet,HttpLocust,between

def login(x):
    x.client.post('/login',{'username':'admin','password':'123456'})

def logout(x):
    x.client.post('/logout',{'username':'admin','password':'123456'})

def home(x):
    x.client.get('/')

def systeminfo(x):
    x.client.get('systeminfo')

class TestLogin(TaskSet):

    tasks = {home: 3,systeminfo: 1}

    def on_start(self):
        login(self)

    def on_stop(self):
        logout(self)

class WebSiteUser(HttpLocust):
    task_set = TestLogin
    wait_time = between(3,6)
实例:
from locust import TaskSet,HttpLocust,between,task

def login(x):
    url = '/api/private/v1/login'
    body = {
        "username": "admin",
        "password": "123456"
    }
    r = x.client.post(url=url, data=body)
    print(r.text)

def logout(x):
    print("退出系统")

def home(x):
    print("进入主页")


def systeminfo(x):
    print("进入系统管理")

class TestLogin(TaskSet):

    tasks = {home: 1,systeminfo: 1}
    # @task
    def setup(self):
        print("开始...")

    def teardown(self):
        print("结束...")

    def on_start(self):
        print("启动")
        login(self)
    # @task
    def on_stop(self):
        print("停止")
        logout(self)


class WebSiteUser(HttpLocust):
    def setup(self):
        print('locust setup')
    def teardown(self):
        print('locust teardown')
    task_set = TestLogin
    wait_time = between(1,2)

if __name__ == '__main__':
    import os
    os.system('locust -f locustfile.py --host=http://192.168.1.105:8899 --port=8089 ')
说明:
Locust类有setup和teardown,TaskSet类有setup、teardown、on_start、on_stop。
每次启动locust时运行setup方法,退出时运行teardown方法,locust执行TaskSet时运行TaskSet的setup方法,退出时运行teardown方法,每个虚拟用户执行操作时运行on_start方法,退出时执行on_stop方法,运行上面的脚本,执行顺序如下:
执行顺序:Locust setup → TaskSet setup → TaskSet on_start → TaskSet tasks → TaskSet on_stop → TaskSet teardown → Locust teardown
运行结果:
[2020-06-22 21:30:10,993] WIN10-804191526/INFO/locust.main: Starting web monitor at http://*:8089
[2020-06-22 21:30:10,993] WIN10-804191526/INFO/locust.main: Starting Locust 0.14.6
[2020-06-22 21:30:20,212] WIN10-804191526/INFO/locust.runners: Hatching and swarming 2 users at the rate 1 users/s (0 users already running)...
[2020-06-22 21:30:20,213] WIN10-804191526/INFO/stdout: locust setup
[2020-06-22 21:30:20,213] WIN10-804191526/INFO/stdout:
[2020-06-22 21:30:20,213] WIN10-804191526/INFO/stdout: 开始...
[2020-06-22 21:30:20,213] WIN10-804191526/INFO/stdout:
[2020-06-22 21:30:20,213] WIN10-804191526/INFO/stdout: 启动
[2020-06-22 21:30:20,213] WIN10-804191526/INFO/stdout:
[2020-06-22 21:30:21,213] WIN10-804191526/INFO/locust.runners: All locusts hatched: WebSiteUser: 2 (0 already running)
[2020-06-22 21:30:21,213] WIN10-804191526/INFO/stdout: 启动
[2020-06-22 21:30:21,213] WIN10-804191526/INFO/stdout:
[2020-06-22 21:30:41,220] WIN10-804191526/INFO/stdout:
[2020-06-22 21:30:41,220] WIN10-804191526/INFO/stdout:
[2020-06-22 21:30:41,220] WIN10-804191526/INFO/stdout: 进入主页
[2020-06-22 21:30:41,220] WIN10-804191526/INFO/stdout:
[2020-06-22 21:30:42,217] WIN10-804191526/INFO/stdout:
[2020-06-22 21:30:42,217] WIN10-804191526/INFO/stdout:
[2020-06-22 21:30:42,217] WIN10-804191526/INFO/stdout: 进入系统管理
界面:

项目实例
标准写法
from locust import TaskSet,HttpLocust,between,task


class TestLogin(TaskSet):

    def setup(self):
        print("开始...")

    def teardown(self):
        print("结束...")

    def _login(self):
        url = '/api/private/v1/login'
        body = {
            "username": "admin",
            "password": "123456"
        }
        r = self.client.post(url=url, data=body)
        print(r.text)
        assert "等1" in r.text

    def logout(self):
        print("退出系统")

    @task(1)
    def home(self):
        print("进入主页")

    @task(1)
    def systeminfo(self):
        print("进入系统管理")

    def on_start(self):
        """ on_start is called when a Locust start before any task is scheduled """
        print("启动")
        self._login()

    def on_stop(self):
        """ on_stop is called when the TaskSet is stopping """
        print("停止")
        self.logout()


class WebsiteUser(HttpLocust):
    task_set = TestLogin
    def setup(self):
        print('locust setup')

    def teardown(self):
        print('locust teardown')
    wait_time = between(5,6)


if __name__ == '__main__':
    import os
    os.system('locust -f locustfile_pro.py --host=http://192.168.1.105:8899 --port=8084')
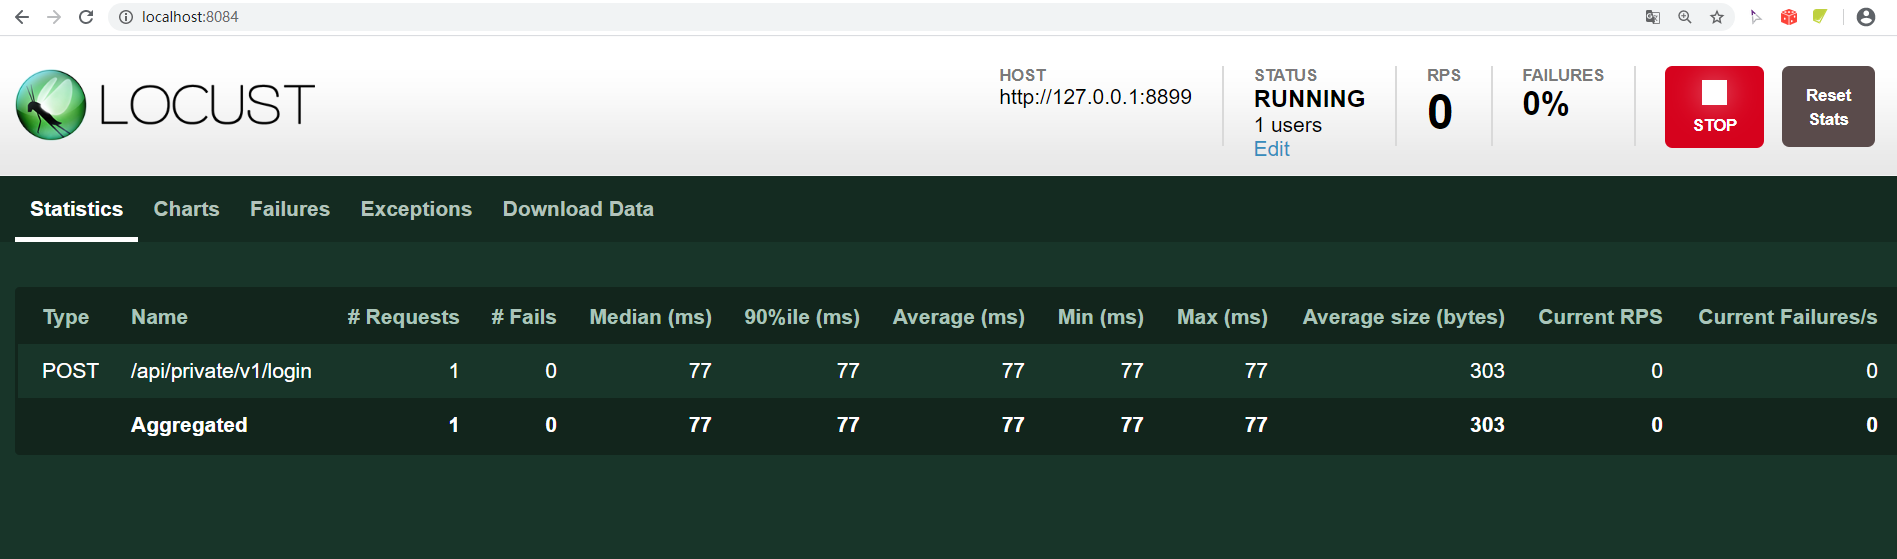
结果:
[2020-06-22 23:47:09,088] WIN10-804191526/INFO/locust.main: Starting web monitor at http://*:8084
[2020-06-22 23:47:09,088] WIN10-804191526/INFO/locust.main: Starting Locust 0.14.6
[2020-06-22 23:48:05,436] WIN10-804191526/INFO/locust.runners: Hatching and swarming 1 users at the rate 1 users/s (0 users already running)...
[2020-06-22 23:48:05,436] WIN10-804191526/INFO/stdout: locust setup
[2020-06-22 23:48:05,436] WIN10-804191526/INFO/stdout:
[2020-06-22 23:48:05,436] WIN10-804191526/INFO/locust.runners: All locusts hatched: WebsiteUser: 1 (0 already running)
[2020-06-22 23:48:05,436] WIN10-804191526/INFO/stdout: 开始...
[2020-06-22 23:48:05,436] WIN10-804191526/INFO/stdout:
[2020-06-22 23:48:05,436] WIN10-804191526/INFO/stdout: 启动
[2020-06-22 23:48:05,436] WIN10-804191526/INFO/stdout:
[2020-06-22 23:48:05,513] WIN10-804191526/INFO/stdout: 测试
[2020-06-22 23:48:05,513] WIN10-804191526/INFO/stdout:
[2020-06-22 23:48:05,513] WIN10-804191526/INFO/stdout: 响应数据是:{"data":{"id":500,"rid":0,"username":"admin","mobile":"12345678","email":"adsfad@qq.com","token":"Bearer eyJhbGciOiJIUzI1NiIsInR5cCI6IkpXVCJ9.eyJ1aWQiOjUwMCwicmlkIjowLCJpYXQiOjE1OTI4NDA4ODUsImV4cCI6MTU5MjkyNzI4NX0.wN9CrRtyENoQgMWKgtaK5toa47fB3qz1nvki9PvqdVg"},"meta":{"msg":"登录成功","status":200}}
[2020-06-22 23:48:05,513] WIN10-804191526/INFO/stdout:
[2020-06-22 23:48:05,513] WIN10-804191526/INFO/stdout: 进入主页
[2020-06-22 23:48:05,513] WIN10-804191526/INFO/stdout:
[2020-06-22 23:48:11,277] WIN10-804191526/INFO/stdout: 进入系统管理
界面:
需要注意的是如果是V0.13.0版本以上就不能用min_wait和max_wait了。不然会报错:
eprecationWarning: Usage of min_wait and max_wait is deprecated since version 0.13. Instead use: wait_time = between(5, 6)
), DeprecationWarning
脚本解读:
1、创建TestLogin()类继承TaskSet类:  用于定义测试业务。
2、创建login()、logout()、home()、systeminfo()方法分别表示一个行为,访问http://127.0.0.1:8899。用@task() 装饰该方法为一个任务。1、2表示一个Locust实例被挑选执行的权重,数值越大,执行频率越高。在当前TestLogin()行为下的两个方法得执行比例为1:1
3、WebsiteUser()类: 用于定义模拟用户。
4、task_set :  指向一个定义了的用户行为类。
5、host:   指定被测试应用的URL的地址
6、min_wait :   用户执行任务之间等待时间的下界,单位:毫秒。
7、max_wait :   用户执行任务之间等待时间的上界,单位:毫秒。
备注:默认情况下,时间是在min_wait和max_wait之间随机选择,但是可以通过将wait_function设置为任意函数来使用任何用户定义的时间分布。
对于指数分布的等待时间平均为1秒:
class WebsiteUser(HttpLocust):
    task_set = TestLogin
    wait_function = lambda self: random.expovariate(1) * 1000
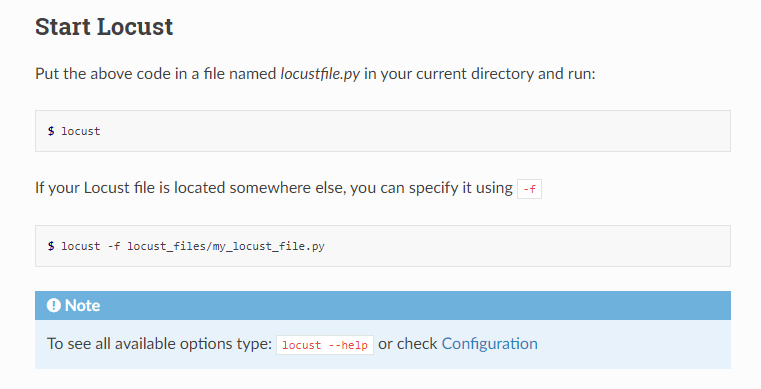
启动程序
最新文档:
历史文档:
在cmd窗口,进入到执行py文件的路径下,进行start,默认的启用方法如下:

>>> locust -f 需要执行的脚本.py --host=http://需要用到的url

官网针对启用,专门的介绍如下:

To run Locust with the above Locust file, if it was named locustfile.py and located in the current working directory, we could run:

locust --host=http://example.com
If the Locust file is located under a subdirectory and/or named different than locustfile.py, specify it using -f:

locust -f locust_files/my_locust_file.py --host=http://example.com
To run Locust distributed across multiple processes we would start a master process by specifying --master:

locust -f locust_files/my_locust_file.py --master --host=http://example.com
and then we would start an arbitrary number of slave processes:

locust -f locust_files/my_locust_file.py --slave --host=http://example.com
If we want to run Locust distributed on multiple machines we would also have to specify the master host when starting the slaves (this is not needed when running Locust distributed on a single machine, since the master host defaults to 127.0.0.1):

locust -f locust_files/my_locust_file.py --slave --master-host=192.168.0.100 --host=http://example.com
You may wish to consume your Locust results via a csv file. In this case, there are two ways to do this.

First, when running the webserver, you can retrieve a csv from localhost:8089/stats/requests/csv and localhost:8089/stats/distribution/csv. Second you can run Locust with a flag which will periodically save the csv file. This is particularly useful if you plan on running Locust in an automated way with the --no-web flag:

locust -f locust_files/my_locust_file.py --csv=foobar --no-web -n10 -c1
You can also customize how frequently this is written if you desire faster (or slower) writing:

import locust.stats
locust.stats.CSV_STATS_INTERVAL_SEC = 5 # default is 2 seconds
备注:8089是该服务启动的端口号,如果是本地启动,可以直接在浏览器输入http://localhost:8089打开UI界面,如果是其他机器搭建locust服务,则输入该机器的IP+端口即可;
总结
关于Locust性能测试模拟案例介绍到此,有兴趣的朋友可以加入测开交流群进行沟通与学习,一起成长!