前情概要
1.flask的基本使用
- 配置
- 路由
- 视图
- 请求与响应相关
- 模板
2.flask基于装饰器实现的路由
- 基本操作
- functools
- 带参数的装饰器
- 源码剖析
3.flask-基于源码剖析session&特殊装饰器原理
一.历史回顾
1.装饰器原理
def wapper(func):
    def inner(*args,**kwargs):
        print("执行装饰器逻辑")
        return func(*args,**kwargs)
    return inner

"""
在程序执行从上到下加载,还未执行的时候 先执行如下两个步骤
1. 立即执行wapper函数,并将下面装饰的函数当做参数传递
2. 将wapper函数返回值获取,在index赋值
    index = inner函数
"""
@wapper
def index():
    print('函数内容')

# 实际执行的 inner函数,inner函数内部调用原函数
index()
2.functools
import functools
def wapper(func):
    @functools.wraps(func)
    def inner(*args,**kwargs):
        return func(*args,**kwargs)
    return inner

@wapper
def index():
    print('index')

@wapper
def order():
    print("order")

"""
默认不加functools会直接返回当前函数装饰器里inner的函数名字
"""
print(index.__name__)
print(order.__name__)
"""
返回值
index
order
"""
3.面向对象封装
"""
面向对象封装
"""
#将一些变量封装到一个类里进行统一调用
class Foo(object):
    def __init__(self,age,name):
        self.age = age
        self.name = name

    def get_info(self):
        return self.name,self.age

    def __call__(self, *args, **kwargs):
        return self.name

class Bar(object):
    def __init__(self,counter):
        self.counter = counter
        self.obj = Foo('18','guest') #这个也算是面向对象的组合,将用户封装到一个类里

b1 = Bar(1)
print(b1.obj.get_info())
print(b1.obj()) #对象加()执行对象所在类的__call__方法
4.加()会有几种表现形式-函数,类,方法,对象
def f1():
    print('f1')

class F2(object):
    pass

class F3(object):
    def __init__(self):
        pass

    def ff3(self):
        print('ff3')

class F4(object):
    def __init__(self):
        pass

    def __call__(self, *args, **kwargs):
        print('f4')
def func(arg):
    """
    由于arg在函数中加括号,所以他只有4中表现形式:
        - 函数
        - 类
        - 方法
        - 对象
    :param arg:
    :return:
    """
    arg()

# 1. 函数,内部执行函数
func(f1)
# 2. 类,内部执行__init__方法
func(F2)

# 3. 方法,obj.ff3,执行方法
obj1 = F3()
func(obj1.ff3)

# F3.ff3(F3)类+方法的时候 方法就不是方法了而是函数 需要自行将self加进去

# 4. 对象
obj2 = F4()
func(obj2)
5.函数和方法的区别
from types import MethodType,FunctionType
class F3(object):
    def __init__(self):
        pass

    def ff3(self):
        print('ff3')

# v1 = isinstance(F3.ff3,MethodType)
# v2 = isinstance(F3.ff3,FunctionType)
# print(v1,v2) # False,True

obj = F3()
v1 = isinstance(obj.ff3,MethodType)
v2 = isinstance(obj.ff3,FunctionType)
print(v1,v2) # True False
二、框架的本质
1.基于socket实现
import socket
def main():
    # 创建老师
    sock = socket.socket(socket.AF_INET, socket.SOCK_STREAM)
    sock.bind(('localhost', 8000))
    sock.listen(5) #队列长度

    while True:
        # 老师等待 用户请求的到来
        connection, address = sock.accept()
        # 获取发送的内容:x有没有女朋友?
        # 获取发送的内容:xx 有没有女朋友?
        # 获取发送的内容:xxx有没有女朋友?
        # 获取发送的内容:xxxx有没有女朋友?
        buf = connection.recv(1024)

        # 根据请求URL的不同:
        # 回答:没有
        connection.send(b"HTTP/1.1 200 OK

")
        connection.send(b"No No No")
        # 关闭连接
        connection.close()
if __name__ == '__main__':
    main()
2.flask依赖werkzeug,django依赖wsgiref
"""
from werkzeug.wrappers import Request, Response
from werkzeug.serving import run_simple

@Request.application
def hello(request):
    return Response('Hello World!')

if __name__ == '__main__':
    # 当请求打来之后,自动执行:hello()
    run_simple('localhost', 4000, hello)
"""


from werkzeug.wrappers import Request, Response
from werkzeug.serving import run_simple

class Foo(object):
    def __call__(self, *args, **kwargs):
        return Response('Hello World!')

if __name__ == '__main__':
    # 当请求打来之后,自动执行:hello()
    obj = Foo()
    run_simple('localhost', 4000, obj)
3.快速使用flask搭建web
from flask import Flask
# 1. 实例化Flask对象
app = Flask('xxxx')

"""
1. 执行 app.route('/index')并获取返回值 xx
2.
    @xx
    def index():
        return 'Hello World'
3. 执行 index = xx(index)
本质:
    {
        '/index': index
    }
"""
@app.route('/index')
def index():
    return 'Hello World'


if __name__ == '__main__':
    app.run()
三、Flask快速使用
import functools
from flask import Flask,render_template,request,redirect,session

app = Flask('xxxx',template_folder="templates")
app.secret_key = 'as923lrjks9d8fwlkxlduf'
def auth(func):
    @functools.wraps(func)  #为了添加路由的时候函数名为被装饰的函数名
    def inner(*args,**kwargs):
        user_info = session.get('user_info')
        if not user_info:
            return redirect('/login')
        return func(*args,**kwargs)
    return inner
"""
{
    /order: inner函数, name: order
    /index: inner函数, name: index
}
"""

@app.route('/order',methods=['GET'])  #认证的装饰器要放路由下面 先加载app.route
@auth
def order():
    user_info = session.get('user_info')
    if not user_info:
        return redirect('/login')

    return render_template('index.html')

@app.route('/index',methods=['GET'])
@auth
def index():
    return render_template('index.html')

@app.route('/login',methods=['GET','POST'])
def login():
    if request.method == "GET":
        return render_template('login.html')
    else:
        user = request.form.get('user')
        pwd = request.form.get('pwd')
        if user == 'alex' and pwd == '123':
            session['user_info'] = user
            return redirect('/index')
        # return render_template('login.html',msg = "用户名或密码错误",x =  123)
        return render_template('login.html',**{'msg':'用户名或密码错误'})

@app.route('/logout',methods=['GET'])
def logout():
    del session['user_info']
    return redirect('/login')
if __name__ == '__main__':
    app.run()
四、导入配置文件
1.app.py
#app.py
from flask import Flask

# 配置:模板/静态文件
app = Flask('xxxx',template_folder="templates")
# 配置:secret_key
app.secret_key = 'as923lrjks9d8fwlkxlduf'

# 导入配置文件
app.config.from_object('settings.TestingConfig')

@app.route('/index')
def index():
    return "index"

if __name__ == '__main__':
    app.run()
2.settings.py
class BaseConfig(object):
    DEBUG = False
    SESSION_REFRESH_EACH_REQUEST = True

class ProConfig(BaseConfig):
    pass

class DevConfig(BaseConfig):
    DEBUG = True

class TestingConfig(BaseConfig):
    DEBUG = True
flask配置文件详解:
flask中的配置文件是一个flask.config.Config对象(继承字典),默认配置为:
    {
        'DEBUG':                                get_debug_flag(default=False),  是否开启Debug模式
        'TESTING':                              False,                          是否开启测试模式
        'PROPAGATE_EXCEPTIONS':                 None,
        'PRESERVE_CONTEXT_ON_EXCEPTION':        None,
        'SECRET_KEY':                           None,
        'PERMANENT_SESSION_LIFETIME':           timedelta(days=31),
        'USE_X_SENDFILE':                       False,
        'LOGGER_NAME':                          None,
        'LOGGER_HANDLER_POLICY':               'always',
        'SERVER_NAME':                          None,
        'APPLICATION_ROOT':                     None,
        'SESSION_COOKIE_NAME':                  'session',
        'SESSION_COOKIE_DOMAIN':                None,
        'SESSION_COOKIE_PATH':                  None,
        'SESSION_COOKIE_HTTPONLY':              True,
        'SESSION_COOKIE_SECURE':                False,
        'SESSION_REFRESH_EACH_REQUEST':         True,
        'MAX_CONTENT_LENGTH':                   None,
        'SEND_FILE_MAX_AGE_DEFAULT':            timedelta(hours=12),
        'TRAP_BAD_REQUEST_ERRORS':              False,
        'TRAP_HTTP_EXCEPTIONS':                 False,
        'EXPLAIN_TEMPLATE_LOADING':             False,
        'PREFERRED_URL_SCHEME':                 'http',
        'JSON_AS_ASCII':                        True,
        'JSON_SORT_KEYS':                       True,
        'JSONIFY_PRETTYPRINT_REGULAR':          True,
        'JSONIFY_MIMETYPE':                     'application/json',
        'TEMPLATES_AUTO_RELOAD':                None,
    }

方式一:
    app.config['DEBUG'] = True

    PS: 由于Config对象本质上是字典,所以还可以使用app.config.update(...)

方式二:
    app.config.from_pyfile("python文件名称")
        如:
            settings.py
                DEBUG = True

            app.config.from_pyfile("settings.py")

    app.config.from_envvar("环境变量名称")
        环境变量的值为python文件名称名称,内部调用from_pyfile方法


    app.config.from_json("json文件名称")
        JSON文件名称,必须是json格式,因为内部会执行json.loads

    app.config.from_mapping({'DEBUG':True})
        字典格式

    app.config.from_object("python类或类的路径")

        app.config.from_object('pro_flask.settings.TestingConfig')

        settings.py

            class Config(object):
                DEBUG = False
                TESTING = False
                DATABASE_URI = 'sqlite://:memory:'

            class ProductionConfig(Config):
                DATABASE_URI = 'mysql://user@localhost/foo'

            class DevelopmentConfig(Config):
                DEBUG = True

            class TestingConfig(Config):
                TESTING = True

        PS: 从sys.path中已经存在路径开始写


    PS: settings.py文件默认路径要放在程序root_path目录,如果instance_relative_config为True,则就是instance_path目录
五、给字符串路径自动找到指定类并执行
importlib + 反射
import settings
import importlib
def send_notify():
    for path in settings.NOTIFY_LIST:
        # 'notify.email.Email',
        # 'notify.msg.Msg',
        module_path,cls_name = path.rsplit('.',maxsplit=1) #右排序 取一个
        # m = importlib.import_module("notify.email") # import  notify.email
        m = importlib.import_module(module_path)
        cls = getattr(m,cls_name)
        obj = cls()
        obj.send()

"""
settings.py
NOTIFY_LIST = [
    'notify.email.Email',
    'notify.wechat.Wechat',
    'notify.msg.Msg',
"""

"""
run.py
from notify import send_notify

def run():
    send_notify()


if __name__ == '__main__':
    run()
"""
六、路由系统
1.cbv与fbv的使用方法:fbv可以种app.route的方法添加
#fbv可以用装饰器
@app.route('/index')
def index():
    return "index"


def order():
    return 'Order'
app.add_url_rule('/order', None, order)


class TestView(views.View):
    methods = ['GET']
    def dispatch_request(self):
        return 'test!'

app.add_url_rule('/test', view_func=TestView.as_view(name='test'))  # name=endpoint
# app.add_url_rule('/test', view_func=view函数)  # name=endpoint
2.CBV加装饰器和methods方法
def auth(func):
    def inner(*args, **kwargs):
        print('before')
        result = func(*args, **kwargs)
        print('after')
        return result
    return inner

class X1View(views.MethodView):
    methods = ['GET','POST']
    decorators = [auth, ]

    def get(self):
        return 'x1.GET'

    def post(self):
        return 'x1.POST'


app.add_url_rule('/x1', view_func=X1View.as_view(name='x1'))  #name=endpoint
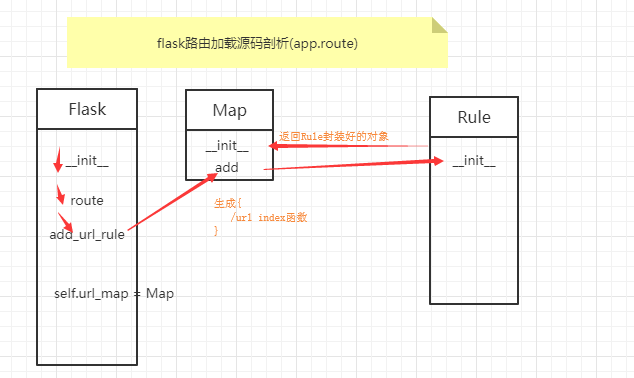
3.执行@app.route('/index')
"""
生成类似dict的形式
{
    '/index': index函数
}
1. decorator = app.route('/index')
2.
    @decorator
    def index():
        return "index"
3. decorator(index)
"""
"""
Map() = [
    Rule(rule=/index/ endpoint=None  view_func=函数),
]
"""
4.路由系统源码剖析
route函数
def route(self, rule, **options):
	'''
	rule为url 例子rule='/index'
	'''

    def decorator(f):
        endpoint = options.pop('endpoint', None)
        '''
        rule为/index,f为函数名
        '''
        self.add_url_rule(rule, endpoint, f, **options)
        return f
    return decorator
"""
这段说明 如果endpoint为空,类似django的url里的name字段,就使用当前函数的__name__做为endpoint
"""

if endpoint is None:
endpoint = _endpoint_from_view_func(view_func)
"""
将options里封装了反向生成url
"""
options['endpoint'] = endpoint

def _endpoint_from_view_func(view_func):

	assert view_func is not None, 'expected view func if endpoint '
                      'is not provided.'
	return view_func.__name__
 def execute(app):
    application_iter = app(environ, start_response) #对象加()执行__call__方法
    try:
        for data in application_iter:
            write(data)
        if not headers_sent:
            write(b'')
    finally:
        if hasattr(application_iter, 'close'):
            application_iter.close()
        application_iter = None

try:
    execute(self.server.app) #self.server.app 应该为Flask对象
可以看到 application_iter = app(environ, start_response) 就是调用代码获取结果的地方。
要调用 app 实例,那么它就需要定义了 __call__ 方法,我们找到 flask.app:Flask 对应的内容:


def auth(func):
            def inner(*args, **kwargs):
                print('before')
                result = func(*args, **kwargs)
                print('after')
                return result

        return inner

        @app.route('/index.html',methods=['GET','POST'],endpoint='index')
        @auth
        def index():
            return 'Index'

        或

        def index():
            return "Index"

        self.add_url_rule(rule='/index.html', endpoint="index", view_func=index, methods=["GET","POST"])
        or
        app.add_url_rule(rule='/index.html', endpoint="index", view_func=index, methods=["GET","POST"])
        app.view_functions['index'] = index


        或
        def auth(func):
            def inner(*args, **kwargs):
                print('before')
                result = func(*args, **kwargs)
                print('after')
                return result

        return inner

        class IndexView(views.View):
            methods = ['GET']
            decorators = [auth, ]

            def dispatch_request(self):
                print('Index')
                return 'Index!'

        app.add_url_rule('/index', view_func=IndexView.as_view(name='index'))  # name=endpoint


        或


        class IndexView(views.MethodView):
            methods = ['GET']
            decorators = [auth, ]

            def get(self):
                return 'Index.GET'

            def post(self):
                return 'Index.POST'


        app.add_url_rule('/index', view_func=IndexView.as_view(name='index'))  # name=endpoint


        @app.route和app.add_url_rule参数:
            rule,                       URL规则
            view_func,                  视图函数名称
            defaults=None,              默认值,当URL中无参数,函数需要参数时,使用defaults={'k':'v'}为函数提供参数
            endpoint=None,              名称,用于反向生成URL,即: url_for('名称')
            methods=None,               允许的请求方式,如:["GET","POST"]


            strict_slashes=None,        对URL最后的 / 符号是否严格要求,
                                        如:
                                            @app.route('/index',strict_slashes=False),
                                                访问 http://www.xx.com/index/ 或 http://www.xx.com/index均可
                                            @app.route('/index',strict_slashes=True)
                                                仅访问 http://www.xx.com/index
            redirect_to=None,           重定向到指定地址
                                        如:
                                            @app.route('/index/<int:nid>', redirect_to='/home/<nid>')
                                            或
                                            def func(adapter, nid):
                                                return "/home/888"
                                            @app.route('/index/<int:nid>', redirect_to=func)
            subdomain=None,             子域名访问
                                                from flask import Flask, views, url_for

                                                app = Flask(import_name=__name__)
                                                app.config['SERVER_NAME'] = 'wupeiqi.com:5000'


                                                @app.route("/", subdomain="admin")
                                                def static_index():
                                                    """Flask supports static subdomains
                                                    This is available at static.your-domain.tld"""
                                                    return "static.your-domain.tld"


                                                @app.route("/dynamic", subdomain="<username>")
                                                def username_index(username):
                                                    """Dynamic subdomains are also supported
                                                    Try going to user1.your-domain.tld/dynamic"""
                                                    return username + ".your-domain.tld"


                                                if __name__ == '__main__':
                                                    app.run()
from flask import Flask, views, url_for
            from werkzeug.routing import BaseConverter

            app = Flask(import_name=__name__)


            class RegexConverter(BaseConverter):
                """
                自定义URL匹配正则表达式
                """
                def __init__(self, map, regex):
                    super(RegexConverter, self).__init__(map)
                    self.regex = regex

                def to_python(self, value):
                    """
                    路由匹配时,匹配成功后传递给视图函数中参数的值
                    :param value:
                    :return:
                    """
                    return int(value)

                def to_url(self, value):
                    """
                    使用url_for反向生成URL时,传递的参数经过该方法处理,返回的值用于生成URL中的参数
                    :param value:
                    :return:
                    """
                    val = super(RegexConverter, self).to_url(value)
                    return val

            # 添加到flask中
            app.url_map.converters['regex'] = RegexConverter


            @app.route('/index/<regex("d+"):nid>')
            def index(nid):
                print(url_for('index', nid='888'))
                return 'Index'


            if __name__ == '__main__':
                app.run()

b. 自定制正则路由匹配
@app.route('/user/<username>')
@app.route('/post/<int:post_id>')
@app.route('/post/<float:post_id>')
@app.route('/post/<path:path>')
@app.route('/login', methods=['GET', 'POST'])
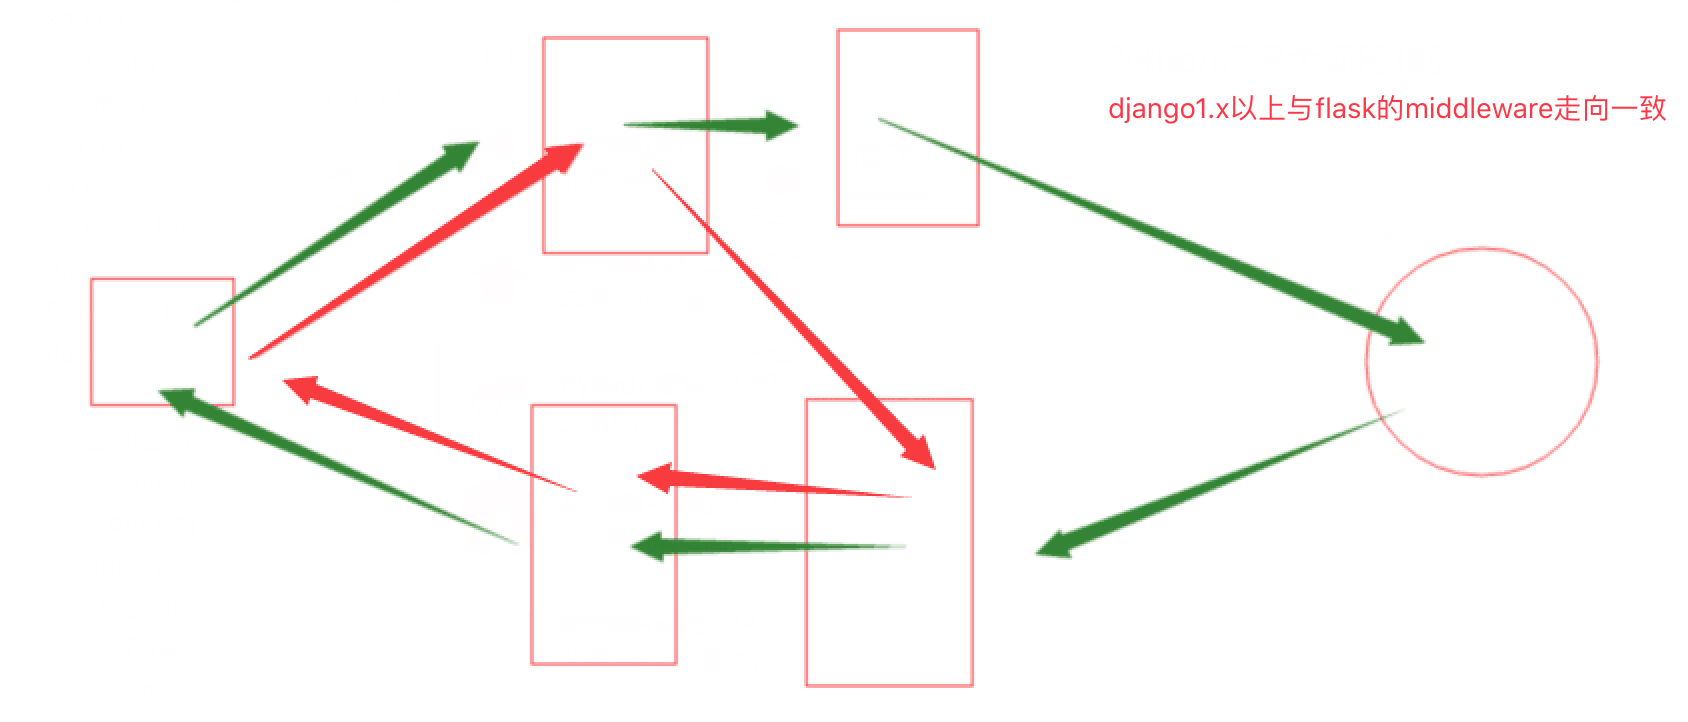
七、Flask特殊装饰器
from flask import Flask,render_template,request,redirect,session

app = Flask('xxxx',template_folder="templates")
app.secret_key = 'as923lrjks9d8fwlkxlduf'


@app.before_request #类似于django的middleware
def bf():
    if request.path == '/login':
        return None
    user_info = session.get('user_info')
    if not user_info:
        return redirect('/login')

@app.route('/order',methods=['GET'])
def order():
    return "order"

@app.route('/index',methods=['GET'])
def index():
    return "index"

@app.route('/logout',methods=['GET'])
def logout():
    del session['user_info']
    return redirect('/login')

@app.route('/login',methods=['GET','POST'])
def login():
    if request.method == "GET":
        return render_template('login.html')
    else:
        user = request.form.get('user')
        pwd = request.form.get('pwd')
        if user == 'alex' and pwd == '123':
            session['user_info'] = user
            return redirect('/index')
        # return render_template('login.html',msg = "用户名或密码错误",x =  123)
        return render_template('login.html',**{'msg':'用户名或密码错误'})

if __name__ == '__main__':
    app.run()
请求之前:@app.before_request
def before_request(self, f):

    #self.before_request_funcs = {}
    #结果返回 {None: [bf1,bf2]}
    # setdefault(None, [])会返回{None:[]}
self.before_request_funcs.setdefault(None, []).append(f) return f
请求之后:
def after_request(self, f):
	#{None:[af1,af2]}
    self.after_request_funcs.setdefault(None, []).append(f)
    return f
八、模版使用
import functools
from flask import Flask,render_template,request,redirect,session,Markup

app = Flask('xxxx',template_folder="templates")
app.secret_key = 'as923lrjks9d8fwlkxlduf'

@app.template_global()

def sb(a1, a2):
    return a1 + a2


@app.template_filter()
"""
类似django的filter
"""
def db(a1, a2, a3):
    return a1 + a2 + a3


def fffff(value):
    return Markup("<input type='text' value='%s' />" %(value,))  #与django的make_safe一样

@app.route('/index',methods=['GET'])
def index():
    context = {
        'k1': 'v1',
        'k2': [11,22,33],
        'k3':{
            'name':'oldboy',
            'age': 56
        },
        'k4':fffff
    }
    return render_template('index.html',**context)

@app.route('/order',methods=['GET'])
def order():
    return render_template('order.html')

if __name__ == '__main__':
    app.run()
{% extends "layout.html" %} #继承


{% block content %}
    <h1>欢迎进入系统</h1>

    {% include 'xxx.html'%} #类似django的include_tag
    {% include 'xxx.html'%}
    {% include 'xxx.html'%}

    <p>{{k1}}</p>
    <p>{{k2.0}}  {{k2[0]}}</p>
    <ul>
        {% for item in k2 %}
            <li>{{item}}</li>
        {% endfor %}
    </ul>

    <p>{{k3.name}} {{k3['name']}} {{k3.get('name')}} </p> #可以用get,这样可以设置取不到为空不会出现异常
    <ul>
        {% for item in k3.keys() %}
            <li>{{item}}</li>
        {% endfor %}
    </ul>
    <ul>
        {% for item in k3.values() %}
            <li>{{item}}</li>
        {% endfor %}
    </ul>
    <ul>
        {% for k,v in k3.items() %}
            {% if v == 'oldboy'%}
                <li>老男人:{{k}} {{v}}</li>
            {% else %}
                <li>{{k}} {{v}}</li>
            {% endif %}
        {% endfor %}
    </ul>
    <h1>函数: {{k4('123')}}</h1> #可以执行函数返回
    <h1>全局函数: {{sb(1,2)}}  {{ 1|db(2,3)}}</h1> #全局生效,类似于django的filter和simple_tag
{% endblock %}
<!DOCTYPE html>
<html lang="en">
<head>
    <meta charset="UTF-8">
    <title>Title</title>
</head>
<body>
    <div style="height: 48px;">
        头部内容
    </div>
    <div>
        {% block content %} {% endblock %}
    </div>

    <div style="height: 48px;">
        底部内容
    </div>
</body>
</html>
{% extends "layout.html" %}


{% block content %}
    <h1>订单列表</h1>

{% endblock %}
九、Flask-session源码剖析
1.特殊的字典,当前类继承dict就具有dict的特性
class MyDict(dict):
    def on_update(self):
        pass

v2 = MyDict()
v2['k1'] = 'v1'
print(v2,type(v2))
v3 = dict(v2)
print(v3,type(v3))
2.flask请求进来先执行Flask类的__call__方法 将environ和start_response传入(请求相关的信息)
 def __call__(self, environ, start_response):
     """Shortcut for :attr:`wsgi_app`."""
     return self.wsgi_app(environ, start_response)
3. ctx = self.request_context(environ)将请求相关的数据传入Flask类的request_context方法,request_context方法实例化RequestContext,执行__init__
def request_context(self, environ):
	#实例化RequestContext 执行__init__
    return RequestContext(self, environ)
4.RequestContext的构造方法中,再次实例化了request = app.request_class(environ) 一个request类将请求相关的数据封装到request类中,执行request的__init__方法
def __init__(self, app, environ, request=None):
    self.app = app
    if request is None:
        request = app.request_class(environ) #封装
    self.request = request
    self.url_adapter = app.create_url_adapter(self.request)
    self.flashes = None
    self.session = None

    # Request contexts can be pushed multiple times and interleaved with
    # other request contexts.  Now only if the last level is popped we
    # get rid of them.  Additionally if an application context is missing
    # one is created implicitly so for each level we add this information
    self._implicit_app_ctx_stack = []

    # indicator if the context was preserved.  Next time another context
    # is pushed the preserved context is popped.
    self.preserved = False

    # remembers the exception for pop if there is one in case the context
    # preservation kicks in.
    self._preserved_exc = None
5.通过ctx.push()=Request_Context.push()执行session的操作
def push(self):

    top = _request_ctx_stack.top
    if top is not None and top.preserved:
        top.pop(top._preserved_exc)

    app_ctx = _app_ctx_stack.top
    if app_ctx is None or app_ctx.app != self.app:
        app_ctx = self.app.app_context()
        app_ctx.push()
        self._implicit_app_ctx_stack.append(app_ctx)
    else:
        self._implicit_app_ctx_stack.append(None)

    if hasattr(sys, 'exc_clear'):
        sys.exc_clear()

    _request_ctx_stack.push(self)

    #此处操作session
    self.session = self.app.open_session(self.request)
    if self.session is None:
            self.session = self.app.make_null_session()
6.open_session执行Flask类的 self.session_interface.open_session(self, request)
Flask的 session_interface = SecureCookieSessionInterface()
相当于执行了 SecureCookieSessionInterface类里的 open_session 方法
def open_session(self, app, request):
    s = self.get_signing_serializer(app)
    if s is None:
        return None
    val = request.cookies.get(app.session_cookie_name)
    if not val:
        return self.session_class()
        “”“
        	self.session_class() = SecureCookieSession() SecureCookieSession继承了dict
        ”“”
    max_age = total_seconds(app.permanent_session_lifetime)
    try:
        data = s.loads(val, max_age=max_age) #通过sercet_key进行编码
        return self.session_class(data)
    except BadSignature:
        return self.session_class()

