(补上文《线程基础:JDK1.5+(10)——线程新特性(下)》)
3-5、java.util.concurrent.atomic:线程安全的原子操作包
在JDK1.5+的版本中,Doug Lea和他的团队还为我们提供了一套用于保证线程安全的原子操作。我们都知道在多线程环境下,对于更新对象中的某个属性、更新基本类型数据、更新数组(集合)都可能产生脏数据问题(如果您不清楚这个问题,请Google或者Baidu。这边文章本身不讨论脏数据产生的具体原因)。
为了避免多线程环境下的脏数据问题,JDK1.5的版本中为我们提供了java.util.concurrent.atomic原子操作包。所谓“原子”操作,是指一组不可分割的操作:操作者对目标对象进行操作时,要么完成所有操作后其他操作者才能操作;要么这个操作者不能进行任何操作;
java.util.concurrent.atomic原子操作包为我们提供了四类原子操作:原子更新基本类型,原子更新数组,原子更新引用和原子更新字段。灵活使用它们完全可以我们在日常工作中遇到的多线程数据脏读问题。
3-5-1、原子操作基本类型
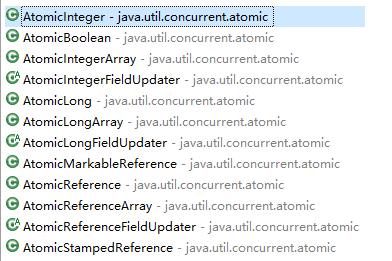
AtomicBoolean:布尔数据的原子操作
AtomicInteger:整型数字的原子操作
AtomicLong:长整型数字的原子操作
这里我们首先使用AtomicInteger给出一段使用代码,让各位读者对基本类型的原子操作有一个感性的认识,然后再给出常用的API方法。基本的使用过程如下:
package test.thread.atomic;

import java.util.concurrent.atomic.AtomicInteger;

public class TestAtomic {
    public static void main(String[] args) throws Exception {
        // 实例化了一个AtomicInteger类的对象atomic并定义初始值为1
        AtomicInteger atomic = new AtomicInteger(1);
        // 进行atomic的原子化操作:增加1并且获取这个增加后的新值
        atomic.incrementAndGet();
    }
}在以上两句代码中,我们看到了原子操作的基本使用。但是有的读者要问了,这和index++有什么不同吗?最大的不同是:index++不是线程安全的。本文由于篇幅限制不过多介绍为什么它不是线程安全的,这里有一篇文章,详细记录了index++或者++index的处理过程,感兴趣的读者可以参考:http://www.importnew.com/17056.html
那么我们重点分析一下AtomicInteger的源代码,来看一下为什么incrementAndGet()方法是怎么做到原子性的(只列出相关部分的代码):
public class AtomicInteger extends Number implements java.io.Serializable {
    ......
    // setup to use Unsafe.compareAndSwapInt for updates
    private static final Unsafe unsafe = Unsafe.getUnsafe();

    ......
    private volatile int value;
    ......

    /**
     * Gets the current value.
     *
     * @return the current value
     */
    public final int get() {
        return value;
    }

    ......

    /**
     * Atomically increments by one the current value.
     * @return the updated value
     */
    public final int incrementAndGet() {
        for (;;) {
            int current = get();
            int next = current + 1;
            if (compareAndSet(current, next))
                return next;
        }
    }

    ......

    /**
     * Atomically sets the value to the given updated value
     * if the current value {@code ==} the expected value.
     * @param expect the expected value
     * @param update the new value
     * @return true if successful. False return indicates that
     * the actual value was not equal to the expected value.
     */
    public final boolean compareAndSet(int expect, int update) {
        return unsafe.compareAndSwapInt(this, valueOffset, expect, update);
    }
}
3-5-2、悲观锁和乐观锁
上一小节中给出的AtomicInteger源代码,有部分读者是不是感觉有点看不懂?是不是有几个疑问在您心中:为什么AtomicInteger不使用synchronized关键字就可以实现线程安全的原子性操作?为什么incrementAndGet方法中居然还有一个死循环?
要解决这些疑问,我们首先就要介绍乐观锁和悲观锁以及JAVA对它的支持。悲观锁是一种独占锁,它假设的前提是“冲突一定会发生”,所以处理某段可能出现数据冲突的代码时,这个代码段就要被某个线程独占。而独占意味着“其它即将执行这段代码的其他线程”都将进入“阻塞”/“挂起”状态。是的,synchronized关键字就是java对于悲观锁的实现。
由于悲观锁的影响下,其他线程都将进入 阻塞/挂起 状态。而我们在之前的文章中都已经讲过,CPU执行线程状态切换是要耗费相当资源的,这主要涉及到CPU寄存器的操作。所以悲观锁在性能上不会有太多惊艳的表现(但是也不至于成为性能瓶颈)
有悲观锁的存在当然就有乐观锁的存在。乐观锁假定“冲突不一定会出现”,如果出现冲突则进行重试,直到冲突消失。 由于乐观锁的假定条件,所以乐观锁不会独占资源,性能自然在多数情况下就会好于悲观锁。AtomicInteger是一个标准的乐观锁实现,sun.misc.Unsafe是JDK提供的乐观锁的支持。为什么是多数情况呢?因为一旦多线程对某个资源的抢占频度达到了某种规模,就会导致乐观锁内部出现多次更新失败的情况,最终造成乐观锁内部进入一种“活锁”状态。这时乐观锁的性能反而没有悲观锁好。
您在incrementAndGet中,会看到有一个“死循环”,这是incrementAndGet方法中有“比较—重试”的需求。现在您明白了悲观锁和乐观锁的不同,那我们再次审视incrementAndGet方法中的代码(JDK1.7):
public final int incrementAndGet() {
    // 一直循环的目的是为了“预期值”与“真实值”不一致的情况下,
    // 能够重新进行+1计算
    for (;;) {
        // 取得/重新取得 当前的value值
        int current = get();
        // 将当前值+1
        int next = current + 1;
        // 这是最关键的,使用JDK中实现的CAS机制
        // 对当前值和预期值进行比较
        // 如果当前值和预期的不一样,说明有某一个其他线程完成了值的更改
        // 那么进行下一次循环,进行重新操作(因为之前的操作结果就不对了)
        if (compareAndSet(current, next))
            return next;
    }
}
这就是整个利用乐观锁进行原子操作的过程。当然您在理解了这个过程后,就可以将乐观锁的支持直接运用到您的业务代码中,帮助改善性能了。祝贺您!
在代码中还有一个volatile关键字,volatile关键字用于修饰变量,线程在每次使用该变量时,都会读取变量修改后的最的值。注意,如果只是使用volatile,也不足以保证数据操作的原子性。
3-5-3、原子操作数组
AtomicIntegerArray:原子操作整型数组
AtomicLongArray:原子操作长整型数组
AtomicReferenceArray:原子操作对象引用数组(后文会介绍对象引用的原子操作)
我们首先来看一看AtomicIntegerArray的基本使用。代码如下所示:
package test.thread.atomic;

import java.util.concurrent.atomic.AtomicIntegerArray;

public class TestAtomicArray {
    public static void main(String[] args) throws Exception {
        AtomicIntegerArray atomicArray = new AtomicIntegerArray(5);
        // 设置指定索引位的数值
        atomicArray.set(0, 5);

        // 您也可以通过以下方法设置
        //(实际上默认值为0,这里加了5)
        // atomicArray.addAndGet(0, 5);

        // --
        int current = atomicArray.decrementAndGet(0);
        System.out.println("current = " + current);
    }
}
在代码中,我们使用addAndGet方法设置数字指定索引位的值;使用decrementAndGet方法将指定索引位的值减少1,并且取得最新值。
public class AtomicIntegerArray implements java.io.Serializable {
    ......
    private static final Unsafe unsafe = Unsafe.getUnsafe();
    private static final int base = unsafe.arrayBaseOffset(int[].class);
    ......

    private final int[] array;

    ......

    /**
     * Creates a new AtomicIntegerArray of the given length, with all
     * elements initially zero.
     *
     * @param length the length of the array
     */
    public AtomicIntegerArray(int length) {
        array = new int[length];
    }

    ......

    /**
     * Atomically decrements by one the element at index {@code i}.
     *
     * @param i the index
     * @return the updated value
     */
    public final int decrementAndGet(int i) {
        return addAndGet(i, -1);
    }

    ......

    public final int addAndGet(int i, int delta) {
        long offset = checkedByteOffset(i);
        while (true) {
            int current = getRaw(offset);
            int next = current + delta;
            if (compareAndSetRaw(offset, current, next))
                return next;
        }
    }
}
如果您想查看AtomicIntegerArray中的完整操作方式,可以查看JDK的API文档,这里的文章只给出一些主要的操作方式,以便您进行查看:
- get(int i):获取数组指定位置的值,并不会改变原来的值。
- set(int i, int newValue):为数组指定索引位设置一个新值。数组的索引位都是从0开始计数。
- getAndSet(int i, int newValue):获取数组指定位置的原始值后,用newValue这个新值进行覆盖。
- getAndAdd(int i, int delta):获取数组指定索引位的原始值后,为数组指定索引位的值增加delta。那么还有个类似的操作为:addAndGet。
- incrementAndGet(int i):为数组指定索引位的值+1后,然后获取这个位置上的新值。当然,还有个类似的操作:getAndIncrement。
- decrementAndGet(int i):为数组指定索引位的值-1后,然后获取这个位置上的新值。当然,类似的操作为:getAndDecrement。
和上文中我们介绍的AtomicInteger类相似,AtomicIntegerArray中的decrementAndGet方法(还有其他操作方法)也是乐观锁的一个应用。
实际上不仅如此,在JDK1.5+中,Doug Lea和他的团队为我们提供的线程安全的数据操作,基本上都是基于乐观锁的实现。包括(但不限于):java.util.concurrent.atomic包中的原子数据操作、java.util.concurrent包中的线程安全的数据结构等等。
3-5-4、原子操作对象字段
- AtomicIntegerFieldUpdater:整型数据字段更新器
- AtomicLongFieldUpdater:长型数据字段更新器
- AtomicReferenceFieldUpdater:对象数据字段更新器
- AtomicReference:对象原子操作
java.util.concurrent.atomic还为我们提供了进行对象(和对象中依赖)原子操作的方式。当然,同样也似基于乐观锁。为了演示这样的操作,我们首先要定义一个被操作的类,以便稍后对它进行实例化。
在这个示例程序中,我们定义了一个“学生”类:Student,并且为这个Student引入了一个“成绩”类:Performance。我们先来看看这两个类的定义:
/**
 * 代表学生的Student类
 * @author yinwenjie
 */
class Student {
    /**
     * 学生成绩
     */
    private Performance performance;
    /**
     * 学生姓名
     */
    private String name;

    public Student(String name , Integer performance) {
        this.name = name;
        this.performance = new Performance();
        this.performance.setPerformance(performance);
    }

    /**
     * @return the performance
     */
    public Performance getPerformance() {
        return performance;
    }
    /**
     * @param performance the performance to set
     */
    public void setPerformance(Performance performance) {
        this.performance = performance;
    }
    /**
     * @return the name
     */
    public String getName() {
        return name;
    }
    /**
     * @param name the name to set
     */
    public void setName(String name) {
        this.name = name;
    }
}

/**
 * 代表着学生成绩
 * @author yinwenjie
 */
class Performance {
    /**
     * 成绩属性是一个整数
     */
    private Integer performance;

    /**
     * @return the performance
     */
    public Integer getPerformance() {
        return performance;
    }

    /**
     * @param performance the performance to set
     */
    public void setPerformance(Integer performance) {
        this.performance = performance;
    }
}
好了,我们来看看原子操作包是如何帮助我们进行多线程安全的对象(和对象引用)操作的。
首先我们实例化这个Student对象,然后使用AtomicReference对这个对象进行操作:
public static void main(String[] args) throws RuntimeException {
    Student student = new Student("yinwenjie" , 80);
    AtomicReference<Student> ref = new AtomicReference<Student>(student);

    student = new Student("yinwenjie" , 70);
    Student oldStudent = ref.getAndSet(student);

    System.out.println(student + "和" + oldStudent + "是两个对象");
    System.out.println("AtomicReference保证了赋值时的原子操作性");
}可以看出,我们使用AtomicReference对某一个对象的赋值过程进行了操作。但是很明显,这绝对不是我们的目的。我们的目的是,保证student对象不变,只是改变student的成绩属性。所以,我们应当使用AtomicReferenceFieldUpdater
public class Student {
    ......
    /**
     * 学生成绩
     */
    private volatile Performance performance;

    /**
     * 学生成绩“更改者”
     */
    // 会重点讲解关于“更改器”的参数问题
    private AtomicReferenceFieldUpdater<Student, Performance> performance_updater =
    AtomicReferenceFieldUpdater.newUpdater(Student.class, Performance.class, "performance");
    ......

    /**
     * @return the performance
     */
    public Performance getPerformance() {
        return performance;
    }

    /**
     * @param performance the performance to set
     */
    public void setPerformance(Performance performance) {
        // 注意,这里设置的是updater,而不是直接设置performance属性
        performance_updater.set(this, performance);
    }

    ......
}
AtomicReferenceFieldUpdater.newUpdater这个静态方法是为了创建一个新的“更新器”。其中的三个参数分别表示:持有要进行原子操作属性的类、要进行原子操作的类和要进行原子操作的属性的名称。
对于Student类来说,持有要进行原子操作属性的类当然就是Student类本身;要进行原子操作的类当然就是Performance类;属性名称我们设置的名称是“performance”。
另外需要注意的是setPerformance方法。在这个方法中,我们不再直接设置performance参数,而是使用updater的set方法间接设置performance参数。
下面,我们就来测试一下更改后的Student类的使用效果。首先看一下测试代码:
public static void main(String[] args) throws RuntimeException {
Student student = new Student();
Performance newPerformance = new Performance();
newPerformance.setPerformance(80);
// 注意,这样student中的performance属性
// 就是用了乐观机制,保证了操作的线程安全性
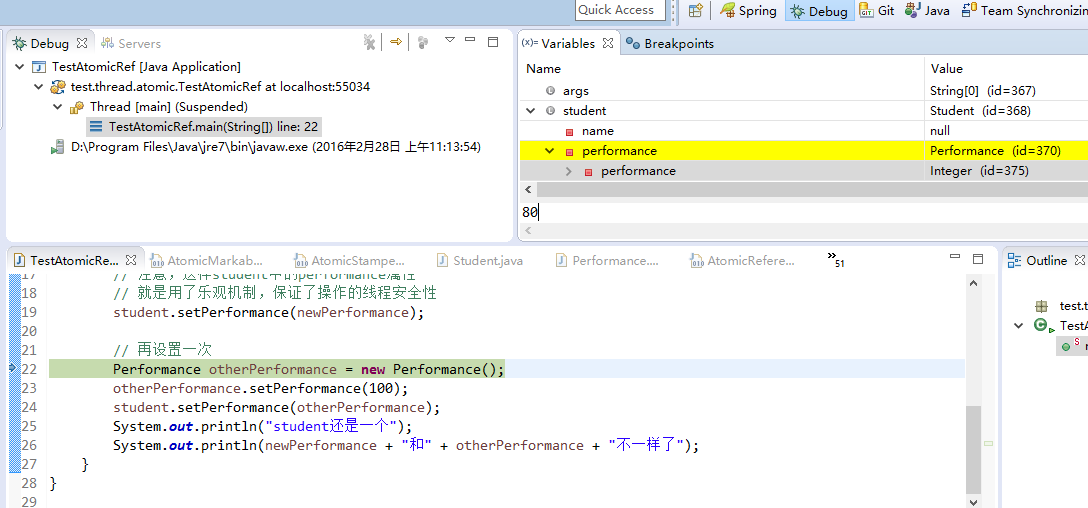
student.setPerformance(newPerformance);
// 再设置一次
Performance otherPerformance = new Performance();
otherPerformance.setPerformance(100);
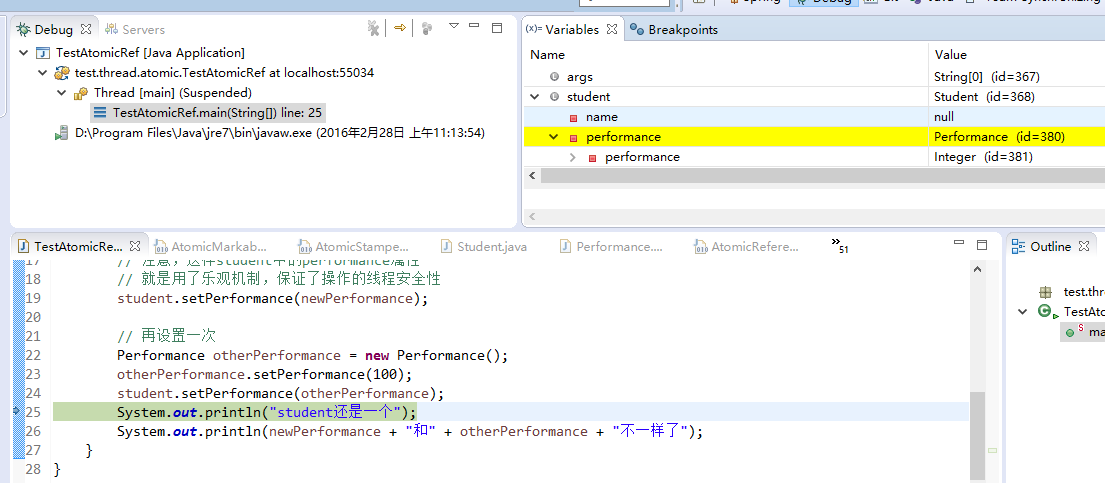
student.setPerformance(otherPerformance);
System.out.println("student还是一个");
System.out.println(newPerformance + "和" + otherPerformance + "不一样了");
}以下是运行效果:
- 第一次student.setPerformance的执行效果:
- 第二次student.setPerformance的执行效果: