一、建立表
1.1、建立表,并插入数据
/*
SQLyog Enterprise v12.09 (64 bit)
MySQL - 5.6.27-log : Database - mybatis
*********************************************************************
*/


/*!40101 SET NAMES utf8 */;

/*!40101 SET SQL_MODE=''*/;

/*!40014 SET @OLD_UNIQUE_CHECKS=@@UNIQUE_CHECKS, UNIQUE_CHECKS=0 */;
/*!40014 SET @OLD_FOREIGN_KEY_CHECKS=@@FOREIGN_KEY_CHECKS, FOREIGN_KEY_CHECKS=0 */;
/*!40101 SET @OLD_SQL_MODE=@@SQL_MODE, SQL_MODE='NO_AUTO_VALUE_ON_ZERO' */;
/*!40111 SET @OLD_SQL_NOTES=@@SQL_NOTES, SQL_NOTES=0 */;
CREATE DATABASE /*!32312 IF NOT EXISTS*/`mybatis` /*!40100 DEFAULT CHARACTER SET utf8 */;

USE `mybatis`;

/*Table structure for table `author` */

DROP TABLE IF EXISTS `author`;

CREATE TABLE `author` (
  `author_id` int(11) unsigned NOT NULL AUTO_INCREMENT COMMENT '作者ID主键',
  `author_username` varchar(30) NOT NULL COMMENT '作者用户名',
  `author_password` varchar(32) NOT NULL COMMENT '作者密码',
  `author_email` varchar(50) NOT NULL COMMENT '作者邮箱',
  `author_bio` varchar(1000) DEFAULT '这家伙很赖,什么也没留下' COMMENT '作者简介',
  `register_time` datetime DEFAULT CURRENT_TIMESTAMP COMMENT '注册时间',
  PRIMARY KEY (`author_id`)
) ENGINE=InnoDB AUTO_INCREMENT=10 DEFAULT CHARSET=utf8;

/*Data for the table `author` */

insert  into `author`(`author_id`,`author_username`,`author_password`,`author_email`,`author_bio`,`register_time`)
values (1,'张三','123456','123@qq.com','张三是个新手,刚开始注册','2015-10-29 10:23:59'),(2,'李四','123asf','lisi@163.com','魂牵梦萦 ','2015-10-29 10:24:29'),(3,'王五','dfsd342','ww@sina.com','康熙王朝','2015-10-29 10:25:23'),(4,'赵六','123098sdfa','zhaoliu@qq.com','花午骨','2015-10-29 10:26:09'),(5,'钱七','zxasqw','qianqi@qq.com','这家伙很赖,什么也没留下','2015-10-29 10:27:04'),(6,'张三丰','123456','zhangsf@qq.com','这家伙很赖,什么也没留下','2015-10-29 11:48:00'),(7,'金庸','qwertyuiop','wuji@163.com','这家伙很赖,什么也没留下','2015-10-29 11:48:24'),(8,'知道了','456789','456789@qq.com','哈哈哈哈哈雅虎','2015-10-29 14:03:27'),(9,'不知道','1234567890','123456@qq.com','哈哈哈哈哈雅虎','2015-10-29 14:01:16');

/*!40101 SET SQL_MODE=@OLD_SQL_MODE */;
/*!40014 SET FOREIGN_KEY_CHECKS=@OLD_FOREIGN_KEY_CHECKS */;
/*!40014 SET UNIQUE_CHECKS=@OLD_UNIQUE_CHECKS */;
/*!40111 SET SQL_NOTES=@OLD_SQL_NOTES */;
二、创建项目
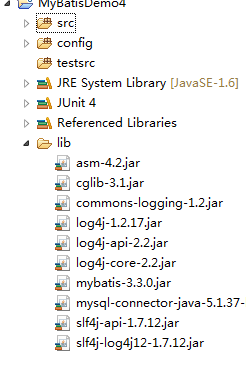
2.1、创建项目
2.2、创建POJO类
package com.pb.mybatis.po;

import java.util.Date;

/**
 *

* @Title: Author.java

* @Package com.pb.mybatis.po

* @ClassName Author

* @Description: TODO(Blog作者类)

* @author 刘楠

* @date 2015-10-29 上午9:27:53

* @version V1.0
 */
public class Author {
    //作者ID
    private int authorId;

    //作者用户名
    private String authorUserName;

    //作者密码
    private String authorPassword;

    //作者邮箱
    private String authorEmail;

    //作者介绍
    private int authorBio;

    //注册时间
    private Date registerTime;

    /**
     * @return the authorId
     */
    public int getAuthorId() {
        return authorId;
    }

    /**
     * @param authorId the authorId to set
     */
    public void setAuthorId(int authorId) {
        this.authorId = authorId;
    }

    /**
     * @return the authorUserName
     */
    public String getAuthorUserName() {
        return authorUserName;
    }

    /**
     * @param authorUserName the authorUserName to set
     */
    public void setAuthorUserName(String authorUserName) {
        this.authorUserName = authorUserName;
    }

    /**
     * @return the authorPassword
     */
    public String getAuthorPassword() {
        return authorPassword;
    }

    /**
     * @param authorPassword the authorPassword to set
     */
    public void setAuthorPassword(String authorPassword) {
        this.authorPassword = authorPassword;
    }

    /**
     * @return the authorEmail
     */
    public String getAuthorEmail() {
        return authorEmail;
    }

    /**
     * @param authorEmail the authorEmail to set
     */
    public void setAuthorEmail(String authorEmail) {
        this.authorEmail = authorEmail;
    }

    /**
     * @return the authorBio
     */
    public int getAuthorBio() {
        return authorBio;
    }

    /**
     * @param authorBio the authorBio to set
     */
    public void setAuthorBio(int authorBio) {
        this.authorBio = authorBio;
    }

    /**
     * @return the registerTime
     */
    public Date getRegisterTime() {
        return registerTime;
    }

    /**
     * @param registerTime the registerTime to set
     */
    public void setRegisterTime(Date registerTime) {
        this.registerTime = registerTime;
    }

    /** (non Javadoc)

     * <p>Title: toString</p>

     * <p>Description:重写toString方法 </p>

     * @return

     * @see java.lang.Object#toString()
     */
    @Override
    public String toString() {
        return "Author [authorId=" + authorId + ", authorUserName="
                + authorUserName + ", authorPassword=" + authorPassword
                + ", authorEmail=" + authorEmail + ", authorBio=" + authorBio
                + ", registerTime=" + registerTime + "]";
    }


}
2.3、创建configruation
<?xml version="1.0" encoding="UTF-8"?>
<!DOCTYPE configuration
  PUBLIC "-//mybatis.org//DTD Config 3.0//EN"
  "http://mybatis.org/dtd/mybatis-3-config.dtd">

<configuration>
<properties resource="db.properties" />
<typeAliases>
<!--使用默认别名  -->
<package name="com.pb.mybatis.po"/>
</typeAliases>
<environments default="development">
<environment id="development">
    <transactionManager type="JDBC"/>
    <dataSource type="POOLED">
        <property name="driver" value="${jdbc.driver}"/>
        <property name="url" value="${jdbc.url}"/>
        <property name="username" value="${jdbc.username}"/>
        <property name="password" value="${jdbc.password}"/>
    </dataSource>
</environment>
</environments>
<mappers>
<!-- 加载映射 -->

<package name="com.pb.mybatis.mapper"/>
</mappers>
</configuration>
2.3、创建mapper接口
public interface AuthorMapper {

    /**
     *
     * @Title: findById

     * @Description: TODO(根据查找一个用户)

     * @param id
     * @return Author
     */
    public Author findAuthorById(int authorId);

}
2.4、创建mapper.xml
<?xml version="1.0" encoding="UTF-8"?>
<!DOCTYPE mapper
  PUBLIC "-//mybatis.org//DTD Mapper 3.0//EN"
  "http://mybatis.org/dtd/mybatis-3-mapper.dtd">
<mapper namespace="com.pb.mybatis.mapper.AuthorMapper">
<!--使用resultMap映射  type使用别名,-->
<resultMap type="Author" id="authorResultMap">
<!--主键  -->
<id property="authorId" column="author_id"/>
<!--普通属性与表中的字段对应  -->
<result property="authorUserName" column="author_username"/>
<result property="authorPassword" column="author_password"/>
<result property="authorEmail" column="author_email"/>
<result property="authorBio" column="author_bio"/>
<result property="registerTime" column="register_time"/>
</resultMap>

<!--根据查找一个用户  -->
<select id="findAuthorById" parameterType="int" resultMap="authorResultMap">
SELECT * FROM author
WHERE author_id=#{authorId}
</select>
</mapper>
三、传入多个ID,进行查找使用List
3.1、更改Mapper接口
/**
     *
     * @Title: findAuthors

     * @Description: TODO(根据多个ID进行查找)

     * @param idLists
     * @return List<Author>
     */
    public List<Author> findAuthors(List<Integer> idLists);
3.2、更改Mapper.xml
<!--根据多个ID查找  -->
<select id="findAuthors"  resultMap="authorResultMap">
SELECT * FROM author
WHERE author_id in
<foreach collection="list" item="item" index="index" open="(" close=")" separator=",">
#{item}
</foreach>

        <!-- collection:传入参数的名称 index:索引: item:collection的别名 -->
</select>
3.3、测试
@Test
    public void testFindAuthors() {
        //获取会话
        SqlSession sqlSession=sqlSessionFactory.openSession();
        //Mapper接口
        AuthorMapper authorMapper=sqlSession.getMapper(AuthorMapper.class);
        List<Integer> list=new ArrayList<Integer>();

        list.add(1);
        list.add(3);
        list.add(4);
        list.add(6);
        list.add(7);
        //调用方法
        List<Author> authors=authorMapper.findAuthors(list);
        System.out.println(authors);
        //关闭会话
        sqlSession.close();
    }
四、使用Map做为参数
4.1、在Mapper接口中增加相应方法
/**
     *
     * @Title: findAuthorsByMap

     * @Description: TODO(使用Map做为参数)

     * @param map
     * @return List<Author>
     */
    public List<Author> findAuthorsByMap(Map<String, Object> map);
4.2、更改Mapper.xml
<!--使用Map查找  -->
<select id="findAuthorsByMap" resultMap="authorResultMap">
SELECT * FROM author
<!--  参数使用Map的Key-->
WHERE author_username LIKE "%"#{username}"%"
or author_bio like"%"#{bio}"%"
</select>
4.3、测试
@Test
    public void testFindAuthorsByMap() {
        //获取会话
                SqlSession sqlSession=sqlSessionFactory.openSession();
                //Mapper接口
                AuthorMapper authorMapper=sqlSession.getMapper(AuthorMapper.class);
                Map<String, Object> map=new HashMap<String, Object>();
                map.put("username", "张");
                map.put("bio", "哈");

                //调用方法
                List<Author> authors=authorMapper.findAuthorsByMap(map);
                System.out.println(authors);
                //关闭会话
                sqlSession.close();
                for(Author a:authors){
                    System.out.println(a.toString());
                }
    }
五、直接使用多个参数
5.1、Mapper接口
/**
     *
     * @Title: findAuthorsByParams

     * @Description: TODO(使用多个参数

     * @param id
     * @param username
     * @return List<Author>
     */
    public List<Author> findAuthorsByParams(int authorId,String authorUserName);
5.2、Mapper.xml
<!--直接使用多个参数  -->
<select id="findAuthorsByParams" resultMap="authorResultMap">
SELECT * FROM author
WHERE author_id=#{0}
OR author_username LIKE "%"#{1}"%"
<!-- 其中,#{0}代表接收的是dao层中的第一个参数,#{1}代表dao层中第二参数,更多参数一致往后加即可。 -->
</select>
5.3、测试
@Test
    public void testFindAuthorsByParams() {
        //获取会话
                SqlSession sqlSession=sqlSessionFactory.openSession();
                //Mapper接口
                AuthorMapper authorMapper=sqlSession.getMapper(AuthorMapper.class);


                //调用方法
                List<Author> authors=authorMapper.findAuthorsByParams(6,"张");
                System.out.println(authors);
                //关闭会话
                sqlSession.close();
                for(Author a:authors){
                    System.out.println(a.toString());
                }
    }
六、直接使用多个参数注解写法
6.1、Mapper接口
public List<Author> findAuthorsByParams(@Param("id") int authorId,@Param("username")String authorUserName);
6.2、Mapper.xml
<!--使用注解的方式使用多个参数  -->
<select id="findAuthorsByParams" resultMap="authorResultMap">
SELECT * FROM author
WHERE author_id=#{id}
or author_username LIKE "%"#{username}"%"
<!-- 使用注解的方式。,直接使用Param中的参数即可 -->
</select>