在现有的iOS工程中集成react native, 或者说将react native引入到iOS 项目,是RN和iOS混合开发的必经之路
参考官网教程:https://reactnative.cn/docs/integration-with-existing-apps/
但是会有一些步骤报错,这里记录一下。首先我的项目结构是这样:
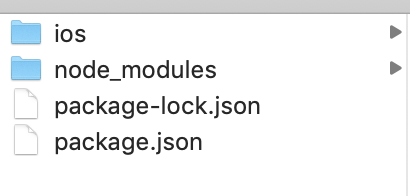
RNTEST 是最外面的文件夹的名字,也是iOS项目的名字。ios/ 下是iOS项目文件。
npm安装RN依赖都没问题,按照官网步骤来
最主要的是
cd ios
pod install
会报错。。。

错误提示是找不到XXX索引库,在Podfile文件中将这些对应的注释掉:
Podfile文件参考:https://github.com/facebook/react-native/blob/v0.60.0/template/ios/Podfile
platform :ios, '9.0'
require_relative '../node_modules/@react-native-community/cli-platform-ios/native_modules'

target 'RNTEST' do
  # Pods for HelloWorld
  pod 'React', :path => '../node_modules/react-native/'
  pod 'React-Core', :path => '../node_modules/react-native'
  #pod 'React-DevSupport', :path => '../node_modules/react-native/React'
  #pod 'React-fishhook', :path => '../node_modules/react-native/Libraries/fishhook'
  pod 'React-RCTActionSheet', :path => '../node_modules/react-native/Libraries/ActionSheetIOS'
  pod 'React-RCTAnimation', :path => '../node_modules/react-native/Libraries/NativeAnimation'
  pod 'React-RCTBlob', :path => '../node_modules/react-native/Libraries/Blob'
  pod 'React-RCTImage', :path => '../node_modules/react-native/Libraries/Image'
  pod 'React-RCTLinking', :path => '../node_modules/react-native/Libraries/LinkingIOS'
  pod 'React-RCTNetwork', :path => '../node_modules/react-native/Libraries/Network'
  pod 'React-RCTSettings', :path => '../node_modules/react-native/Libraries/Settings'
  pod 'React-RCTText', :path => '../node_modules/react-native/Libraries/Text'
  pod 'React-RCTVibration', :path => '../node_modules/react-native/Libraries/Vibration'
  #pod 'React-RCTWebSocket', :path => '../node_modules/react-native/Libraries/WebSocket'

  pod 'React-cxxreact', :path => '../node_modules/react-native/ReactCommon/cxxreact'
  pod 'React-jsi', :path => '../node_modules/react-native/ReactCommon/jsi'
  pod 'React-jsiexecutor', :path => '../node_modules/react-native/ReactCommon/jsiexecutor'
  pod 'React-jsinspector', :path => '../node_modules/react-native/ReactCommon/jsinspector'
  pod 'Yoga', :path => '../node_modules/react-native/ReactCommon/yoga'

  pod 'DoubleConversion', :podspec => '../node_modules/react-native/third-party-podspecs/DoubleConversion.podspec'
  pod 'glog', :podspec => '../node_modules/react-native/third-party-podspecs/glog.podspec'
  pod 'Folly', :podspec => '../node_modules/react-native/third-party-podspecs/Folly.podspec'


  use_native_modules!
end
结果:

之后就是在iOS工程中写相关代码, 可以运行起来,但是在Native调RN时
然后发现又报错了,改了package.json中的版本如下:

就可以了。
iOS项目代码参考的是慕课网上的教程。
要想在iOS中加载一个JSX页面,有两种方式:
一:在控制器导入头文件
//#import <React/RCTBundleURLProvider.h>
//#import <React/RCTRootView.h>
//#import <React/RCTEventEmitter.h>
然后加载JSX中注册的模块
//    NSURL *jsCodeLocation;
//
//    jsCodeLocation = [[RCTBundleURLProvider sharedSettings] jsBundleURLForBundleRoot:@"index" fallbackResource:nil];
//
//    RCTRootView *rootView =
//    [[RCTRootView alloc] initWithBundleURL: jsCodeLocation
//                                moduleName: @"App"
//                         initialProperties:nil
//                             launchOptions: nil];
//    self.view = rootView;
上面这个moduleName (任意取,但是要与OC中一致才能加载对应页面)就是在index.js中的这个:
import {AppRegistry} from 'react-native'
import App from './App';
import App2 from './App2';
AppRegistry.registerComponent('App1',()=>App);
AppRegistry.registerComponent('App2',()=>App2);

AppRegistry.registerComponent('App3',()=>App2);
二:借鉴AppDelegate中加载方式,首先导入头文件,遵循代理,实现代理方法,加载index.js中的模块
//
//  RNPageController.m
//  RNTEST
//
//  Created by LiuWei on 2019/10/18.
//  Copyright © 2019 udc. All rights reserved.
//

#import "RNPageController.h"

//#import <React/RCTBundleURLProvider.h>
//#import <React/RCTRootView.h>
//#import <React/RCTEventEmitter.h>


#import <React/RCTBridge.h>
#import <React/RCTBundleURLProvider.h>
#import <React/RCTRootView.h>


@interface RNPageController ()<RCTBridgeDelegate>

@end

@implementation RNPageController

- (void)viewDidLoad {
    [super viewDidLoad];
    // Do any additional setup after loading the view.
//    [self initRCTRootView];

    RCTBridge *bridge = [[RCTBridge alloc] initWithDelegate:self launchOptions:nil];
    RCTRootView *rootView = [[RCTRootView alloc] initWithBridge:bridge
                                                     moduleName:@"App1"
                                              initialProperties:nil];
    self.view=rootView;
}

//-(void)initRCTRootView{
//    NSURL *jsCodeLocation;
//
//    jsCodeLocation = [[RCTBundleURLProvider sharedSettings] jsBundleURLForBundleRoot:@"index" fallbackResource:nil];
//
//    RCTRootView *rootView =
//    [[RCTRootView alloc] initWithBundleURL: jsCodeLocation
//                                moduleName: @"App"
//                         initialProperties:nil
//                             launchOptions: nil];
//    self.view = rootView;
//}

- (NSURL *)sourceURLForBridge:(RCTBridge *)bridge
{
#if DEBUG
    return [[RCTBundleURLProvider sharedSettings] jsBundleURLForBundleRoot:@"index" fallbackResource:nil];
#else
    return [[NSBundle mainBundle] URLForResource:@"main" withExtension:@"jsbundle"];
#endif
}
@end
以上这种开发方式最终打包 ipa时,
先在ios/ 下创建一个 release_ios/
然后执行命令生成必要的jsbundle文件和图片资源文件
react-native bundle --entry-file index.js --platform ios --dev false --bundle-output release_ios/main.jsbundle --assets-dest release_ios/
--platform ios:代表打包导出的平台为iOS;--dev false:代表关闭JS的开发者模式;-entry-file index.js:代表js的入口文件为index.js;--bundle-output:后面跟的是打包后将JS bundle包导出到的位置;--assets-dest:后面跟的是打包后的一些资源文件导出到的位置;
好了之后将生成必要的jsbundle文件和图片资源文件拖进iOS项目
接下来就可以打包了
特别注意:如果项目用到了CodePush热更新:加载js文件的方式变成这样
...
  NSURL *jsCodeLocation;
#ifdef DEBUG     jsCodeLocation = [[RCTBundleURLProvider sharedSettings] jsBundleURLForBundleRoot:@"index" fallbackResource:nil];
#else     jsCodeLocation = [CodePush bundleURL];
#endif ...
最后Demo地址:https://github.com/nwgdegitHub/OCCallRNDemo.git