1、配置环境pom


 1 <?xml version="1.0" encoding="UTF-8"?>
 2 <project xmlns="http://maven.apache.org/POM/4.0.0" xmlns:xsi="http://www.w3.org/2001/XMLSchema-instance"
 3          xsi:schemaLocation="http://maven.apache.org/POM/4.0.0 http://maven.apache.org/xsd/maven-4.0.0.xsd">
 4     <modelVersion>4.0.0</modelVersion>
 5
 6     <groupId>com.spring</groupId>
 7     <artifactId>boot_jpa</artifactId>
 8     <version>0.0.1-SNAPSHOT</version>
 9     <packaging>jar</packaging>
10
11     <name>boot_jpa</name>
12     <url>http://maven.apache.org</url>
13     <description>Demo project for Spring Boot</description>
14
15     <parent>
16         <groupId>org.springframework.boot</groupId>
17         <artifactId>spring-boot-starter-parent</artifactId>
18         <version>1.5.9.RELEASE</version>
19         <relativePath/> <!-- lookup parent from repository -->
20     </parent>
21
22     <properties>
23         <project.build.sourceEncoding>UTF-8</project.build.sourceEncoding>
24         <project.reporting.outputEncoding>UTF-8</project.reporting.outputEncoding>
25         <java.version>1.8</java.version>
26     </properties>
27
28     <dependencies>
29         <dependency>
30             <groupId>org.springframework.boot</groupId>
31             <artifactId>spring-boot-starter-web</artifactId>
32         </dependency>
33
34         <dependency>
35             <groupId>org.springframework.boot</groupId>
36             <artifactId>spring-boot-starter-test</artifactId>
37             <scope>test</scope>
38         </dependency>
39
40         <!--自定义配置文件-->
41         <dependency>
42             <groupId>com.alibaba</groupId>
43             <artifactId>fastjson</artifactId>
44             <version>1.2.15</version>
45         </dependency>
46
47         <dependency>
48             <groupId>org.springframework.boot</groupId>
49             <artifactId>spring-boot-starter-jdbc</artifactId>
50         </dependency>
51
52
53         <!-- 添加fastjson 依赖包. -->
54         <dependency>
55             <groupId>com.alibaba</groupId>
56             <artifactId>fastjson</artifactId>
57             <version>1.2.15</version>
58         </dependency>
59
60         <!-- spring boot devtools 依赖包. -->
61         <dependency>
62             <groupId>org.springframework.boot</groupId>
63             <artifactId>spring-boot-devtools</artifactId>
64             <optional>true</optional>
65             <scope>true</scope>
66         </dependency>
67
68         <!-- 添加MySQL数据库驱动依赖包. -->
69         <dependency>
70             <groupId>mysql</groupId>
71             <artifactId>mysql-connector-java</artifactId>
72         </dependency>
73
74         <!-- 添加Spring-data-jpa依赖. -->
75         <dependency>
76             <groupId>org.springframework.boot</groupId>
77             <artifactId>spring-boot-starter-data-jpa</artifactId>
78         </dependency>
79
80
81     </dependencies>
82
83     <build>
84         <plugins>
85             <plugin>
86                 <groupId>org.springframework.boot</groupId>
87                 <artifactId>spring-boot-maven-plugin</artifactId>
88                 <configuration>
89                     <!--fork :  如果没有该项配置,肯呢个devtools不会起作用,即应用不会restart -->
90                     <fork>true</fork>
91                 </configuration>
92             </plugin>
93         </plugins>
94     </build>
95
96
97 </project>
2、建立数据库连接的application.properties
 1 #######################################################
 2 ##datasource -- 指定mysql数据库连接信息.
 3 #######################################################
 4 spring.datasource.url = jdbc:mysql://localhost:3306/test
 5 spring.datasource.username = root
 6 spring.datasource.password = 123456
 7 spring.datasource.driverClassName = com.mysql.jdbc.Driver
 8 spring.datasource.max-active=20
 9 spring.datasource.max-idle=8
10 spring.datasource.min-idle=8
11 spring.datasource.initial-size=10
12
13
14 ########################################################
15 ### Java Persistence Api --  Spring jpa的配置信息.
16 ########################################################
17 # Specify the DBMS
18 spring.jpa.database = MYSQL
19 # Show or not log for each sql query
20 spring.jpa.show-sql = true
21 # Hibernate ddl auto (create, create-drop, update)
22 spring.jpa.hibernate.ddl-auto = update
23 # Naming strategy
24 #[org.hibernate.cfg.ImprovedNamingStrategy  #org.hibernate.cfg.DefaultNamingStrategy]
25 spring.jpa.hibernate.naming-strategy = org.hibernate.cfg.ImprovedNamingStrategy
26 # stripped before adding them to the entity manager)
27 spring.jpa.properties.hibernate.dialect = org.hibernate.dialect.MySQL5Dialect
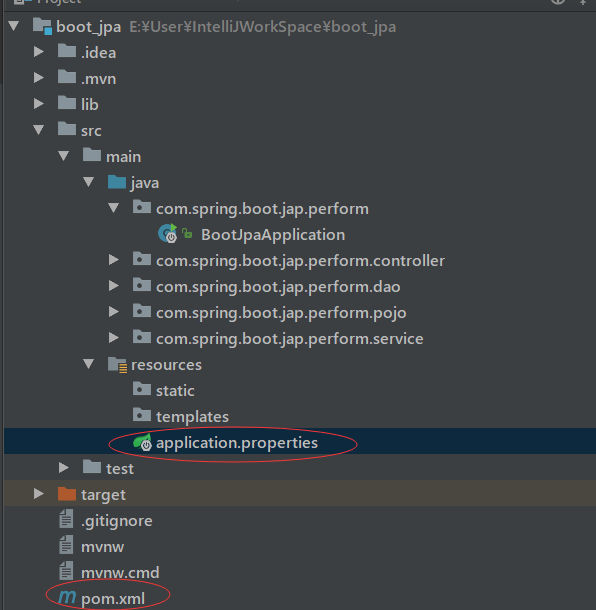
结构如图:
3、建立pojo实体类
 1 package com.spring.boot.jap.perform.pojo;
 2
 3 import javax.persistence.Entity;
 4 import javax.persistence.GeneratedValue;
 5 import javax.persistence.GenerationType;
 6 import javax.persistence.Id;
 7
 8 /**
 9  * Created by liuya on 2018-01-26.
10  */
11 @Entity
12 public class Cat {
13
14     /**
15      * 使用@Id指定主键.
16      * <p>
17      * 使用代码@GeneratedValue(strategy=GenerationType.AUTO)
18      * 指定主键的生成策略,mysql默认的是自增长。
19      */
20     @Id
21     @GeneratedValue(strategy = GenerationType.AUTO)
22     private int id;//主键.
23
24     private String catName;//姓名. cat_name
25
26     private int catAge;//年龄. cat_age;
27
28     public int getId() {
29         return id;
30     }
31
32     public void setId(int id) {
33         this.id = id;
34     }
35
36     public String getCatName() {
37         return catName;
38     }
39
40     public void setCatName(String catName) {
41         this.catName = catName;
42     }
43
44     public int getCatAge() {
45         return catAge;
46     }
47
48     public void setCatAge(int catAge) {
49         this.catAge = catAge;
50     }
51
52 }
4、通过实体类自动生成数据库表(前提建立数据库,名称为test)
 1 package com.spring.boot.jap.perform;
 2
 3 import com.alibaba.fastjson.serializer.SerializerFeature;
 4 import com.alibaba.fastjson.support.config.FastJsonConfig;
 5 import com.alibaba.fastjson.support.spring.FastJsonHttpMessageConverter;
 6 import org.springframework.boot.SpringApplication;
 7 import org.springframework.boot.autoconfigure.SpringBootApplication;
 8 import org.springframework.boot.autoconfigure.web.HttpMessageConverters;
 9 import org.springframework.context.annotation.Bean;
10 import org.springframework.context.annotation.ComponentScan;
11 import org.springframework.http.MediaType;
12 import org.springframework.http.converter.HttpMessageConverter;
13
14 import java.util.ArrayList;
15 import java.util.List;
16
17 @SpringBootApplication
18 //@ComponentScan(basePackages = {"com.spring.boot.service.*"})
19 public class BootJpaApplication {
20     public static void main(String[] args) {
21         SpringApplication.run(BootJpaApplication.class,args);
22     }
23
24     /**
25      * 在这里我们使用 @Bean注入 fastJsonHttpMessageConvert
26      *
27      * @return
28      */
29     @Bean
30     public HttpMessageConverters fastJsonHttpMessageConverters() {
31         // 1、需要先定义一个 convert 转换消息的对象;
32         FastJsonHttpMessageConverter fastConverter = new FastJsonHttpMessageConverter();
33
34         //2、添加fastJson 的配置信息,比如:是否要格式化返回的json数据;
35         FastJsonConfig fastJsonConfig = new FastJsonConfig();
36         fastJsonConfig.setSerializerFeatures(SerializerFeature.PrettyFormat);
37
38         //处理中文乱码
39         List<MediaType> fastMediaTypes = new ArrayList<>();
40         fastMediaTypes.add(MediaType.APPLICATION_JSON_UTF8);
41         fastConverter.setSupportedMediaTypes(fastMediaTypes);
42
43         //3、在convert中添加配置信息.
44         fastConverter.setFastJsonConfig(fastJsonConfig);
45
46
47         HttpMessageConverter<?> converter = fastConverter;
48         return new HttpMessageConverters(converter);
49     }
50 }
建立这个BootJpaApplication类中书写内容,然后run这个类,就会在数据库中产生cat的表
5、建立dao层
 1 package com.spring.boot.jap.perform.dao;
 2
 3 import com.spring.boot.jap.perform.pojo.Cat;
 4 import org.springframework.data.repository.CrudRepository;
 5
 6 /**
 7  * Created by liuya on 2018-01-27.
 8  */
 9 public interface CatDao  extends CrudRepository<Cat, Integer> {
10 }
6、建立service层
 1 package com.spring.boot.jap.perform.service;
 2
 3 import com.spring.boot.jap.perform.dao.CatDao;
 4 import com.spring.boot.jap.perform.pojo.Cat;
 5 import org.springframework.stereotype.Service;
 6
 7 import javax.annotation.Resource;
 8 import javax.transaction.Transactional;
 9
10 /**
11  * Created by liuya on 2018-01-27.
12  */
13
14
15 @Service
16 public class CatService {
17
18     @Resource
19     private CatDao catRepository;
20
21     /**
22      * save,update ,delete 方法需要绑定事务.
23      *
24      * 使用@Transactional进行事务的绑定.
25      *
26      * @param cat
27      */
28
29     //保存数据.
30     @Transactional
31     public void save(Cat cat){
32         catRepository.save(cat);
33     }
34
35     //删除数据》
36     @Transactional
37     public void delete(int id){
38         catRepository.delete(id);
39     }
40
41     //查询数据.
42     public Iterable<Cat> getAll(){
43         return catRepository.findAll();
44     }
45
46
47 }
7、建立controller层
 1 package com.spring.boot.jap.perform.controller;
 2
 3 import com.spring.boot.jap.perform.pojo.Cat;
 4 import com.spring.boot.jap.perform.service.CatService;
 5 import org.springframework.web.bind.annotation.RequestMapping;
 6 import org.springframework.web.bind.annotation.RestController;
 7
 8 import javax.annotation.Resource;
 9
10 /**
11  * Created by liuya on 2018-01-27.
12  */
13
14
15 @RestController
16 @RequestMapping("/cat")
17 public class CatController {
18
19     @Resource
20     private CatService catService;
21
22     @RequestMapping("/save")
23     public String save(){
24         Cat cat = new Cat();
25         cat.setCatName("jack");
26         cat.setCatAge(3);
27         catService.save(cat);
28         return "save ok.";
29     }
30
31     //每次需要更改delete删除的id值,否则会报错
32     @RequestMapping("/delete")
33     public String delete(){
34         catService.delete(2);
35         return "delete ok";
36     }
37
38     @RequestMapping("/getAll")
39     public Iterable<Cat> getAll(){
40         return catService.getAll();
41     }
42
43
44 }
8、测试代码是否成功,启动

9、浏览器访问,url:http://127.0.0.1:8080/cat/save 首先新建数据
http://127.0.0.1:8080/cat/delete 删除id为1的数据
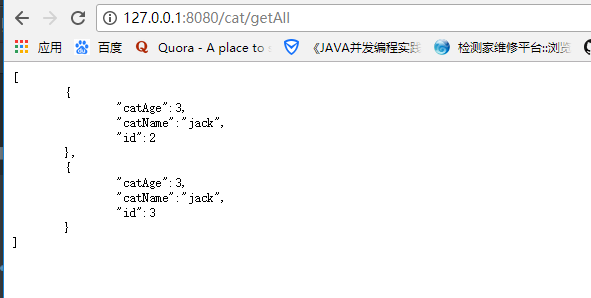
http://127.0.0.1:8080/cat/getAll 显示全部数据,如果按照上两步,就只有2和之后的数据存在