docker run -e ES_JAVA_OPTS="-Xms256m -Xmx256m" -d -p 9201:9200 -p 9301:9300 --name ES02 752be83a5396
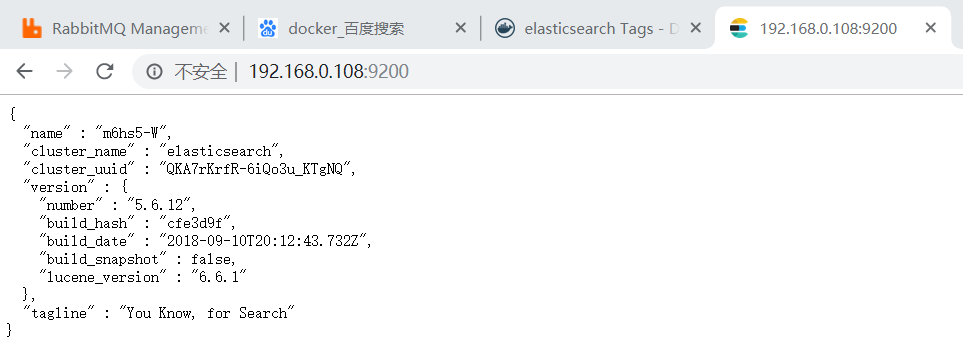
浏览器访问地址:
将 HTTP 命令由 PUT 改为 GET 可以用来检索文档,同样的,可以使用 DELETE 命令来删除文档,
以及使用 HEAD 指令来检查文档是否存在。如果想更新已存在的文档,只需再次 PUT 。
/**
* SpringBoot默认支持两种技术来和ES交互;
* 1、Jest(默认不生效)
* 需要导入jest的工具包(io.searchbox.client.JestClient)
* 2、SpringData ElasticSearch【ES版本有可能不合适】
* 版本适配说明:https://github.com/spring-projects/spring-data-elasticsearch
* 如果版本不适配:2.4.6
* 1)、升级SpringBoot版本
* 2)、安装对应版本的ES
*
* 1)、Client 节点信息clusterNodes;clusterName
* 2)、ElasticsearchTemplate 操作es
* 3)、编写一个 ElasticsearchRepository 的子接口来操作ES;
* 两种用法:https://github.com/spring-projects/spring-data-elasticsearch
* 1)、编写一个 ElasticsearchRepository
*/
bean:
public class Article {

    @JestId
    private Integer id;
    private String author;
    private String title;
    private String content;
}
application.properties
spring.elasticsearch.jest.uris=http://192.168.0.106:9200

spring.data.elasticsearch.cluster-name=elasticsearch
spring.data.elasticsearch.cluster-nodes=192.168.0.106:9301
测试类:
@RunWith(SpringRunner.class)
@SpringBootTest
public class SpringbootElasticsearchApplicationTests {
   @Autowired
   JestClient jestClient;

   @Test
   public void contextLoads() {
      //1、给Es中索引(保存)一个文档;
      Article article = new Article();
      article.setId(1);
      article.setTitle("好消息");
      article.setAuthor("zhangsan");
      article.setContent("Hello World");
      //构建一个索引功能
      Index index = new Index.Builder(article).index("hourui").type("news").build();
      try {
         jestClient.execute(index);
      } catch (IOException e) {
         e.printStackTrace();
      }

   }

访问结果如下:

   //测试搜索
   @Test
   public void search(){

      //查询表达式
      String json ="{
" +
            "    "query" : {
" +
            "        "match" : {
" +
            "            "content" : "hello"
" +
            "        }
" +
            "    }
" +
            "}";

      //更多操作:https://github.com/searchbox-io/Jest/tree/master/jest
      //构建搜索功能
      Search search = new Search.Builder(json).addIndex("hourui").addType("news").build();

      //执行
      try {
         SearchResult result = jestClient.execute(search);
         System.out.println(result.getJsonString());
      } catch (IOException e) {
         e.printStackTrace();
      }
   }

}
搜索结果执行如下:
