SVG的视窗,视野和全局(世界)
SVG全局(世界)是无穷大的(SVG的全局并不局限于html的范围);
例:
    <svg width="100%" height="100%" style="border: solid 1px red;">
        <circle cx="100" cy="100" fill="green" r="200" />
    </svg>
上述代码绘制了一个半径为200px的圆,圆心坐标为100 * 100,SVG标签(视窗)占满整个浏览器。但从下图中可以看到圆形还是有一部分在屏幕之外,所以SVG的全局(世界)是无穷大且不受任何元素的影响。

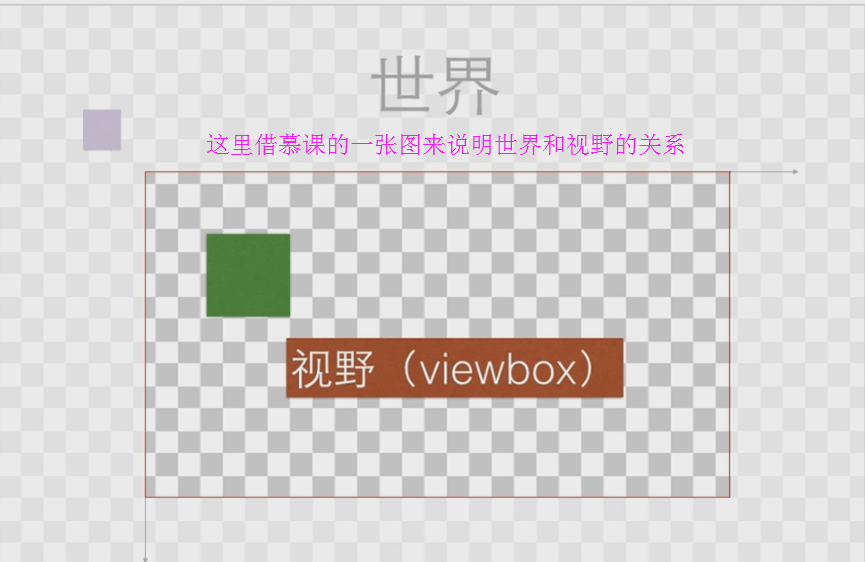
SVG的视野(viewbox)是观察全局(世界)的一个矩形区域,可定义。
例:
    <svg width="500px" height="400px" viewbox="-15 -20 80 80" style="border: solid 1px red;display: block;margin-left:200px;">
        <circle cx="0" cy="0" fill="green" r="20" />
    </svg>

通过viewbox属性来调整SVG视野;
viewbox=" x y width height " x:左上角横坐标,y:左上角纵坐标,宽度,height:高度;
viewbox的参数可以自己动手做几个demo体会这些参数的作用;
SVG标签的 width height可自定义大小,这就是SVG的视窗。SVG视窗可以理解为在页面中定义一片区域用来渲染SVG元素。
例:
    <svg width="500px" height="400px" style="border: solid 1px red;display: block;margin-left:200px;">
        <circle cx="100" cy="100" fill="green" r="200" />
    </svg>

同样还是刚才那个圆,现在将SVG标签的左边距调整200像素。发现圆心相对于SVG视窗的位置没变,但相对于屏幕左上角的位置变了。所以说SVG视窗是页面中用来渲染SVG元素的。
小结:SVG全局(世界)可以理解为景,SVG视野可以理解为相片视野,SVG视窗可以理解为相片本身。
SVG分组——g标签
g标签在svg标签内使用,功能用来对图形,文字,线段进行分组。
分组可以对一组SVG元素统一调整 填充色,笔触色,坐标等属性。
g标签下所有子标签都将继承g标签的属性;
g标签可嵌套使用;
可通过定义transform属性改变坐标;
HTML代码
    <svg class="svg">
        <g class="g_1">
            <rect x="20" y="20"/><rect x="240" y="20" />
        </g>
        <g class="g_2">
            <circle cx="100" cy="200" /><circle cx="220" cy="200" />
        </g>
    </svg>
CSS代码
.g_1{
    stroke:rgb(0,0,0);
    stroke-width:2px;
    fill:rgb(0,255,255);
}
rect{ width:200px; height:100px; }
.g_2{
    stroke:rgb(220,17,20);
    stroke-width:2px;
    fill:rgb(255,255,255);
}
circle{ r:50px; }
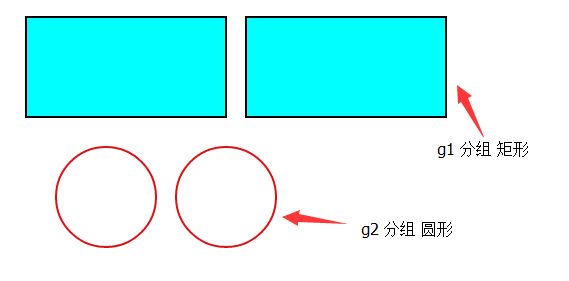
g标签可以对一组图形,文字或线段的笔触色,填充色,笔触宽度进行统一定义
SVG超链接——图形,线段也能链接
HTML代码
    <svg class="svg">
        <a xlink:href="http://www.baidu.com" target="_blank">
            <circle class="circle" />
        </a>
    </svg>
CSS代码
.circle{ cx:100px;cy:100px;fill:rgb(0,0,255);stroke-width:6;stroke:rgb(0,255,0);r:80px; }
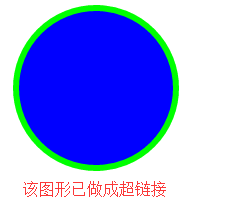
svg标签中可加入a标签,但href属性前必须加上xlink,svg是xhtml元素超链接必须加上xlink。
同理,svg中的a标签可以包含任何svg元素。
SVG的stroke属性(SVG的画笔)
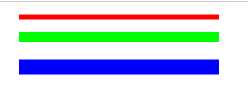
stroke : 定义笔触颜色;
stroke-width : 定义笔触宽度;
stroke-linecap : 定义线段两端样式;
stroke-dasharray : 定义虚线样式;
HTML代码
    <svg class="svg">
        <g fill="none">
            <line stroke="rgb(255,0,0)" stroke-width="5" x1="2" y1="5" x2="202" y2="5"/>
            <line stroke="rgb(0,255,0)" stroke-width="10" x1="2" y1="25" x2="202" y2="25"/>
            <line stroke="rgb(0,0,255)" stroke-width="15" x1="2" y1="55" x2="202" y2="55"/>
        </g>
    </svg>
HTML代码
    <svg class="svg">
        <g fill="none" stroke="rgb(0,255,221)" stroke-width="50">
            <line stroke-linecap="butt" x1="50" y1="50" x2="552" y2="50"/>
            <line stroke-linecap="round" x1="50" y1="150" x2="552" y2="150"/>
            <line stroke-linecap="square" x1="50" y1="250" x2="552" y2="250"/>
        </g>
    </svg>

HTML代码
    <svg class="svg">
        <g fill="none" stroke="rgb(0,255,221)" stroke-width="10">
            <line stroke-dasharray="2,2" x1="50" y1="50" x2="552" y2="50"/>
            <line stroke-dasharray="20,20" x1="50" y1="150" x2="552" y2="150"/>
            <line stroke-dasharray="20,10,30,10,20,30" x1="50" y1="250" x2="552" y2="250"/>
            <line stroke-dasharray="5,20,10,20,15,20,20,20,25,20,30,20,35" x1="50" y1="350" x2="552" y2="350"/>
        </g>
    </svg>
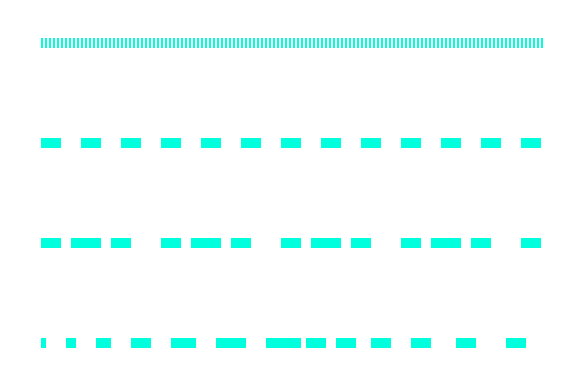
stroke-dasharray定义虚线方式,建议值为规律性数列。
Docker 在Windows上的安装
Docker Zero Deployment and Secrets (二)
Docker Zero Deployment and Secrets (一)
系统基础信息模块psutil之获取系统性能篇
IPython的安装方法
用三种方法设置CentOS7使用代理服务器上网
CentOS7修改pypi源
CentOS7升级Python3
CPU频率的简单测试工具