1.config服务端配置
1.1 引入依赖
        <dependency>
            <groupId>org.springframework.boot</groupId>
            <artifactId>spring-boot-starter-web</artifactId>
        </dependency>
        <dependency>
            <groupId>org.springframework.cloud</groupId>
            <artifactId>spring-cloud-starter-zookeeper-discovery</artifactId>
            <exclusions>
                <exclusion>
                    <groupId>commons-logging</groupId>
                    <artifactId>commons-logging</artifactId>
                </exclusion>
            </exclusions>
        </dependency>
1.2 配置项application.yml
spring:
  cloud:
    zookeeper:
      connect-string: 192.168.220.128:2181
    config:
      server:
        git:
          uri: https://gitee.com/lm970585581/cloud-config
          username: lm970585581
          password: *****   #密码
1.3 启动类配置
@EnableConfigServer 启用服务配置
测试说明:
/{label}/{name}-{profiles}.yml
/{name}-{profiles}.yml
name git的文件名称不包括后缀
profiles 环境
label 分支(branch)
2、客户配置:provider应用
2.1 引入依赖
        <dependency>
            <groupId>org.springframework.cloud</groupId>
            <artifactId>spring-cloud-config-client</artifactId>
        </dependency>
2.2 配置项bootstrap.yml
spring:
  cloud:
    zookeeper:
      connect-string: 192.168.220.128:2181
    config:
      discovery:
        enabled: true
        service-id: config #配置服务项目名
      profile: dev
  application:
    name: provider
Spring Cloud Bus 手动实现刷配置(不重启项目情况下)
1.安装RabbitMQ
详见:https://www.cnblogs.com/lm970585581/p/9873391.html
2.配置端引入依赖
        <!--加入spring cloud bus + rabbitmq-->
        <dependency>
            <groupId>org.springframework.cloud</groupId>
            <artifactId>spring-cloud-starter-bus-amqp</artifactId>
        </dependency>
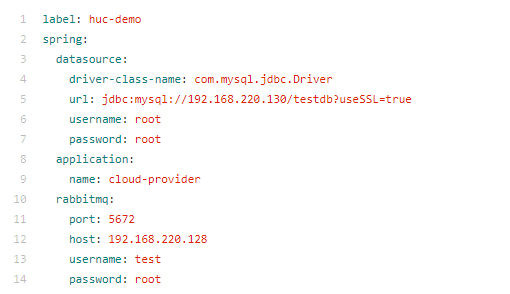
3.配置端配置application.yml
spring:
    rabbitmq:
        port: 5672
        host: 192.168.220.128
        username: test
        password: root
management:
  endpoints:
    web:
      exposure:
        include: '*'  # 开启所有配置url
4.在controller上启用读取刷新数据注解@RefreshScope
此时,当git上的配置修改后,配置应用的内容会同步修改
客户端应用的配置需要手动使用Post方式刷新,即可同步修改,无需重启服务,格式如下:地址是配置应用的地址
http://localhost:8080/actuator/bus-refresh
Spring Cloud Bus 实现自动刷配置(不重启项目情况下)+WebHooks
加入依赖
        <!--添加支持gitlab,github,gitee webhooks依赖-->
        <dependency>
            <groupId>org.springframework.cloud</groupId>
            <artifactId>spring-cloud-config-monitor</artifactId>
        </dependency>
想办法把自己机器变为服务器,可以使用netaap
在gitee里面配置webhook
通过/monitor 接口回调目标服务对应的服务
注意:自动刷新方式有BUG存在,可能会失败,等官方修复吧!
具体实例详见:https://gitee.com/lm970585581/cloud-config
码云上的配置信息