在Linux下使用Bochs参考:
http://wangcong.org/articles/bochs.html
http://kinglaw05.blog.163.com/blog/static/59683314200911205510345/
首先,安装libgtk2.0-dev,build-essential库
1: sudo apt-get install libgtk2.0-dev build-essential
然后下载最新的bochs源码,解压
1: sudo wget http://bochs.sourceforge.net/svn-snapshot/bochs-20140211.tar.gz
2: sudo gzip -d bochs-20140211.tar.gz
3: sudo tar -xvf bochs-20140211.tar
4: cd bobochs-20140211
配置
将.conf.linux修改成下面模样:
1: #!/bin/sh
2: #
3: # .conf.linux
4: #
5:
6: #which_config=normal
7: which_config=plugins
8:
9: CC="gcc"
10: CXX="c++"
11: CFLAGS="-Wall -O3 -fomit-frame-pointer -pipe" # for speed
12: #CFLAGS="-Wall -g -pipe" # for development
13: CXXFLAGS="$CFLAGS"
14:
15: export CC
16: export CXX
17: export CFLAGS
18: export CXXFLAGS
19:
20:
21: case $which_config in
22:
23: normal)
24:
25: #######################################################################
26: # configuration 1 for release binary RPMs
27: # Include a few standard options, speed optimizations, X11 only.
28: #######################################################################
29: ./configure --enable-sb16
30: --enable-ne2000
31: --enable-all-optimizations
32: --enable-cpu-level=6
33: --enable-x86-64
34: --enable-vmx=2
35: --enable-pci
36: --enable-clgd54xx
37: --enable-voodoo
38: --enable-usb
39: --enable-usb-ohci
40: --enable-es1370
41: --enable-e1000
42: --enable-show-ips
43: --enable-debugger
44: --enable-disasm
45: ${CONFIGURE_ARGS}
46: ;;
47:
48: plugins)
49: #######################################################################
50: # configuration 2 for release binary RPMs
51: # Include plugins, every possible gui.
52: #######################################################################
53: ./configure --enable-sb16
54: --enable-ne2000
55: --enable-all-optimizations
56: --enable-cpu-level=6
57: --enable-x86-64
58: --enable-vmx=2
59: --enable-pci
60: --enable-clgd54xx
61: --enable-voodoo
62: --enable-usb
63: --enable-usb-ohci
64: --enable-usb-xhci
65: --enable-es1370
66: --enable-e1000
67: --enable-plugins
68: --enable-show-ips
69: --with-all-libs
70: --enable-debugger
71: --enable-disasm
72: ${CONFIGURE_ARGS}
73: ;;
74:
75: esac
修改完后,执行sudo bash .conf.linux脚本进行配置
安装
1: sudo make
2: sudo make install
到http://bochs.sourceforge.net/diskimages.html,下载一个已经配置好的img.
1: sudo wget http://bochs.sourceforge.net/guestos/dlxlinux4.tar.gz
2: sudo gzip -d dlxlinux4.tar.gz
3: sudo tar -xvf dlxlinux4.tar
4: cd dlxlinux4
5: bochs -q -f bochsrc.txt
就进入了调试状态
1: daniel@ubuntu:~/linux-3.0/bochs/dlxlinux$ bochs -q -f dlxlinux.bxrc
2: ========================================================================
3: Bochs x86 Emulator 2.6.2.svn
4: Built from SVN snapshot after release 2.6.2
5: Compiled on Feb 14 2014 at 01:21:35
6: ========================================================================
7: 00000000000i[ ] LTDL_LIBRARY_PATH not set. using compile time default '/usr/local/lib/bochs/plugins'
8: 00000000000i[ ] BXSHARE not set. using compile time default '/usr/local/share/bochs'
9: 00000000000i[ ] lt_dlhandle is 0xa956340
10: 00000000000i[PLUGIN] loaded plugin libbx_unmapped.so
11: 00000000000i[ ] lt_dlhandle is 0xa9569d0
12: 00000000000i[PLUGIN] loaded plugin libbx_biosdev.so
13: 00000000000i[ ] lt_dlhandle is 0xa956fb0
14: 00000000000i[PLUGIN] loaded plugin libbx_speaker.so
15: 00000000000i[ ] lt_dlhandle is 0xa9577d8
16: 00000000000i[PLUGIN] loaded plugin libbx_extfpuirq.so
17: 00000000000i[ ] lt_dlhandle is 0xa957d28
18: 00000000000i[PLUGIN] loaded plugin libbx_parallel.so
19: 00000000000i[ ] lt_dlhandle is 0xa959160
20: 00000000000i[PLUGIN] loaded plugin libbx_serial.so
21: 00000000000i[ ] lt_dlhandle is 0xa95c400
22: 00000000000i[PLUGIN] loaded plugin libbx_gameport.so
23: 00000000000i[ ] lt_dlhandle is 0xa95c9b8
24: 00000000000i[PLUGIN] loaded plugin libbx_iodebug.so
25: 00000000000i[ ] reading configuration from dlxlinux.bxrc
26: 00000000000i[ ] lt_dlhandle is 0xa95cf28
27: 00000000000i[PLUGIN] loaded plugin libbx_x.so
28: 00000000000i[ ] installing x module as the Bochs GUI
29: 00000000000i[ ] using log file bochsout.txt
30: Next at t=0
31: (0) [0x0000fffffff0] f000:fff0 (unk. ctxt): jmpf 0xf000:e05b ; ea5be000f0
32: <bochs:1> ^C
按下Ctrl+Z可以退出调试程序
dlxlinux内核有一个缺点,就是内核太老了,是1.3版本。
在Bochs img列表中,还有一项
Linux kernel image for x86-64 from Andi Kleen at SuSE, which can be used as a boot floppy. Here is the System.map file for it, which can be useful for debugging.
这里只提供了一个linux内核映像,是bzImage格式,作为floppy挂载可以启动内核,但是提示找不到根文件系统。因此,我们需要自己搞定根文件系统。
不想从头做一个根文件系统,就可以将dlxlinux的拷贝过来用。
怎样将root.img挂载到当前的目录中?
因为root.img里面包含着MBR以及第一个分区,而且第一个分区并不是紧跟在MBR后面,怎么能够知道第一个分区的位置呢?
可以查看MBR中的分区表记录
1: dlxlinux $ hd root.img -s 446 | head
2: 000001be 00 01 01 00 83 03 51 31
11 00 00 00 37 51 00 00
|......Q1....7Q..|
3: 000001ce 00 00 00 00 00 00 00 00 00 00 00 00 00 00 00 00 |................|
4: *
5: 000001fe 55 aa 00 00 00 00 00 00 00 00 00 00 00 00 00 00 |U...............|
6: 0000020e 00 00 00 00 00 00 00 00 00 00 00 00 00 00 00 00 |................|
7: *
8: 000025fe 00 00 30 0a 00 00 9b 28 00 00 07 02 00 00 a6 1c |..0....(........|
9: 0000260e 00 00 b1 07 00 00 01 00 00 00 00 00 00 00 00 00 |................|
10: 0000261e 00 00 00 20 00 00 00 20 00 00 18 05 00 00 b4 7a |... ... .......z|
11: 0000262e ff 52 79 17 ff 52 1e 00 14 00 53 ef 00 00 01 00 |.Ry..R....S.....|
红色部分分别代表第一个分区的起始扇区号为0x00000011,扇区个数为0x00005137。
因此, 我们可以用下面命令将root.img挂载起来。
1: sudo mkdir root
2: sudo mount -o loop,offset=8704 root.img ./root
其中,8704=0x11 * 0x200
自己创建一个img,并且将一个文件系统塞进去,并且制作分区表。
http://archive09.linux.com/forums/topic/1519
http://thestarman.pcministry.com/asm/mbr/PartTables.htm
http://aneeska.com/2011/04/07/how-to-create-a-partition-in-an-image-file/
1: losetup /dev/loop0 root.img
2: mkfs.ext3 /dev/loop0
3: mount /dev/loop0 ./root
4: # copy files to ./root
5: umount ./root
6: losetup -d /dev/loop0
给img扩容
1: sudo dd if=/dev/zero of=bigroot.img bs=1024 seek=10404 count=5120
1: fdisk -u bigroot.img -c=dos
打造一个自己的根文件系统,使用指定的Linux内核文件,再加上Grub用于启动。
参考:http://blog.csdn.net/deansrk/article/details/6661293
http://blog.chinaunix.net/uid-26207112-id-3332621.html
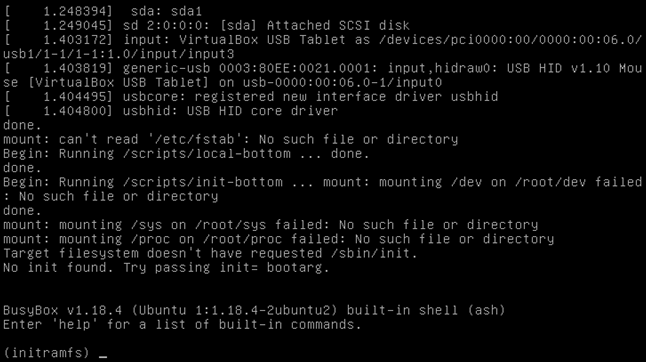
但是无法进入
将linux.vdi文件作成linux.img文件,用Bochs进行调试,并且参考System.map中给出的线性地址进行断点设置,发现有执行到/sbin/init初始化任务
1: do_execve
2: do_execve_common
3: open_execve
4: do_filp_open
5: path_openat
返回了-1(#define EPERM 1 /* Operation not permitted */)
即操作不允许错误。
1: static struct file *path_openat(int dfd, const char *pathname,
2: struct nameidata *nd, const struct open_flags *op, int flags)
3: {
4:
5: current->total_link_count = 0;
6: error = link_path_walk(pathname, nd);
7: if (unlikely(error))
8: goto out_filp;
9:
10: }
