作者:Panda Fang
出处:http://www.cnblogs.com/lonkiss/p/6895617.html
原创文章,转载请注明作者和出处,未经允许不可用于商业营利活动
官方网站 http://www.mybatis.org/mybatis-3/zh/index.html , 汉化做的不错
首先安装 mysql ,不详述,前面写过
创建一个数据库, 命名为 mybatis
CREATE DATABASE IF NOT EXISTS `mybatis` DEFAULT CHARACTER SET utf8;
创建一个学生表
CREATE TABLE IF NOT EXISTS `t_student` (
  `id` int(11) NOT NULL AUTO_INCREMENT,
  `name` varchar(20) NOT NULL,
  `age` int(11) DEFAULT NULL,
  PRIMARY KEY (`id`)
) ENGINE=InnoDB DEFAULT CHARSET=utf8;
插入一条记录
INSERT INTO `t_student` (`id`, `name`, `age`) VALUES(1, '张三', 10);
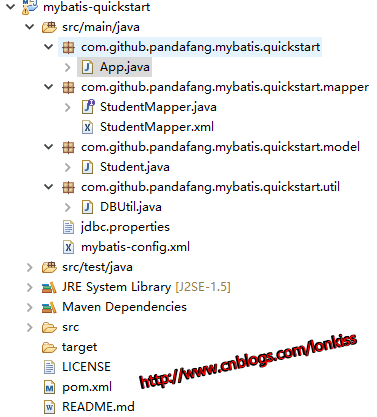
eclipse 中创建 maven project , archetype 选择 quickstart
最终结构预览
pom 中加入 依赖
<dependency>
    <groupId>org.mybatis</groupId>
    <artifactId>mybatis</artifactId>
    <version>3.2.8</version>
</dependency>
再加上 mysql jdbc 依赖
<dependency>
    <groupId>mysql</groupId>
    <artifactId>mysql-connector-java</artifactId>
    <version>5.1.42</version>
</dependency>
在src/main/java 目录中创建两个文件, jdbc.properties 和 mybatis-config.xml
jdbc.properties 内容
jdbc.driver=com.mysql.jdbc.Driver
jdbc.url=jdbc:mysql://localhost:3306/mybatis
jdbc.username=root
jdbc.password=123456
mybatis-config.xml 文件内容
<?xml version="1.0" encoding="UTF-8" ?>
<!DOCTYPE configuration
  PUBLIC "-//mybatis.org//DTD Config 3.0//EN"
  "http://mybatis.org/dtd/mybatis-3-config.dtd">
<configuration>
  <properties resource="jdbc.properties" />

  <environments default="development">
    <environment id="development">
      <transactionManager type="JDBC"/>
      <dataSource type="POOLED">
        <property name="driver" value="${jdbc.driver}"/>
        <property name="url" value="${jdbc.url}"/>
        <property name="username" value="${jdbc.username}"/>
        <property name="password" value="${jdbc.password}"/>
      </dataSource>
    </environment>
  </environments>
</configuration>
mybatis-config.xml 内容这么长, 哪里来, 可以直接复制官方文件 入门教程 中模板。 但是要稍作修改,比如指定 properties文件 通过 <properties resource="jdbc.properties" /> 放在 environments 内容之前
下面的value 名称引用的变量名也要改成 jdbc.properties 文件中的 key 名称, 又或者 jdbc.properties 中的key名称与官方教程中的名称一致则可以不用改
建一个util子包, 建一个DBUtil类
package com.github.pandafang.mybatis.quickstart.util;

import java.io.IOException;
import java.io.InputStream;

import org.apache.ibatis.io.Resources;
import org.apache.ibatis.session.SqlSession;
import org.apache.ibatis.session.SqlSessionFactory;
import org.apache.ibatis.session.SqlSessionFactoryBuilder;

public class DBUtil {

    private static SqlSessionFactory sqlSessionFactory;

    public static SqlSessionFactory getSqlSessionFactory()  {

        if (sqlSessionFactory == null ) {
            String resource = "mybatis-config.xml";
            InputStream inputStream = null;
            try {
                inputStream = Resources.getResourceAsStream(resource);
                sqlSessionFactory = new SqlSessionFactoryBuilder().build(inputStream);
            } catch (IOException e) {
                throw new RuntimeException(e.getMessage(), e);
            }
        }
        return sqlSessionFactory;
    }

    public static SqlSession openSqlSession() {
        return getSqlSessionFactory().openSession();
    }
}
注意 String resource = "mybatis-config.xml"; 如果mybatis-config.xml文件不是在 源代码的根目录下,而是在某个包下,则要写成 "org/mybatis/example/mybatis-config.xml" 这种形式。所谓源代码根目录,如果是个常见结构的项目,就是指在src目录下, 如果是maven约定结构的,就是在 src/main/java目录下 。
SqlSessionFactory和SqlSession是mybatis中操作数据库 的核心。
建一个model子包, 建一个 Student 类
package com.github.pandafang.mybatis.quickstart.model;

public class Student {

    private Integer id;
    private Integer age;
    private String name;

    public Student(String name, Integer age) {
        this.name = name;
        this.age = age;
    }

    public Integer getId() {
        return id;
    }

    public void setId(Integer id) {
        this.id = id;
    }

    public Integer getAge() {
        return age;
    }

    public void setAge(Integer age) {
        this.age = age;
    }

    public String getName() {
        return name;
    }

    public void setName(String name) {
        this.name = name;
    }

}
代码写好之后,在 mybatis-config.xml 中 增加 typeAlias , 注意位置 要在 properties之后 environments 之前
<configuration>

  <properties resource="jdbc.properties" />

    <typeAliases>
      <typeAlias alias="Student" type="com.github.pandafang.mybatis.quickstart.model.Student"/>
    </typeAliases>

  <environments default="development">

…………………………
其它内容
…………………………

</configuration>
建一个mapper子包, 建一个StudentMapper interface
package com.github.pandafang.mybatis.quickstart.mapper;

import com.github.pandafang.mybatis.quickstart.model.Student;

public interface StudentMapper {

    public int add(Student student);

}
再在同位置建一个StudentMapper.xml
<?xml version="1.0" encoding="UTF-8" ?>
<!DOCTYPE mapper
  PUBLIC "-//mybatis.org//DTD Mapper 3.0//EN"
  "http://mybatis.org/dtd/mybatis-3-mapper.dtd">
<mapper namespace="com.github.pandafang.mybatis.quickstart.mapper.StudentMapper">
  <insert id="add" parameterType="Student">
    INSERT INTO t_student(name, age) VALUES(#{name}, #{age})
  </insert>
</mapper>
namespace 就是 mapper的含包名的完整限定名, <insert> 就是插入操作,其他还有 select update delete 等等(官方文档:mybatis – MyBatis 3 | Mapper XML 文件), id 就是StudentMapp中定义的方法名, parameterType 就是这个方法的参数类型,此处Student, 就是mybatis-config.xml 中的 typeAlias 定义的alias, 如果没有定义 typeAlias ,这个parameterType 后面也要使用Student的含包名的完整限定名。mybatis是半自动的orm框架, 这里还是要写SQL , #{name} 这种形式就是取 Student类中的属性
准备工作做完, 开始真正通过mybatis操作数据库了。
maven project自带了一个App 类, 如果没有可以自己建一个,在main方法里面执行数据库增加记录的操作 ,代码如下
package com.github.pandafang.mybatis.quickstart;

import org.apache.ibatis.session.SqlSession;

import com.github.pandafang.mybatis.quickstart.mapper.StudentMapper;
import com.github.pandafang.mybatis.quickstart.model.Student;
import com.github.pandafang.mybatis.quickstart.util.DBUtil;

public class App
{
    public static void main( String[] args )
    {
        SqlSession ss = DBUtil.openSqlSession();
        try {

            Student student = new Student("李四", 22);
            StudentMapper studentMapper = ss.getMapper(StudentMapper.class);
            int result = studentMapper.add(student);
            ss.commit();
            if (result > 0) {
                System.out.println("增加成功, result:" + result);
            }
            else {
                System.out.println("增加失败");
            }

        }
        finally {
            ss.close();
        }

    }
}
所以步骤就是
- 通过 SqlSessionFactory 打开 SqlSession
- 通过 SqlSession 获得 Mapper
- 通过 Mapper 操作数据库
- SqlSession commit
- SqlSession close
至此 一个完整可运行的demo完成
代码在线阅读: https://coding.net/u/pandafang/p/mybatis-quickstart/git/tree/v1.0
前面已经做了 增,继续完成改、查、删。
修改 StudentMapper.xml, 内容变成下面这样
<?xml version="1.0" encoding="UTF-8" ?>
<!DOCTYPE mapper
  PUBLIC "-//mybatis.org//DTD Mapper 3.0//EN"
  "http://mybatis.org/dtd/mybatis-3-mapper.dtd">
<mapper namespace="com.github.pandafang.mybatis.quickstart.mapper.StudentMapper">

<resultMap type="Student" id="StudentResult">
    <id property="id" column="id"/>
    <result property="name" column="name"/>
    <result property="age" column="age"/>
</resultMap>

  <insert id="add" parameterType="Student">
    INSERT INTO t_student(name, age) VALUES(#{name}, #{age})
  </insert>
  <update id="update" parameterType="Student">
      UPDATE t_student SET name=#{name}, age=#{age} WHERE id=#{id}
  </update>
  <select id="findById" parameterType="Integer" resultType="Student">
      SELECT * FROM t_student WHERE id=#{id}
  </select>
  <select id="findAll" resultMap="StudentResult">
      SELECT * FROM t_student
  </select>
  <delete id="delete" parameterType="Integer">
      DELETE FROM t_student WHERE id=#{id}
  </delete>
</mapper>
修改 App.java 文件 内容变成下面这样
package com.github.pandafang.mybatis.quickstart;

import java.util.List;

import org.apache.ibatis.session.SqlSession;

import com.github.pandafang.mybatis.quickstart.mapper.StudentMapper;
import com.github.pandafang.mybatis.quickstart.model.Student;
import com.github.pandafang.mybatis.quickstart.util.DBUtil;

public class App
{
    public static void main( String[] args )
    {
        SqlSession ss = DBUtil.openSqlSession();
        try {

            Student student = new Student("李四", 22);
            StudentMapper studentMapper = ss.getMapper(StudentMapper.class);
            int result = studentMapper.add(student);
            ss.commit();
            if (result > 0) {
                System.out.println("增加成功, result:" + result);
            }
            else {
                System.out.println("增加失败");
            }

            Student student2 = new Student("王五", 23);
            student2.setId(2);
            studentMapper.update(student2);
            ss.commit();

            Student student3 = studentMapper.findById(2);
            if (student3 != null) {
                System.out.println("查到 student id=" + student3.getId() + " name=" + student3.getName() + " age=" + student3.getAge());
            }
            else {
                System.out.println("没有查到id 为2的 student");
            }

            System.out.println("------ 查询所有的Student -------");
            List<Student> students = studentMapper.findAll();

            for (Student stu : students) {
                System.out.println("查到 student id=" + stu.getId() + " name=" + stu.getName() + " age=" + stu.getAge());
            }

            studentMapper.delete(student3);
            ss.commit();

        }
        finally {
            ss.close();
        }

    }
}
运行App ,然而在执行 findById时 报错:
Error instantiating class …… with invalid types () or values (). Cause: java.lang.NoSuchMethodException:……<init>()
遇到这个错误,是因为前面写有参构造函数, 无参构造函数没了, 要为 Student 类显示写出无参数构造函数。
再次运行 App 就ok了。
至此,使用mybatis + mysql 增删改查就实现了。
代码在线阅读:https://coding.net/u/pandafang/p/mybatis-quickstart/git/tree/v1.1
延伸
之前add返回的整数是插入的行数, 并不是id , 那插入后如何获取自增的 id 呢,
修改 StudentMapper.xml , 在insert 上加入 useGeneratedKeys="true" keyProperty="id"
  <insert id="add" parameterType="Student" useGeneratedKeys="true" keyProperty="id">
    INSERT INTO t_student(name, age) VALUES(#{name}, #{age})
  </insert>
加了上面两个属性后, 插入后 数据库自增的主键id 会自动填充到作为参数的对象中
然后代码就是下面这样
Student student = new Student("李四", 22);
StudentMapper studentMapper = ss.getMapper(StudentMapper.class);
int result = studentMapper.add(student);
ss.commit();
Integer id = student.getId();
if (id != null) {
    System.out.println("插入成功 id=" + id);
}
参考资料 : http://www.cnblogs.com/fsjohnhuang/p/4078659.html
至此版本的代码在线阅读: https://coding.net/u/pandafang/p/mybatis-quickstart/git/tree/v1.2
历史版本代码下载:https://coding.net/u/pandafang/p/mybatis-quickstart/git/tags
这篇文章的测试代码都卸载main 方法中,为了不引入过多的外部知识提高难度。 实际开发应该用junit