上次回说了@SpringBootApplication里的scanBasePackages里来实现不同级别包的加载问题,而这次主要说一下ImportSelector来实现加载不同包的方法,事实上,在springboot里,所有的Enable开头的组件也是使用的这种方式来实现的。
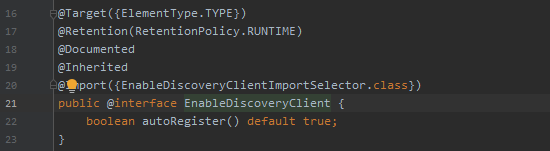
nacos组件里的体现
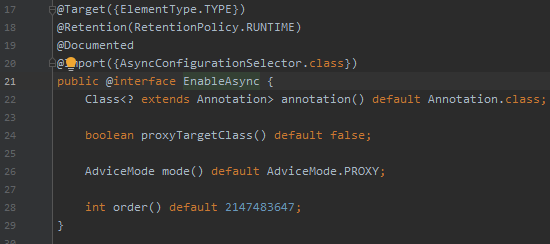
异步组件里的体现
@SpringBootApplication注解里也实现了@ComponentScan,所以scanBasePackages其实就是@ComponentScan里的basePackages参数
ImportSelector实现不同包的加载
首先,定义一个需要的bean对象,比如一个monodb的配置对象
@Configuration
public class MongodbConfig {
    public void print() {
        System.out.println("hello mongodb!");
    }
}
之后,对这个对象进行一个ImportSelector接口的实现
public class MongodbSelector implements ImportSelector {
    public String[] selectImports(AnnotationMetadata annotationMetadata) {
        return new String[]{MongodbConfig.class.getName()};
    }
}
最后,按着springboot一惯的作用,添加呈个Enable的注解,以向外界开启它
/**
 * 自定义注释,引用不同包里的配置默认项.
 */
@Retention(RetentionPolicy.RUNTIME)
@Documented
@Target(ElementType.TYPE)
@Import(MongodbSelector.class)
public @interface EnableMongodb {
}
然后在对象的项目main方法的入口类上,开高这个注解
@SpringBootApplication(scanBasePackages = {"com.lind.nacosdemo", "com.lind.redis"})
@EnableDiscoveryClient
@EnableMongodb
public class NacosDemoApplication {
    public static void main(String[] args) {
        SpringApplication.run(NacosDemoApplication.class, args);
    }
}
最后测试的结果如下,我们之前的redis和现在的mongodb都被打印出来了。

最后,再总结一下,一般我们在开发自定义的start包时,都使用了ImportSelector类。