Spring MVC 注解开发
所需pom依赖:
 <dependency>
      <groupId>org.springframework</groupId>
      <artifactId>spring-webmvc</artifactId>
      <version>5.2.0.RELEASE</version>
    </dependency>

    <dependency>
      <groupId>javax.servlet</groupId>
      <artifactId>servlet-api</artifactId>
      <version>2.5</version>
    </dependency>
    <dependency>
      <groupId>javax.servlet.jsp</groupId>
      <artifactId>jsp-api</artifactId>
      <version>2.2</version>
    </dependency>
    <dependency>
      <groupId>javax.servlet</groupId>
      <artifactId>jstl</artifactId>
      <version>1.2</version>
    </dependency>
第一步配置 web.xml:
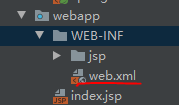
<?xml version="1.0" encoding="UTF-8"?>
<web-app xmlns="http://xmlns.jcp.org/xml/ns/javaee"
         xmlns:xsi="http://www.w3.org/2001/XMLSchema-instance"
         xsi:schemaLocation="http://xmlns.jcp.org/xml/ns/javaee http://xmlns.jcp.org/xml/ns/javaee/web-app_4_0.xsd"
         version="4.0">
  <!--    配置DispatchServlet 这个是springMVC的核心;请求分发器,前端控制器-->
  <servlet>
    <servlet-name>springmvc</servlet-name>
    <servlet-class>org.springframework.web.servlet.DispatcherServlet</servlet-class>
    <init-param>
<!--  DispatchServlet要绑定的配置文件  -->
      <param-name>contextConfigLocation</param-name>
      <param-value>classpath:springmvc-servlet.xml</param-value>
    </init-param>
<!--    启动级别-->
    <load-on-startup>1</load-on-startup>
  </servlet>
<!--
在SpringMVC中,/ /*
/:只匹配所有的请求,不会去匹配jsp页面
/*:匹配所有的请求,包括jsp页面

-->
  <servlet-mapping>
    <servlet-name>springmvc</servlet-name>
    <url-pattern>/</url-pattern>
  </servlet-mapping>

</web-app>
第二步:编写DispatchServlet绑定的配置文件:
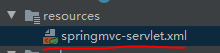
<?xml version="1.0" encoding="UTF-8"?>
<beans xmlns="http://www.springframework.org/schema/beans"
       xmlns:xsi="http://www.w3.org/2001/XMLSchema-instance"
       xmlns:context="http://www.springframework.org/schema/context"
       xmlns:mvc="http://www.springframework.org/schema/mvc"
       xsi:schemaLocation="http://www.springframework.org/schema/beans
        http://www.springframework.org/schema/beans/spring-beans.xsd
        http://www.springframework.org/schema/context
        https://www.springframework.org/schema/context/spring-context.xsd
        http://www.springframework.org/schema/mvc
        https://www.springframework.org/schema/mvc/spring-mvc.xsd">

<!--        自动扫描包,让指定包下的注解生效,由IOC容器统一管理-->
    <context:component-scan base-package="com.xiaofu.controller"/>
<!--    让spring mvc不处理静态资源-->
    <mvc:default-servlet-handler/>
<!--    支持注解驱动
           在spring中一般采用@ReauestMapping注解来完成映射关系
           想要使@ReauestMapping注解生效
           必须向上下文中注册DefaultAnnotationHandlerMapping
           和一个AnnotationMethodHandlerAdapter实例
           这两个实例分别在类级别和方法级别处理。
           而annotation-driven配置帮助我们自动完成了上述两个实例的注入-->
    <mvc:annotation-driven/>

<!--    视图解析器-->
    <bean class="org.springframework.web.servlet.view.InternalResourceViewResolver" id="internalResourceViewResolver">
        <property name="prefix" value="/WEB-INF/jsp/"/> <!--前缀-->
        <property name="suffix" value=".jsp"/> <!--后缀-->
    </bean>

</beans>
第三步: 创建Controller:
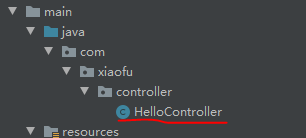
package com.xiaofu.controller;

import org.springframework.stereotype.Controller;
import org.springframework.ui.Model;
import org.springframework.web.bind.annotation.RequestMapping;

@Controller
public class HelloController{
    @RequestMapping("/hello")
    public String hello(Model model){
        //封装数据
        model.addAttribute("msg","helloSpringMVC");
        return "text"; //会被视图解析器处理(相当于要跳转的页面)
    }

}
@Controller 这个注解会自动帮我们注册bean 相当于: <bean id="/hello" class="com.xiaofu.controller.HelloController"/>
@RequestMapping("")设置访问的路由

第四步: 创建对应的返回页面:
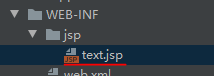
<%--
  Created by IntelliJ IDEA.
  User: 86176
  Date: 2021/1/12
  Time: 11:36
  To change this template use File | Settings | File Templates.
--%>
<%@ page contentType="text/html;charset=UTF-8" language="java" %>
<html>
<head>
    <title>Title</title>
</head>
<body>

${msg}
</body>
</html>
第五步:测试:
先配置tomcat:博客:https://www.cnblogs.com/love2000/p/14164947.html

启动tomcat
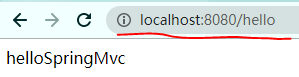
输入地址访问成功!