环境:centos6.8 32位 本教程安装MySQL是通过编译过的二进制文件进行安装。是不针对特定平台的通用安装方法,使用的二进制文件是后缀为.tar.gz的压缩文件 1、下载 http://dev.mysql.com/downloads/mysql/

下载到Windows 中,通过wincap软件传入linxu系统上,
2、解压缩到/usr/local/下面,mysql的主目录命名为mysql
如果是.tar.gz文件直接解压 我下载的是.tar 文件 执行
[root@localhost local]# tar -xvf mysql-5.7.16-linux-glibc2.5-i686.tar
[root@localhost local]# tar xvf mysql-5.7.16-linux-glibc2.5-i686.tar.gz
[root@localhost local]# tar xvf mysql-5.7.16-linux-glibc2.5-i686.tar.gz
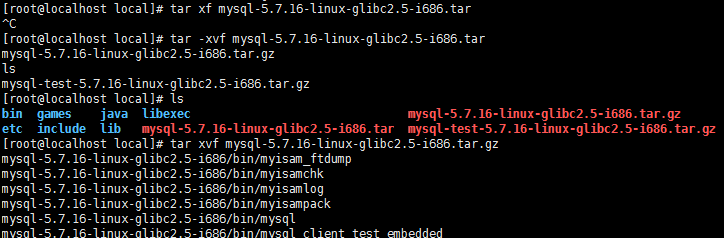
解压后的文件夹重命名
[root@localhost local]# mv mysql-5.7.16-linux-glibc2.5-i686 /mysql
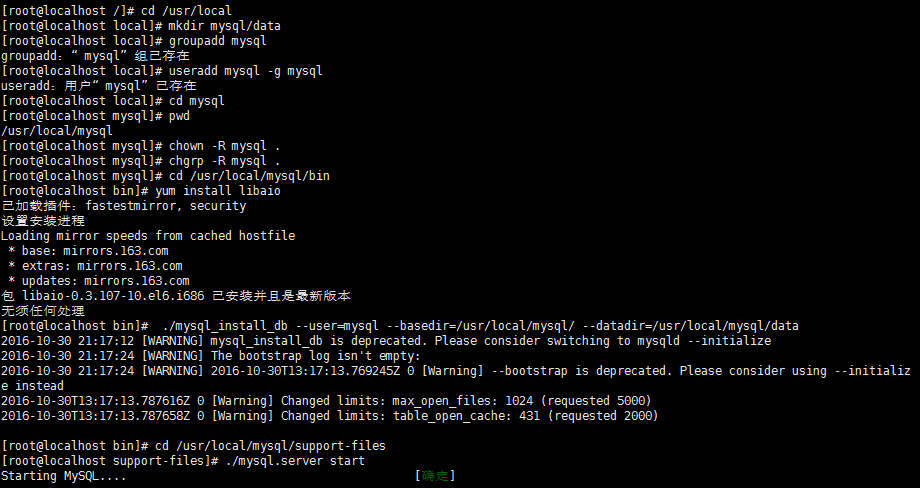
3、在mysql下面创建data数据库文件目录
[root@localhost local]# mkdir mysql/data
4、创建mysql的用户组和用户,并对mysql目录设置用户组和用户
[root@localhost local]# groupadd mysql
[root@localhost local]# useradd mysql -g mysql
[root@localhost local]# cd mysql
[root@localhost mysql]# pwd
/usr/local/mysql
[root@localhost mysql]# chown -R mysql .
[root@localhost mysql]# chgrp -R mysql .
5、初始化mysql并启动mysql服务
[root@localhost mysql]# cd /usr/local/mysql/bin
[root@localhost bin]# yum install libaio
已加载插件:fastestmirror, refresh-packagekit, security
设置安装进程
Loading mirror speeds from cached hostfile
* base: mirrors.opencas.cn
* extras: mirrors.btte.net
* updates: mirrors.btte.net
包 libaio-0.3.107-10.el6.i686 已安装并且是最新版本
无须任何处理
[root@localhost bin]# ./mysql_install_db --user=mysql --basedir=/usr/local/mysql/ --datadir=/usr/local/mysql/data
2016-08-11 12:00:25 [WARNING] mysql_install_db is deprecated. Please consider switching to mysqld --initialize
2016-08-11 12:00:31 [WARNING] The bootstrap log isn't empty:
2016-08-11 12:00:31 [WARNING] 2016-01-09T04:00:29.262989Z 0 [Warning] --bootstrap is deprecated. Please consider using --initialize instead
2016-08-11T04:00:29.264643Z 0 [Warning] Changed limits: max_open_files: 1024 (requested 5000)
2016-08-11T04:00:29.264653Z 0 [Warning] Changed limits: table_open_cache: 431 (requested 2000)
[root@localhost bin]# cd /usr/local/mysql/support-files
[root@localhost support-files]# ./mysql.server start
Starting MySQL.... [确定]
以上操作流程如下图
6、登录mysql,此版本最新版不许空密码登录,实际上有个初始化密码保存在/root/.mysql_secret这个文件里面,用这个密码第一次登录后,再修改密码。因此先cat查看下初始化密码(随机的,每次安装看到的密码都不一样):
[root@localhost support-files]# cat /root/.mysql_secret # Password set for user 'root@localhost' at 2016-10-30 21:17:12 q<.yhitwgg!V [root@localhost support-files]# cd /usr/local/mysql/bin [root@localhost bin]# mysql -uroot -p
|
此处特别说明 如果出现-bash: mysql: command not found 错误 出下这种错误一般是由于安装了一键安装脚本后没有对命令做链接,可以用下面的命令找到mysql命令的绝对路径:
假设查找到的路径为/usr/local/mysql/bin/mysql,可以使用下面的命令设置一个链接:
然后就可以使用mysql命令了。 |
利用初始化密码q<.yhitwgg!V登录mysql 操作如下图:
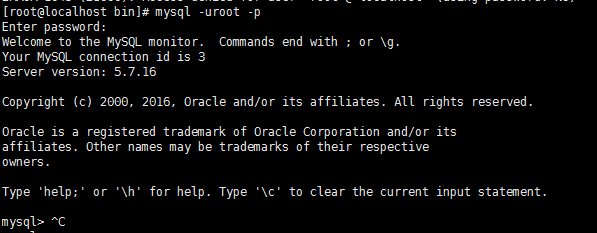
显示登录成功,可以执行mysql命令操作了!
未配置的情况下每次登录需要进入bin目录下操作:
7、 复制配置文件
[root@localhost mysql] cp support-files/my-medium.cnf /etc/my.cnf
|
此处特别说明 如果出现 下面这种错误
找一下my-default.cnf 文件的位置 [root@localhost ~]# find / -name my-default.cnf 比如在(/usr/local/mysql/support-files/my-default.cnf)位置 作如下操作: [root@localhost mysql]# cp support-files/my-default.cnf /etc/my.cnf |

8. 将mysqld服务加入开机自启动项。
*首先需要将scripts/mysql.server服务脚本复制到/etc/init.d/,并重命名为mysqld。
[root@localhostmysql] cp support-files/mysql.server /etc/init.d/mysqld
*通过chkconfig命令将mysqld服务加入到自启动服务项中。
[root@localhost mysql]#chkconfig --add mysqld
*注意服务名称mysqld就是我们将mysql.server复制到/etc/init.d/时重命名的名称。
*查看是否添加成功
[root@localhost mysql]#chkconfig --list mysqld
mysqld 0:off 1:off 2:on 3:on 4:on 5:on 6:off
9. 重启系统,mysqld就会自动启动了。
*检查是否启动
[root@localhost mysql]#netstat -anp|grep mysqld
tcp 0 0 0.0.0.0:3306 0.0.0.0:* LISTEN 2365/mysqld
unix 2 [ ACC ] STREAM LISTENING 14396 2365/mysqld /tmp/mysql.sock
*如果不想重新启动,那可以直接手动启动。
[root@localhost mysql]#service mysqld start
Starting MySQL.. SUCCESS!
10 运行客户端程序mysql,在mysql/bin目录中,测试能否连接到mysqld。
[root@localhost mysql]#/usr/local/mysql/bin/mysql -uroot -p
password: Welcome to the MySQLmonitor. Commands end with ; or g.
Your MySQL connection idis 2
Server version:5.5.29-log MySQL Community Server (GPL)
Copyright (c) 2000, 2012,Oracle and/or its affiliates. All rights reserved.
Oracle is a registeredtrademark of Oracle Corporation and/or its affiliates. Other names may betrademarks of their respective owners.
Type 'help;' or 'h' forhelp. Type 'c' to clear the current input statement.
mysql> quit
Bye
*此时会出现mysql>命令提示符,可以输入sql语句,输入quit或exit退出。为了避免每次都输入mysql的全路径/usr/local/mysql/bin/mysql,可将其加入环境变量中,在/etc/profile最后加入两行命令:
- 方法一:
- 在/etc/profile文件中最后一行添加变量export PATH=$PATH:/usr/local/mysql/bin 【对所有用户生效(永久的)】
- 用VI在文件/etc/profile文件中增加变量,该变量将会对Linux下所有用户有效,并且是“永久的”。
- 要让刚才的修改马上生效,需要执行以下代码
- # source /etc/profile
- 方法二:
- 在用户目录下的.bash_profile文件中增加变量【对单一用户生效(永久的)】
- 用VI在用户目录下的.bash_profile文件中增加变量,改变量仅会对当前用户有效,并且是“永久的”。
- 要让刚才的修改马上生效,需要在用户目录下执行以下代码
- # source .bash_profile
- 方法三:
- 直接运行export命令定义变量【只对当前shell(BASH)有效(临时的)】
- 在shell的命令行下直接使用[export变量名=变量值]定义变量,该变量只在当前的shell(BASH)或其子shell(BASH)下是有效的,shell关闭了,变量也就失效了,再打开新shell时就没有这个变量,需要使用的话还需要重新定义。
- 例如:export PATH=$PATH:/usr/local/mysql/bin
这样就可以在shell中直接输入mysql命令来启动客户端程序了
[root@localhost mysql]#mysql -uroot -p
password: Welcome to the MySQLmonitor. Commands end with ; or g.
Your MySQL connection idis 3
Server version:5.5.29-log MySQL Community Server (GPL)
Copyright (c) 2000, 2012,Oracle and/or its affiliates. All rights reserved.
Oracle is a registeredtrademark of Oracle Corporation and/or its
affiliates. Other namesmay be trademarks of their respective
owners.
Type 'help;' or 'h' forhelp. Type 'c' to clear the current input statement.
mysql>
11、改mysql的root密码,新密码在此为'123456'
mysql> set password=password('123456');
Query OK, 0 rows affected, 1 warning (0.00 sec)
12、设定远程登录mysql。在Linux下为了安全,默认是不允许mysql本机以外的机器访问mysql数据库服务,因此需要重新授权root。方便远程访问。
mysql> use mysql;
Reading table information for completion of table and column names
You can turn off this feature to get a quicker startup with -A
Database changed
mysql> select Host,User from user;
+-----------+-----------+
| Host | User |
+-----------+-----------+
| % | root |
| localhost | mysql.sys |
| localhost | root |
+-----------+-----------+
3 rows in set (0.00 sec)
mysql> GRANT ALL PRIVILEGES ON *.* TO root@'%' identified by '000000';
Query OK, 0 rows affected, 1 warning (0.00 sec)
mysql> flush privileges;
Query OK, 0 rows affected (0.00 sec)
授权语句最后的‘000000’是mysql数据库root用户的新密码。
13、非必要的步骤,如果远程连不上,估计是防火墙的问题,关闭试试:
[root@localhost mysql]# service iptables stop
setenforce 0iptables:将链设置为政策 ACCEPT:filter [确定]
iptables:清除防火墙规则: [确定]
iptables:正在卸载模块: [确定]
[root@localhost mysql]# setenforce 0
setenforce: SELinux is disabl