4个节点:
keepalived1:
IP:172.16.20.10
hostname:knode1.lushenle.com
OS:CentOS Linux release 7.1.1503 (Core)
NetworkDEVICE:eno16777728
keepalived2:
IP:172.16.20.12
hostname:knode2.lushenle.com
OS:CentOS Linux release 7.1.1503 (Core)
NetworkDEVICE:eno16777728
Real Server1:
IP:172.16.100.40
hostname:node1.lushenle.com
OS:CentOS Linux release 7.4.1708 (Core)
NetworkDEVICE:ens32
Real Server2:
IP:172.16.100.50
hostname:node3.lushenle.com
OS:CentOS Linux release 7.4.1708 (Core)
NetworkDEVICE:ens32
还有一个节点是客户端,IP地址为172.16.100.20,OS为MacOSX。其中Real Server2还是yum源。VIP为172.16.20.100,各节点之间的都能相互解析主机名,使用了公钥认证
两个keepalived节点开启核心转发功能,操作是在keepalived1节点中完成的:
# echo 1 > /proc/sys/net/ipv4/ip_forward; ssh knode2.lushenle.com 'echo 1 > /proc/sys/net/ipv4/ip_forward'
安装keepalived,ipvsadm,httpd,其中httpd的作用是Sorry_server:
# yum install -y keepalived,ipvsadm,httpd; ssh knode2.lushenle.com 'yum install -y keepalived,ipvsadm,httpd'
# echo "<h1>The system is upgrading on knode1 Please wait a few minutes retry!<h1>" > /var/www/html/index.html
keepalived2也是一样的,但为了测试效果,加以区别,可显示不同的内容
# echo "<h1>The system is upgrading on knode2 Please wait a few minutes retry!<h1>" > /var/www/html/index.html
# systemctl start http; ssh knode2.lushenle.com 'systemctl start http'
配置keepalived,在不停止服务的前提下可以通过脚本的方式进行流转,且流转的时候发邮件:
# cp /etc/keepalived/keepalived.conf{,.bak} ```先备份一下```
# vim /etc/keepalived/keepalived.conf
 1 ! Configuration File for keepalived
 2
 3 global_defs {
 4     notification_email {
 5     root@localhost
 6     }
 7     notification_email_from kaadmin@localhost
 8     smtp_server 127.0.0.1
 9     smtp_connect_timeout 30
10     router_id LVS_DEVEL
11     vrrp_mcast_group4 224.0.1.118
12 }
13
14 vrrp_script chk_down {
15     script "[[ -f /etc/keepalived/down ]] && exit 1 || exit 0"
16     interval 1
17     weight -20
18 }
19
20 vrrp_instance VI_1 {
21     state MASTER
22     interface eno16777728
23     virtual_router_id 144
24     priority 100
25     advert_int 1
26     authentication {
27         auth_type PASS
28         auth_pass 44dace615cdd5d26
29     }
30     virtual_ipaddress {
31     172.16.20.100/16 dev eno16777728 label eno16777728:1
32     }
33
34     track_script {
35         chk_down
36     }
37
38     notify_master "/etc/keepalived/notify.sh master"
39     notify_backup "/etc/keepalived/notify.sh backup"
40     notify_fault "/etc/keepalived/notify.sh fault"
41 }
42
43 virtual_server 172.16.20.100 80 {
44     delay_loop 6
45     lb_algo wrr
46     lb_kind DR
47     nat_mask 255.255.0.0
48     protocol TCP
49     sorry_server 127.0.0.1 80
50
51     real_server 172.16.100.40 80 {
52         weight 1
53         HTTP_GET {
54             url {
55               path /
56               status_code 200
57             }
58             connect_timeout 3
59             nb_get_retry 3
60             delay_before_retry 3
61         }
62     }
63     real_server 172.16.100.50 80 {
64         weight 2
65         HTTP_GET {
66             url {
67                path /
68                status_code 200
69             }
70             connect_timeout 3
71             nb_get_retry 3
72             delay_before_retry 3
73         }
74     }
75 }
将keepalived1节点中/etc/keepalived/keepalived.conf文件复制keepalived2节点中,将state MASTER改为state BACKUP,priority 100改为priority 90即可
# vim /etc/keepalived/notify.sh
 1 #!/bin/bash
 2 #
 3
 4 vip=172.16.20.100
 5 contact='root@localhost'
 6
 7 notify() {
 8     mailsubject="`hostname` to be $1: $vip floating"
 9     mailbody="`date '+%F %H:%M:%S'`: vrrp transition, `hostname` changed to be $1"
10     echo $mailbody | mail -s "$mailsubject" $contact
11 }
12
13 case "$1" in
14     master)
15         notify master
16         exit 0
17     ;;
18     backup)
19         notify backup
20         exit 0
21     ;;
22     fault)
23         notify fault
24         exit 0
25     ;;
26     *)
27         echo 'Usage: `basename $0` {master|backup|fault}'
28         exit 1
29     ;;
30 esac
也将此脚本复制到keepalived2节点中
启动两个keepalived节点:
# systemctl start keepalived; ssh knode2.lushenle.com 'systemctl start keepalived'
此时可查看自动生成的ipvs规则
# ipvsadm -L -n
两台Real Server中修改内核参数,将Real Server中VIP配置在ens32网卡的别名ens32:0上,并限制其不能响应对VIP地址的请求:
# vim set.sh
1 #!/bin/bash
2 #
3 vip=172.16.20.100
4 ifconfig ens32:0 $vip broadcast $vip netmask 255.255.255.255 up
5 route add -host $vip ens32:0
6 echo 1 > /proc/sys/net/ipv4/conf/ens32/arp_ignore
7 echo 1 > /proc/sys/net/ipv4/conf/all/arp_ignore
8 echo 2 > /proc/sys/net/ipv4/conf/ens32/arp_announce
9 echo 2 > /proc/sys/net/ipv4/conf/all/arp_announce
为Real Server1提供内容,因为Real Server2位所有节点的yum源,就懒得去修改了:
# echo "<h1>This is on real server1<h1>" > /var/www/html/index.html
启动两个Real Server的服务:
# systemctl start httpd; ssh node3.lushenle.com 'systemctl start httpd'
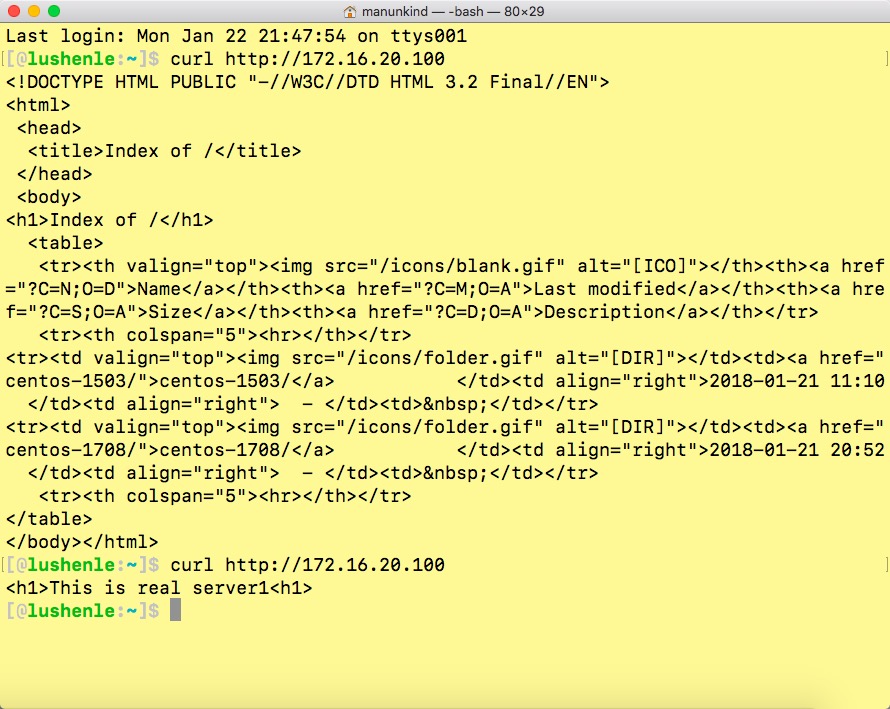
客户端进行访问、测试
