更多详细:https://segmentfault.com/a/1190000009265310
一、标题:页面有两个按钮(test1、test2),点击这两个按钮,跳转相应页面~
注:可直接创建一个带路由模块的项目:ng new project --routing (下面针对新建项目时没有带路由,后边再来新建路由)
1、新建两个页面 test1、test2(html、css、ts): ng g component test1
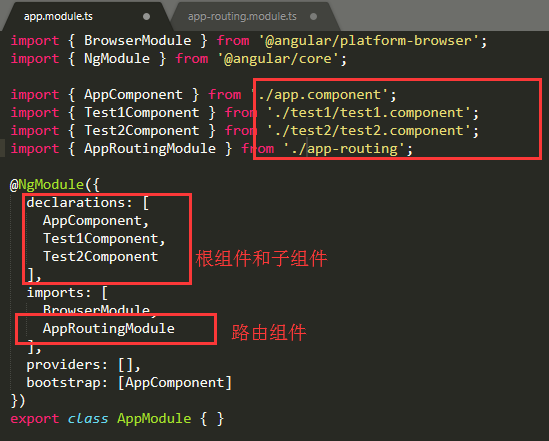
在app.modules.ts(模块)中:
(1)导入根组件,以及相应子组件(test1、test2)
(2)添加相应路由组件 import { AppRoutingModules } from "./app/routing";
(3)初始化路由器imports: [ RouterModule.forRoot(routes) ],用于在主模块中定义主要的路由信息
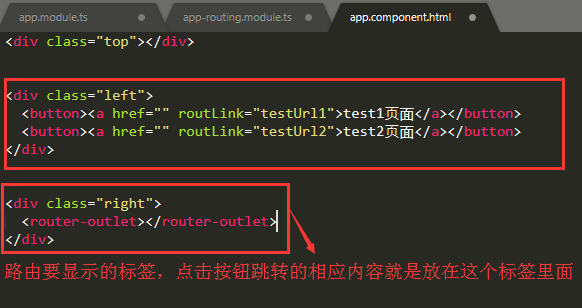
2、在app.component.html中添加相应的跳转按钮,以及路由路径
3、路由配置:新建路由模块 app.routing.ts(配置文件) : ng generate module app-routing --flat --module=app
-
- import 根组件、子组件、路由组件;
- 编写路由路径 const routes;
方法:
const routes: Routes = [
  // path:路径  component:组件
  { path: 'news', component: Newsomponent },

  { path: 'detail/:id', component: DetailComponent }, // 带参数

  { path: 'other', loadChildren:"./other/other.module#otherModule" },// 懒加载子模块, 子模块需要配置路由设置启动子组件
  { path: '**', pathMatch: 'full', redirectTo: '' } // 重定向
];
/index设置页面下有 /index/testUrl1 和 /index/testUrl2 两个页面,分别表示个人资料页和修改密码页。
我们可能希望我们的 / settings 页面拥有自己的组件,然后在设置页面组件中显示 / settings/profile 和 / settings/password 页面。我们可以这样做:
在这里,我们在 setttings 路由中定义了两个子路由,它们将继承父路由的路径,因此修改密码页面的路由匹配地址是 /settings/password ,依此类推。
接下来,我们需要在我们的 AppComponent(index) 组件中添加 router-outlet 指令,因为我们要在设置页面中呈现子路由。

二、链接及访问
<a routerLink="/detail/test1" routerLinkActive="active">detail</a> <a [routerLink]="['/detail', news.id]">{{news.title}}</a> //路由中传参数 <a [routerLink]="[{ outlets: { let2: ['news'] } }]">Contact</a>即在本路由激活时添加样式
//注:routerLinkActive="active".active
或
import { Router } from '@angular/router';
// ...
constructor(private router: Router) {}

// ...
  this.router.navigate(['/detail', {queryParams:item}]); //路由中传参数(多个参数)
  this.router.navigate({'/detail',news.id});   //一个参数
  this.router.navigate([{ outlets: { let2: null }}]);
}

注:navigateByUrl 方法指向完整的绝对路径
传参之后的接收方法:
1.snapshot
import { ActivateRoute } from '@angular/router';

constructor( public route: ActivateRoute ) { };
ngOnInit(){
    this.data = this.route.snapshot.params['id'];
};
2.queryParams
import { ActivateRoute } from '@angular/router';

constructor( public activeRoute:ActivateRoute ) { };
ngOnInit(){
  this.activeRoute.queryParams.subscribe(params => {
    console.log(params);
  });
};