根据上篇《六十二_.实战:低成本华为云主机+云主机集群搭建_01》,现在重新创建一台云主
机test1,绑定安全组s1,手动绑定内网IP地址192.168.1.10(创建的时候,手动配置),不同的是
,这次我们以秘钥对的方式创建虚拟机:
点击创建秘钥对,创建名称为aa的秘钥对: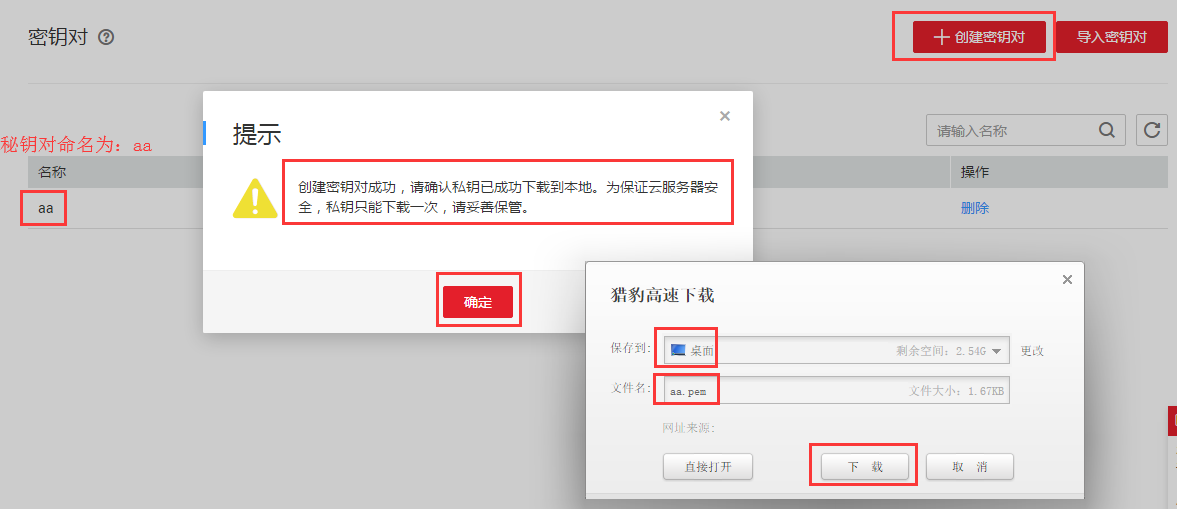
将秘钥对aa.pem保存在桌面,然后返回重新创建虚拟机,选择秘钥对aa: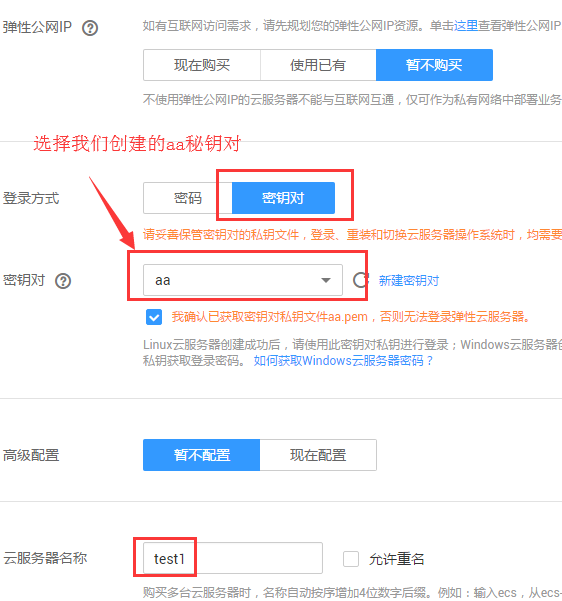
OK,点击购买,成功之后不要绑定公网IP。
Xshell连接先前我们创建的云主机proxy
执行如下命令:
proxy ~]# rm -rf /etc/yum.repos.d/*
proxy~]# curl -o /etc/yum.repos.d/CentOS-Base.repo
http://mirrors.myhuaweicloud.com/repo/CentOS-Base-7.repo
proxy ~]# yum makecache
proxy ~]# yum repolist
repo id repo name status
base/7/x86_64 CentOS-7 - Base 10,019
extras/7/x86_64 CentOS-7 - Extras 371
updates/7/x86_64 CentOS-7 - Updates 1,201
repolist: 11,591
proxy ~]# yum -y install lrzsz lftp psmisc
将Windows桌面的aa.pem拖到proxy里: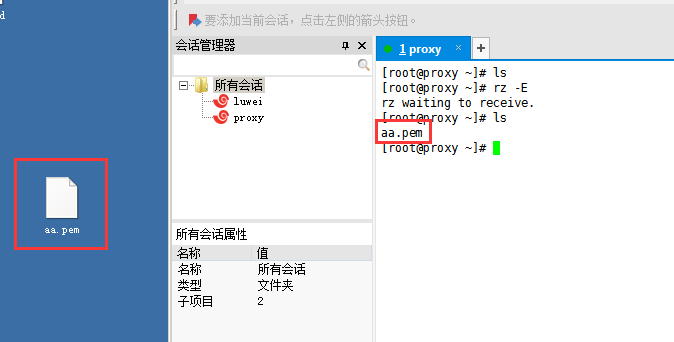
将proxy /etc/passwd下载到Windows桌面:
proxy ~]# sz /etc/passwd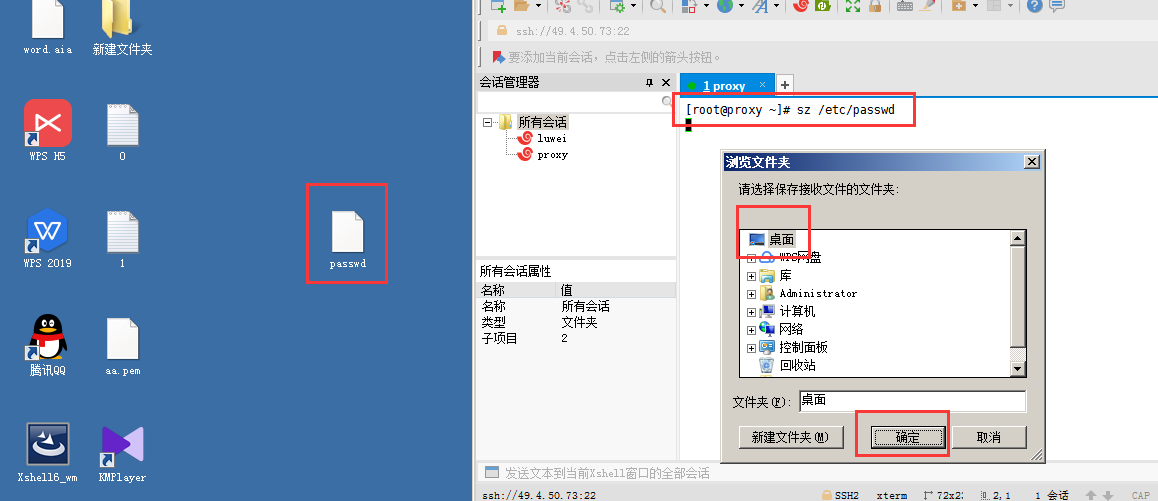
通过proxy跳板机,登录test1:
proxy ~]# rm -rf /root/.ssh/known_hosts
proxy ~]# mv aa.pem /root/.ssh/id_rsa
proxy ~]# chmod 400 /root/.ssh/id_rsa
proxy ~]# ssh 192.168.1.10
好了,现在成功登录到test1虚拟机
1> 配置云主机Yum源
配置云主机test1 华为Yum源:
test1 ~]# rm -rf /etc/yum.repos.d/*
test1 ~]# curl -o /etc/yum.repos.d/CentOS-Base.repo http://mirrors.myhuaweicloud.com/repo/CentOS-Base-7.repo
test1 ~]# yum makecache
test1 ~]# yum repolist
repo id repo name status
base/7/x86_64 CentOS-7 - Base 10,019
extras/7/x86_64 CentOS-7 - Extras 371
updates/7/x86_64 CentOS-7 - Updates 1,201
repolist: 11,591
安装常用工具包:
test1 ~]# yum -y install lrzsz lftp psmisc
配置云主机test1 自定义Yum源,指向跳板机:
test1 ~]# vim /etc/yum.repos.d/local.repo
[local_repo]
baseurl=ftp://192.168.1.222/prorepo
enable=1
gpgcheck=0
test1 ~]# yum repolist //查看是否启用
...
local_repo local_repo 0
另开端口,打开proxy
proxy ~]# yum -y install vsftpd
proxy ~]# systemctl restart vsftpd
proxy ~]# yum -y install createrepo
proxy ~]# mkdir /var/ftp/prorepo
proxy ~]# cd /var/ftp/prorepo
prorepo]#createrepo .
prorepo]# ls
repodata //一个空的yum源
2> 删除test1不需要的软件(根据个人意愿和云主机配置)
test1 ~]# ss -ltun
查到有ntp smtp 卸载掉,不需要
test1 ~]# systemctl stop ntpd
test1 ~]# systemctl stop postfix
test1 ~]# ss -ltun //查看只有三个了
安装chrony 时间同步服务
test1 ~]# yum -y install chrony
test1 ~]# vim /etc/chrony.conf
将这4行删掉:
server 0.centos.pool.ntp.org iburst
server 1.centos.pool.ntp.org iburst
server 2.centos.pool.ntp.org iburst
server 3.centos.pool.ntp.org iburst
替换为:
server ntp.myhuaweicloud.com iburst
test1 ~]# systemctl enable chronyd
test1 ~]# systemctl start chronyd
test1 ~]# chronyc sources -v
...^* 100.125.1.251 //出现*表示同步成功
卸载ntp postfix
test1 ~]# yum remove ntp postfix
proxy将秘钥发给test1:
proxy ~]# scp /root/.ssh/id_rsa 192.168.1.10:/root/.ssh/
test1关机:
test1 ~]# poweroff
OK,镜像模板制作完成!
3> 创建镜像
华为云里查看test1关机完成之后,创建镜像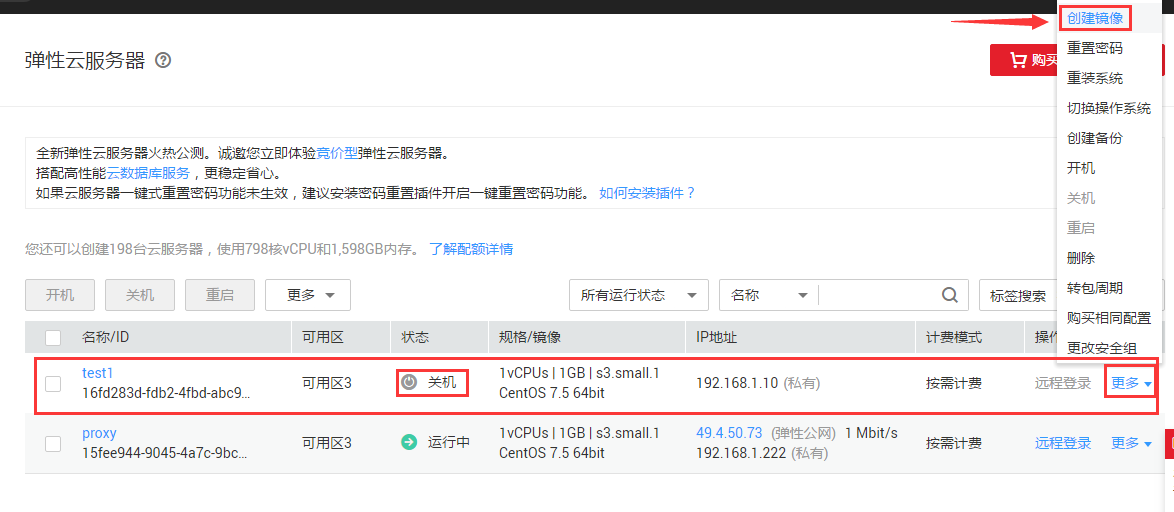

好了,test1使命完成,删除test1云主机。
4> 现在创建5台虚拟机,流程跟上篇《六十二_.实战:低成本华为云主机+云主机集群搭建_01》一样,不同的是,选择镜像的时候,选择我们自己刚刚制作的镜像: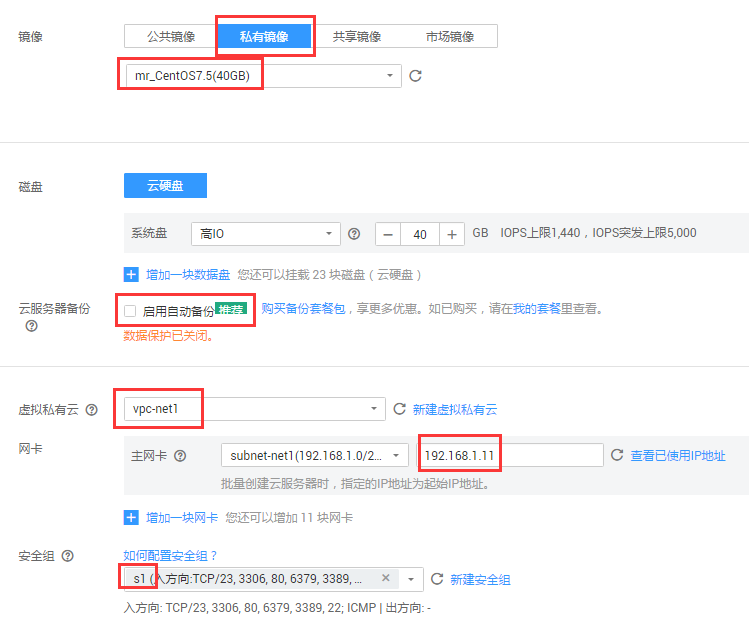
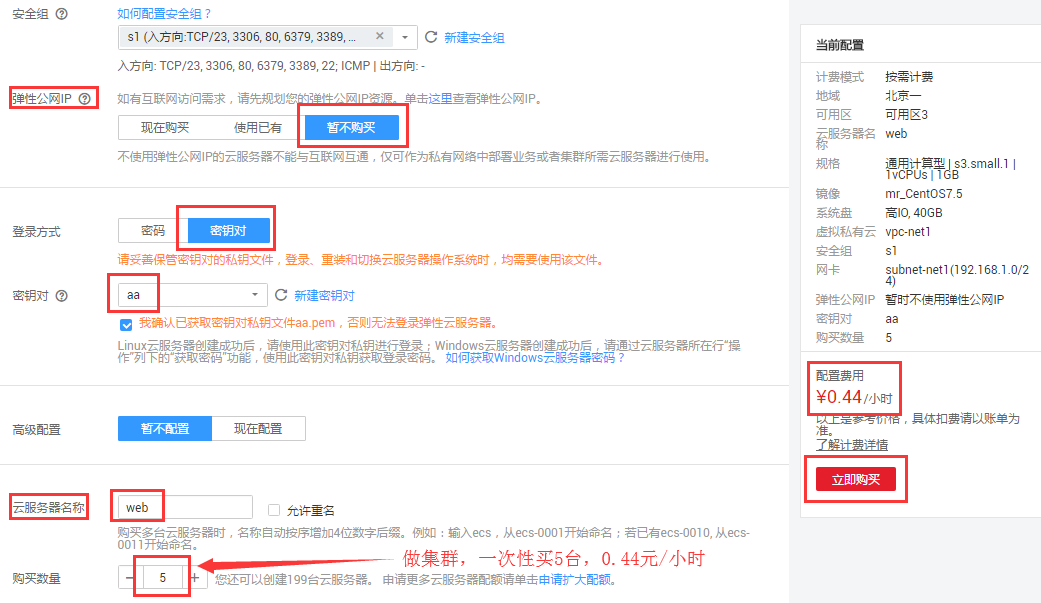
查看创建的5台云主机及对应内网IP:
proxy跳板机免密批量登录5台云主机查看: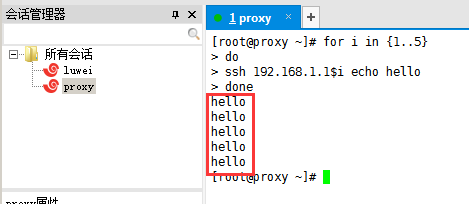
查看yum源: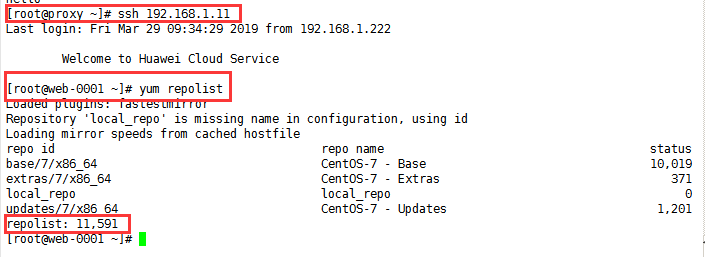
OK,华为云云主机集群创建完成,你可以部署各种集群服务了~