
ASP.NET Core中使用GraphQL
- ASP.NET Core中使用GraphQL - 第一章 Hello World
- ASP.NET Core中使用GraphQL - 第二章 中间件
- ASP.NET Core中使用GraphQL - 第三章 依赖注入
- ASP.NET Core中使用GraphQL - 第四章 GrahpiQL
- ASP.NET Core中使用GraphQL - 第五章 字段, 参数, 变量
本篇中我将演示如何配置持久化仓储,这里原文中是使用的Postgres, 这里我改用了EF Core For SqlServer。本文的例子需要在上一篇的代码基础上修改。没有代码的同学,可以去https://github.com/lamondlu/GraphQL_Blogs/tree/master/Part%20V下载。
之前我们编写了一个DataStore类,里面硬编码了一个数据集合,这里我们希望改用依赖注入的方式进行解耦,所以首先我们需要创建一个抽象接口IDataStore。
public interface IDataStore
{
    IEnumerable<Item> GetItems();
    Item GetItemByBarcode(string barcode);
}
由于接下来我们需要使用EF Core, 所以这里我们需要添加一个EF Core的上下文类ApplicationDbContext。
public class ApplicationDbContext : DbContext
{
    public ApplicationDbContext(DbContextOptions<ApplicationDbContext> options) : base(options)
    {

    }

    public DbSet<Item> Items { get; set; }

    protected override void OnModelCreating(ModelBuilder modelBuilder)
    {
    	modelBuilder.Entity<Item>().ToTable("Items");
        modelBuilder.Entity<Item>().HasKey(p => p.Barcode);

    	modelBuilder.Entity<Item>().HasData(new Item {
    		Barcode = "123",
    		Title = "Headphone",
    		SellingPrice = 50 });

        modelBuilder.Entity<Item>().HasData(new Item {
        	Barcode = "456",
        	Title = "Keyboard",
        	SellingPrice = 40 });
        modelBuilder.Entity<Item>().HasData(new Item {
        	Barcode = "789",
        	Title = "Monitor",
        	SellingPrice = 100 });

        base.OnModelCreating(modelBuilder);
    }
}
这里为了导入一些初始数据,我们在OnModelCreating方法中使用HasData方法添加了3个初始数据。
下面我们修改DataStore类, DataStore应该实现IDataStore接口, 其中的GetItemByBarcode和GetItems方法需要改为从数据库中读取。
public class DataStore : IDataStore
{
    private ApplicationDbContext _applicationDbContext;

    public DataStore(ApplicationDbContext applicationDbContext)
    {
        _applicationDbContext = applicationDbContext;
    }

    public Item GetItemByBarcode(string barcode)
    {
        return _applicationDbContext.Items.First(i => i.Barcode.Equals(barcode));
    }

    public IEnumerable<Item> GetItems()
    {
        return _applicationDbContext.Items;
    }
}
接下来,我们要在Startup.cs类中的ConfigureServices添加Entity Framework配置
services.AddDbContext<ApplicationDbContext>(option =>
{
    option.UseSqlServer(Configuration.GetConnectionString("SampleDB"));
});
TIPS: 这里注意不要忘记创建一个
appsettings.json, 在其中添加数据库连接字符串
配置完成之后,我们需要使用以下命令添加Migration,并更新数据库
dotnet ef migrations add Initial
dotnet ef database update
现在针对数据库的修改都已经完成了。
另外我们还需要修改服务注册代码,将注册服务的生命周期从单例(Singleton)改为作用域(Scoped), 因为当注入服务的生命周期为单例时,需要处理多线程问题和潜在的内存泄漏问题。
services.AddScoped<IDataStore, DataStore>();
services.AddScoped<HelloWorldQuery>();
services.AddScoped<ISchema, HelloWorldSchema>();
修改完成后,Startup.cs最终代码如下:
public class Startup
{
    public Startup(IConfiguration configuration)
    {
        Configuration = configuration;
    }

    public IConfiguration Configuration { get; }

    public void ConfigureServices(IServiceCollection services)
    {
        services.AddDbContext<ApplicationDbContext>(option =>
        {
             option.UseSqlServer(Configuration.GetConnectionString("SampleDB"));
        });

        services.AddSingleton<IDocumentExecuter, DocumentExecuter>();
        services.AddSingleton<IDocumentWriter, DocumentWriter>();

        services.AddScoped<IDataStore, DataStore>();
        services.AddScoped<HelloWorldQuery>();
        services.AddScoped<ISchema, HelloWorldSchema>();
    }

    public void Configure(IApplicationBuilder app, IHostingEnvironment env)
    {
        if (env.IsDevelopment())
        {
            app.UseDeveloperExceptionPage();
        }

        app.UseDefaultFiles();
        app.UseStaticFiles();

        app.UseMiddleware<GraphQLMiddleware>();
    }
}
现在我们启动项目, 程序会抛出一个错误
System.InvalidOperationException: Cannot resolve scoped service 'GraphQL.Types.ISchema' from root provider
这个问题的原因是,中间件是单例的,如果在中间件的构造函数中使用作用域(Scoped)的依赖注入, 会导致这个问题(具体请参见https://docs.microsoft.com/zh-cn/aspnet/core/fundamentals/dependency-injection?view=aspnetcore-2.1)。这里ISchema的生命周期是作用域,并且在GraphQLMiddleware类中是从构造函数注入的,所以这里我们需要修改GraphQLMiddleware类,ISchema需要改从Invoke方法注入。
中间件最终代码如下:
public class GraphQLMiddleware
{
    private readonly RequestDelegate _next;
    private readonly IDocumentWriter _writer;
    private readonly IDocumentExecuter _executor;
    public GraphQLMiddleware(RequestDelegate next, IDocumentWriter writer, IDocumentExecuter executor)
    {
        _next = next;
        _writer = writer;
        _executor = executor;
    }

    public async Task InvokeAsync(HttpContext httpContext, ISchema schema)
    {
        if (httpContext.Request.Path.StartsWithSegments("/api/graphql")
            && string.Equals(httpContext.Request.Method,
            "POST",
            StringComparison.OrdinalIgnoreCase))
        {
            string body;
            using (var streamReader = new StreamReader(httpContext.Request.Body))
            {
                body = await streamReader.ReadToEndAsync();

                var request = JsonConvert.DeserializeObject<GraphQLRequest>(body);

                var result = await _executor.ExecuteAsync(doc =>
                {
                    doc.Schema = schema;
                    doc.Query = request.Query;
                    doc.Inputs = request.Variables.ToInputs();
                }).ConfigureAwait(false);

                var json = await _writer.WriteToStringAsync(result);
                await httpContext.Response.WriteAsync(json);
            }
        }
        else
        {
            await _next(httpContext);
        }
    }
}
修改完成之后,我们重新启动项目,项目正常启动成功, GraphiQL界面出现。
现在我们还是使用上一章的查询代码,查询二维码是123的货物数据。
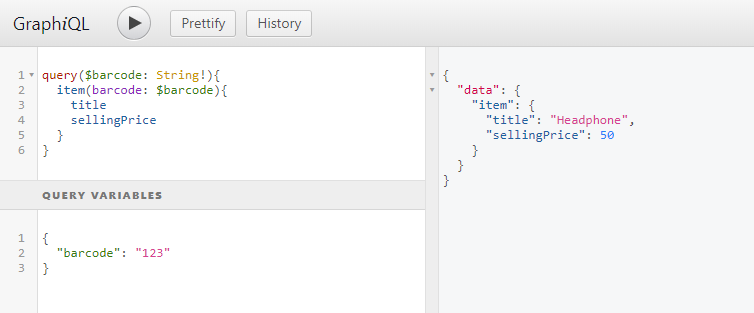
数据正常从数据库中读取成功。下一章我们将讲解在ASP.NET Core中如何使用GraphQL添加修改数据。
本文源代码: https://github.com/lamondlu/GraphQL_Blogs/tree/master/Part%20VI