#!/usr/bin/env python3
# -*- coding:utf-8 -*-
"""
@author:ai
@file:demo.py
@time:2020/09/24
"""
import os

from pyftpdlib.authorizers import DummyAuthorizer
from pyftpdlib.handlers import FTPHandler
from pyftpdlib.servers import FTPServer

def main():
    # Instantiate a dummy authorizer for managing 'virtual' users
    authorizer = DummyAuthorizer()

    # Define a new user having full r/w permissions and a read-only
    # anonymous user
    authorizer.add_user('user', '12345', './file', perm='elradfmwMT')
    #authorizer.add_anonymous(os.getcwd())

    # Instantiate FTP handler class
    handler = FTPHandler
    handler.authorizer = authorizer

    # Define a customized banner (string returned when client connects)
    handler.banner = "pyftpdlib based ftpd ready."

    # Specify a masquerade address and the range of ports to use for
    # passive connections.  Decomment in case you're behind a NAT.
    #handler.masquerade_address = '151.25.42.11'
    #handler.passive_ports = range(60000, 65535)

    # Instantiate FTP server class and listen on 0.0.0.0:2121
    address = ('0.0.0.0', 2121)
    server = FTPServer(address, handler)

    # set a limit for connections
    server.max_cons = 256
    server.max_cons_per_ip = 5

    # start ftp server
    server.serve_forever()

if __name__ == '__main__':
    main()
背景: 公司有fserver,但是只有加域的windows才能访问.而我们都是在Ubuntu开发,所以ubuntu和windows之间共享文件,就很麻烦了.
偶尔发现python可以如此简单的搭建一个ftp服务.这样ubuntu和windows互传文件就可以可视化的拖拽了很方便.
我是把服务搭载ubuntu上,因为我们刚好有一台大内存的机器是ubuntu的
1, windows登录ftp
windows的就不上图了,相信难不住大家.
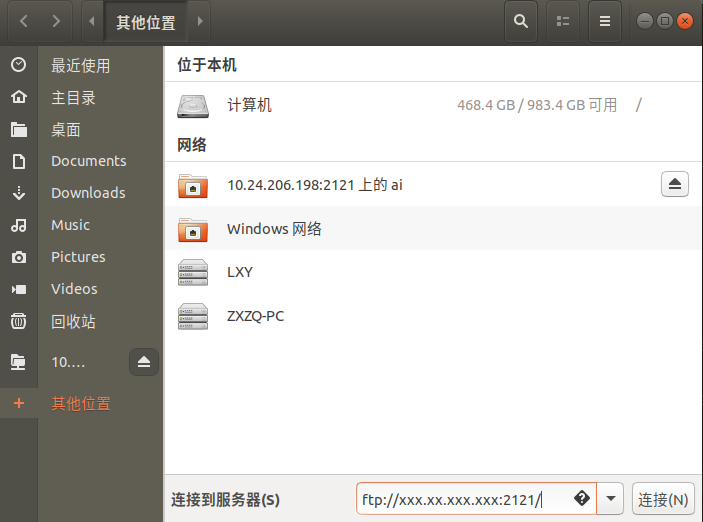
2,ubuntu登录ftp(我用的是ubuntu18.04), 点击文件管理->其他位置 ,右下角连接到服务器位置处,输入相应机器的ip对应的ftp地址和端口,点击连接.便会出现登录界面.登陆完就可以用了.