不废话
1、安装python库
pip install locustio
pip install pyzmq
2、脚本 命名为locust_test.py


 1 from locust import HttpLocust,TaskSet,task
 2
 3 import subprocess
 4
 5 import json
 6
 7
 8
 9 #This is the TaskSet class.
10
11 class UserBehavior(TaskSet):
12
13     #Execute before any task.
14
15     def on_start(self):
16
17         pass
18
19
20
21     #the @task takes an optional weight argument.
22
23     @task(1)
24
25     def list_header(self):
26
27         r = self.client.get("/homepage/list_header.html")
28
29         if json.loads((r.content))["result"] != 100:
30
31             r.failure("Got wrong response:"+r.content)
32
33
34
35     @task(2)
36
37     def list_goods(self):
38
39         r = self.client.get("/homepage/list_goods.html")
40
41         if json.loads((r.content))["result"] != 100:
42
43             r.failure("Got wrong response:"+r.content)
44
45
46
47 #This is one HttpLocust class.
48
49 class WebUserLocust(HttpLocust):
50
51     #Speicify the weight of the locust.
52
53     weight = 1
54
55     #The taskset class name is the value of the task_set.
56
57     task_set = UserBehavior
58
59     #Wait time between the execution of tasks.
60
61     min_wait = 5000
62
63     max_wait = 15000
64
65
66
67 #This is another HttpLocust class.
68
69 class MobileUserLocust(HttpLocust):
70
71     weight = 3
72
73     task_set = UserBehavior
74
75     min_wait = 3000
76
77     max_wait = 6000
78
79
80
81 #if __name__ == '__main__':
82
83 #    subprocess.Popen('locust -f .locust_test_1.py --host=http://api.g.caipiao.163.com', shell=True)
3、对Locust项目的启动,我们可以在命令行终端中执行以下命令:
locust -f .locust_test.py --host=http://api.g.caipiao.163.com
这里的“-f”指定了要执行的python文件路径,“--host”指定了模拟用户请求接口的host名。执行该命令,Locust项目就启动了
接下来就可以在浏览器中访问我们的locust页面来完成负载测试了,如果不想通过浏览器来设置完成负载测试,纯粹命令行模式也是支持的,输入以下命令:
locust -f .locust_test.py --host='http://api.g.caipiao.163.com' --no-web -c 1000 -r 10 -n 1000
接下来负载测试就会自动执行,按“ctrl+c”结束负载测试:
对于命令行中的参数的解释:--no-web是用来选择无浏览器模式,-c后面接的是模拟用户数,-r后面接的每秒模拟用户并发数,-n后面接的是模拟请求数。
对于命令行中的参数的解释:--no-web是用来选择无浏览器模式,-c后面接的是模拟用户数,-r后面接的每秒模拟用户并发数,-n后面接的是模拟请求数。
对于命令行中的参数的解释:--no-web是用来选择无浏览器模式,-c后面接的是模拟用户数,-r后面接的每秒模拟用户并发数,-n后面接的是模拟请求数。
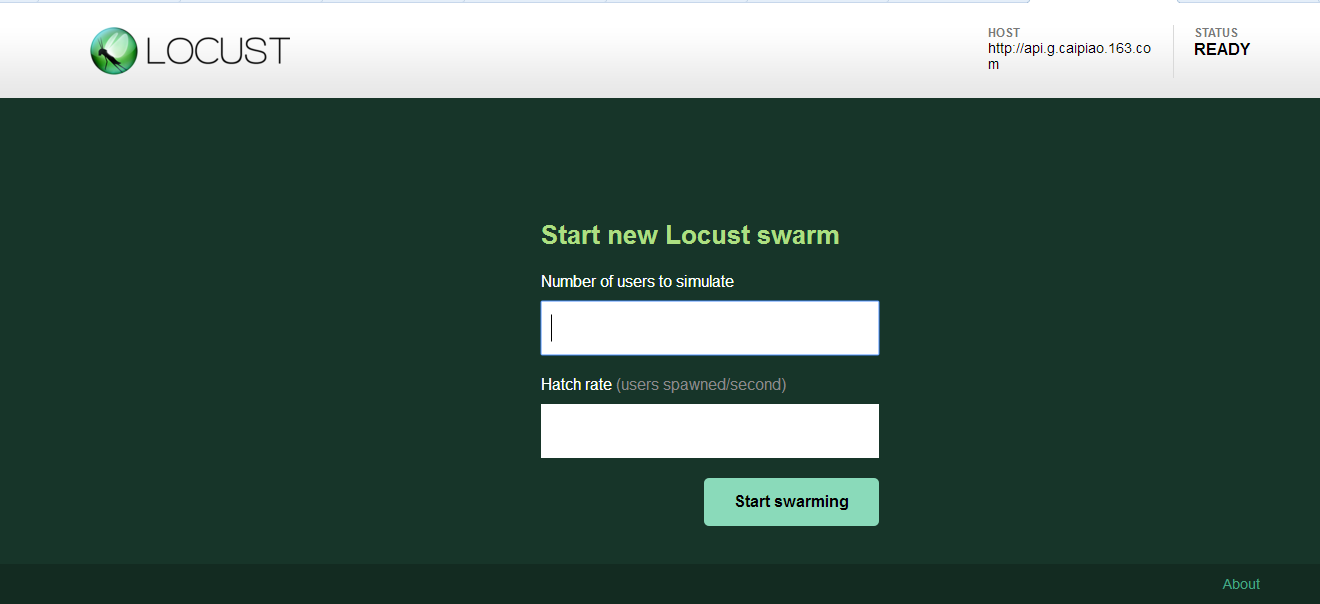
在浏览器中输入“http://localhost:8089/”访问,会看到如下页面: