原博客地址:http://jinnianshilongnian.iteye.com/blog/2018398
根据下载的pdf学习。
开涛shiro教程-第十八章-并发登录人数控制
shiro中没有提供默认实现,不过可以很容易实现。通过shiro filter机制拓展KickoutSessionControllerFilter。
kickoutSessionControllerFilter -> 将这个filter配置到shiro的配置文件中 -> 遇到的一些问题。
示例代码的结构:
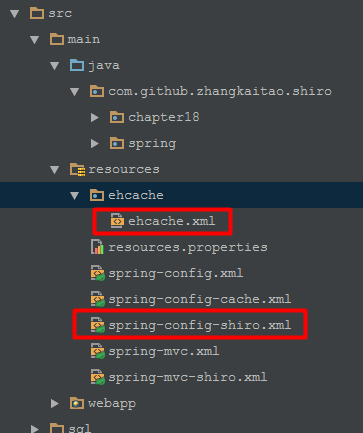
1.配置spring-config-shiro.xml
(1)kickoutSessionControllerFilter
kickoutAfter:是否提出后来登录的,默认为false,即后来登录的踢出前者。
maxSession:同一个用户的最大会话数,默认1,表示同一个用户最多同时一个人登录。
kickoutUrl:被踢出后重定向的地址。
1 <bean id="kickoutSessionControlFilter"
2     class="com.github.zhangkaitao.shiro.chapter18.web.shiro.filter.KickoutSessionControlFilter">
3   <property name="cacheManager" ref="cacheManager"/>
4   <property name="sessionManager" ref="sessionManager"/>
5   <property name="kickoutAfter" value="false"/>
6   <property name="maxSession" value="2"/>
7   <property name="kickoutUrl" value="/login?kickout=1"/>
8 </bean>
(2)shiroFilter
此处配置除了登录等之外的地址都走 kickout 拦截器进行并发登录控制。
 1 <bean id="shiroFilter" class="org.apache.shiro.spring.web.ShiroFilterFactoryBean">
 2   <property name="securityManager" ref="securityManager"/>
 3   <property name="loginUrl" value="/login"/>
 4   <property name="filters">
 5     <util:map>
 6       <entry key="authc" value-ref="formAuthenticationFilter"/>
 7       <entry key="sysUser" value-ref="sysUserFilter"/>
 8       <entry key="kickout" value-ref="kickoutSessionControlFilter"/>
 9     </util:map>
10   </property>
11   <property name="filterChainDefinitions">
12     <value>
13       /login = authc
14       /logout = logout
15       /authenticated = authc
16       /** = kickout,user,sysUser
17     </value>
18   </property>
19 </bean>
(3) ehcache.xml
这里的名称在后面的kickoutController里要用到。
1     <cache name="shiro-kickout-session"
2            maxEntriesLocalHeap="2000"
3            eternal="false"
4            timeToIdleSeconds="3600"
5            timeToLiveSeconds="0"
6            overflowToDisk="false"
7            statistics="true">
8     </cache>
2.KickoutSessionControllerFilter
此处,使用了Cache缓存"用户名-会话id"之间的关系,如果量比较大的话,可以考虑持久化到数据库/其他持久化的Cache中。
另外,此处没有并发控制的同步实现,可以考虑根据用户名来获取锁,减少锁的粒度。
  1 package com.github.zhangkaitao.shiro.chapter18.web.shiro.filter;
  2
  3 import org.apache.shiro.cache.Cache;
  4 import org.apache.shiro.cache.CacheManager;
  5 import org.apache.shiro.session.Session;
  6 import org.apache.shiro.session.mgt.DefaultSessionKey;
  7 import org.apache.shiro.session.mgt.SessionManager;
  8 import org.apache.shiro.subject.Subject;
  9 import org.apache.shiro.web.filter.AccessControlFilter;
 10 import org.apache.shiro.web.util.WebUtils;
 11
 12 import javax.servlet.ServletRequest;
 13 import javax.servlet.ServletResponse;
 14 import java.io.Serializable;
 15 import java.util.Deque;
 16 import java.util.LinkedList;
 17
 18 /**
 19  * <p>User: Zhang Kaitao
 20  * <p>Date: 14-2-18
 21  * <p>Version: 1.0
 22  */
 23 public class KickoutSessionControlFilter extends AccessControlFilter {
 24
 25     private String kickoutUrl; //踢出后到的地址
 26     private boolean kickoutAfter = false; //踢出之前登录的/之后登录的用户 默认踢出之前登录的用户
 27     private int maxSession = 1; //同一个帐号最大会话数 默认1
 28
 29     private SessionManager sessionManager;
 30     private Cache<String, Deque<Serializable>> cache;
 31
 32     public void setKickoutUrl(String kickoutUrl) {
 33         this.kickoutUrl = kickoutUrl;
 34     }
 35
 36     public void setKickoutAfter(boolean kickoutAfter) {
 37         this.kickoutAfter = kickoutAfter;
 38     }
 39
 40     public void setMaxSession(int maxSession) {
 41         this.maxSession = maxSession;
 42     }
 43
 44     public void setSessionManager(SessionManager sessionManager) {
 45         this.sessionManager = sessionManager;
 46     }
 47
 48     public void setCacheManager(CacheManager cacheManager) {
 49         this.cache = cacheManager.getCache("shiro-kickout-session");
 50     }
 51
 52     @Override
 53     protected boolean isAccessAllowed(ServletRequest request, ServletResponse response, Object mappedValue) throws Exception {
 54         return false;
 55     }
 56
 57     @Override
 58     protected boolean onAccessDenied(ServletRequest request, ServletResponse response) throws Exception {
 59         Subject subject = getSubject(request, response);
 60         if(!subject.isAuthenticated() && !subject.isRemembered()) {
 61             //如果没有登录,直接进行之后的流程
 62             return true;
 63         }
 64
 65         Session session = subject.getSession();
 66         String username = (String) subject.getPrincipal();
 67         Serializable sessionId = session.getId();
 68
 69         //TODO 同步控制
 70         Deque<Serializable> deque = cache.get(username);
 71         if(deque == null) {
 72             deque = new LinkedList<Serializable>();
 73             cache.put(username, deque);
 74         }
 75
 76         //如果队列里没有此sessionId,且用户没有被踢出;放入队列
 77         if(!deque.contains(sessionId) && session.getAttribute("kickout") == null) {
 78             deque.push(sessionId);
 79         }
 80
 81         //如果队列里的sessionId数超出最大会话数,开始踢人
 82         while(deque.size() > maxSession) {
 83             Serializable kickoutSessionId = null;
 84             if(kickoutAfter) { //如果踢出后者
 85                 kickoutSessionId = deque.removeFirst();
 86             } else { //否则踢出前者
 87                 kickoutSessionId = deque.removeLast();
 88             }
 89             try {
 90                 Session kickoutSession = sessionManager.getSession(new DefaultSessionKey(kickoutSessionId));
 91                 if(kickoutSession != null) {
 92                     //设置会话的kickout属性表示踢出了
 93                     kickoutSession.setAttribute("kickout", true);
 94                 }
 95             } catch (Exception e) {//ignore exception
 96             }
 97         }
 98
 99         //如果被踢出了,直接退出,重定向到踢出后的地址
100         if (session.getAttribute("kickout") != null) {
101             //会话被踢出了
102             try {
103                 subject.logout();
104             } catch (Exception e) { //ignore
105             }
106             saveRequest(request);
107             WebUtils.issueRedirect(request, response, kickoutUrl);
108             return false;
109         }
110
111         return true;
112     }
113 }
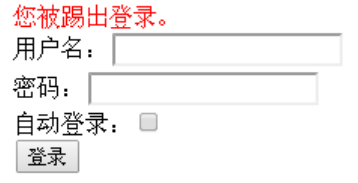
3.测试
因为此处设置maxSession=2,所以需要打开3个浏览器。分别访问:http:l//ocalhost:8080/chapter18 进行登录。
然后刷新第一次打开的浏览器,将会被强制退出。
4.遇到的问题
(1)there is no session Id ***
报错:there is no session Id ***。
原因:我没有在ehcache.xml里配置"shiro-kickout-session"。
因为kickoutController里用到了:
1     public void setCacheManager(CacheManager cacheManager) {
2         this.cache = cacheManager.getCache("shiro-kickout-session");
3     }
所以在ehcache.xml中一定记得加上(名字匹配即可):
1   <cache name="shiro-kickout-session"
2            eternal="false"
3            timeToIdleSeconds="3600"
4            timeToLiveSeconds="0"
5            overflowToDisk="false"
6            statistics="true">
7     </cache>
(2)sessionKey must be an HTTP compatible implementation
报错:sessionKey must be an HTTP compatible implementation。
原因:我的sessionManager和示例代码中的sessionManager不同,示例中用的是DefaultWebSessionManager,我用的是ServletContainerSessionManager。
代码中这一句报的错误:
1 Session kickoutSession = sessionManager.getSession(new DefaultSessionKey(kickoutSessionId));
sessionManager.getSession时,因为sessionManager的类类型是ServletContainerSessionManager,所以会进行一个http判定。
参考来自:http://blog.csdn.net/qq_26946497/article/details/51064654?locationNum=3
 1  public Session getSession(SessionKey key) throws SessionException {
 3         if (!WebUtils.isHttp(key)) { //判断是不是http的key,否则抛异常
 4             String msg = "SessionKey must be an HTTP compatible implementation.";
 5             throw new IllegalArgumentException(msg);
 6         }
 7         ...
14     }
最后的解决办法:不存放sessionId在deque中,直接存放Session。又可以跳过通过sessionId获取session这一步,直接从deque中拿到之前保存的session。
 1 //修改前
 2 Deque<Serializable> deque = cache.get(username);
 3 deque.push(sessionId);
 4 kickoutSessionId = deque.removeLast();
 5 Session kickoutSession = sessionManager.getSession(new DefaultSessionKey(kickoutSessionId));
 6
 7 //修改后
 8 Deque<Session> deque = cache.get(username);
 9 deque.push(session);
10 kickoutSession = deque.removeLast();
(3)没有增加锁
1   synchronized (this.cache) {
2        Deque<Session> deque = cache.get(usernameTenant);
3        ...
4   }
5     //如果被踢出了,直接退出,重定向到踢出后的地址
6     if (session.getAttribute(KICK_OUT) != null && session.getAttribute(KICK_OUT) == true) {
7   ...
(4)动态设定是否需要kickout
在配置文件中,设置参数 kickout = false。然后在kickoutController里拿到这个参数的值。
1   protected boolean onAccessDenied(ServletRequest request, ServletResponse response) throws Exception {
2         if("false".equals(kickout)){
3             //如果不需要单用户登录的限制
4             return true;
5         }
6         ...
7 }
5.CacheManager和SessionManager详解
(1)CacheManager
示例中的配置文件:
-> ehcache.xml
-> ehcacheManager(EhCacheManagerFactoryBean)
-> springCacheManager(EhCacheCacheManager)
-> cacheManager(SpringCacheManagerWrapper)
-> 其他bean里使用
我的配置文件:
-> ehcache.xml
-> ehcacheManager(EhCacheManagerFactoryBean)
-> cacheManager(EhCacheCacheManager)
-> springCacheManager(SpringCacheManagerWrapper)
-> 其他bean里使用
所以名字都是浮云,重点是从cacheManager的构成:
-> ehcache.xml
-> EhCacheManagerFactoryBean
-> EhCacheCacheManager
-> SpringCacheManagerWrapper
-> 其他bean使用
详细配置如下:
 1 spring-config-shiro.xml
 2    <bean id="cacheManager" class="com.github.zhangkaitao.shiro.spring.SpringCacheManagerWrapper">
 3          <property name="cacheManager" ref="springCacheManager"/>
 4    </bean>
 5
 6    <bean id="credentialsMatcher" class="com.github.zhangkaitao.shiro.chapter18.credentials.RetryLimitHashedCredentialsMatcher">
 7         <constructor-arg ref="cacheManager"/>
 8         ...
 9     </bean>
10
11     <bean id="securityManager" class="org.apache.shiro.web.mgt.DefaultWebSecurityManager">
12         <property name="sessionManager" ref="sessionManager"/>
13         <property name="cacheManager" ref="cacheManager"/>
14         ...
15     </bean>
16
17    <bean id="kickoutSessionControlFilter" class="com.github.zhangkaitao.shiro.chapter18.web.shiro.filter.KickoutSessionControlFilter">
18         <property name="cacheManager" ref="cacheManager"/>
19         <property name="sessionManager" ref="sessionManager"/>
20         ...
21     </bean>
22
23  spring-config-cache.xml
24    <bean id="springCacheManager" class="org.springframework.cache.ehcache.EhCacheCacheManager">
25         <property name="cacheManager" ref="ehcacheManager"/>
26    </bean>
27
28    <bean id="ehcacheManager" class="org.springframework.cache.ehcache.EhCacheManagerFactoryBean">
29         <property name="configLocation" value="classpath:ehcache/ehcache.xml"/>
30    </bean>
(2)SessionManager
SessionManager是一个接口。
1 public interface SessionManager {
2     Session start(SessionContext sessionContext);
3     Session getSession(SessionKey sessionKey) throws SessionException;
5 }
类结构图如下:
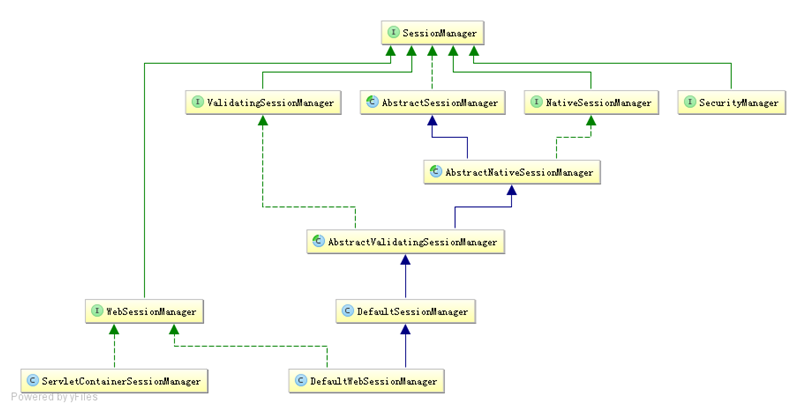
Shiro提供了三个默认实现:
DefaultSessionManager:DefaultSecurityManager使用的默认实现,用于JavaSE环境;
ServletContainerSessionManager:DefaultWebSecurityManager使用的默认实现,用于Web环境,其直接使用Servlet容器的会话;
DefaultWebSessionManager:用于Web环境的实现,可以替代ServletContainerSessionManager,自己维护着会话,直接废弃了Servlet容器的会话管理。
示例中:配置文件spring-config-shiro.xml中使用的是DefaultWebSessionManager。
 1<!-- 会话管理器 -->
 3     <bean id="sessionManager" class="org.apache.shiro.web.session.mgt.DefaultWebSessionManager">
 4     ...
 5     </bean>
 6
 7     <!-- 安全管理器 -->
 8     <bean id="securityManager" class="org.apache.shiro.web.mgt.DefaultWebSecurityManager">
 9         <property name="sessionManager" ref="sessionManager"/>
10         <property name="cacheManager" ref="cacheManager"/>
11         ...
12     </bean>
13
13     <!-- 并发登录控制 -->
14     <bean id="kickoutSessionControlFilter" class="com.github.zhangkaitao.shiro.chapter18.web.shiro.filter.KickoutSessionControlFilter">
15         <property name="cacheManager" ref="cacheManager"/>
16         <property name="sessionManager" ref="sessionManager"/>
17          ...
18     </bean>
我的项目中:配置文件applicationContext-shiro.xml中没有进行sessionManager的配置(为了共享session),所以使用的是shiro的默认实现:ServletContainerSessionManager。(或者运行代码时,可以去看sessionManager的类类型)
 1   <!--文件中没有sessionManager的配置-->
 2
 3   <bean id="securityManager" class="org.apache.shiro.web.mgt.DefaultWebSecurityManager">
 4         <property name="cacheManager" ref="springCacheManager"/>
 5         <!--这里没有配置sessionManager-->
 6         ...
 7     </bean>
 8
 9   <bean id="kickoutSessionControlFilter" class="com.baosight.common.filter.KickoutSessionControlFilter">
10         <property name="cacheManager" ref="springCacheManager"/>
11          <!--这里没有配置sessionManager-->
12          ...
13     </bean>
而这两种实现(DefaultWebSessionManager 和 ServletContainerSessionManager)的区别以及源码分析:
http://blog.csdn.net/qq_26946497/article/details/51064654?locationNum=3
注意:没有配置SessionManager时,默认为ServletContainerSessionManager。