摘要: 原创出处 https://www.cnkirito.moe/spring-security-5/ 「老徐」欢迎转载,保留摘要,谢谢!
在开始这篇文章之前,我们似乎应该思考下为什么需要搞清楚Spring Security的内部工作原理?按照第二篇文章中的配置,一个简单的表单认证不就达成了吗?更有甚者,为什么我们不自己写一个表单认证,用过滤器即可完成,大费周章引入Spring Security,看起来也并没有方便多少。对的,在引入Spring Security之前,我们得首先想到,是什么需求让我们引入了Spring Security,以及为什么是Spring Security,而不是shiro等等其他安全框架。我的理解是有如下几点:
1 在前文的介绍中,Spring Security支持防止csrf攻击,session-fixation protection,支持表单认证,basic认证,rememberMe…等等一些特性,有很多是开箱即用的功能,而大多特性都可以通过配置灵活的变更,这是它的强大之处。
2 Spring Security的兄弟的项目Spring Security SSO,OAuth2等支持了多种协议,而这些都是基于Spring Security的,方便了项目的扩展。
3 SpringBoot的支持,更加保证了Spring Security的开箱即用。
4 为什么需要理解其内部工作原理?一个有自我追求的程序员都不会满足于浅尝辄止,如果一个开源技术在我们的日常工作中十分常用,那么我偏向于阅读其源码,这样可以让我们即使排查不期而至的问题,也方便日后需求扩展。
5 Spring及其子项目的官方文档是我见过的最良心的文档!相比较于Apache的部分文档
这一节,为了对之前分析的Spring Security源码和组件有一个清晰的认识,介绍一个使用IP完成登录的简单demo。
5 动手实现一个IP_Login
5.1 定义需求
在表单登录中,一般使用数据库中配置的用户表,权限表,角色表,权限组表…这取决于你的权限粒度,但本质都是借助了一个持久化存储,维护了用户的角色权限,而后给出一个/login作为登录端点,使用表单提交用户名和密码,而后完成登录后可自由访问受限页面。
在我们的IP登录demo中,也是类似的,使用IP地址作为身份,内存中的一个ConcurrentHashMap维护IP地址和权限的映射,如果在认证时找不到相应的权限,则认为认证失败。
实际上,在表单登录中,用户的IP地址已经被存放在Authentication.getDetails()中了,完全可以只重写一个AuthenticationProvider认证这个IP地址即可,但是,本demo是为了厘清Spring Security内部工作原理而设置,为了设计到更多的类,我完全重写了IP过滤器。
5.2 设计概述
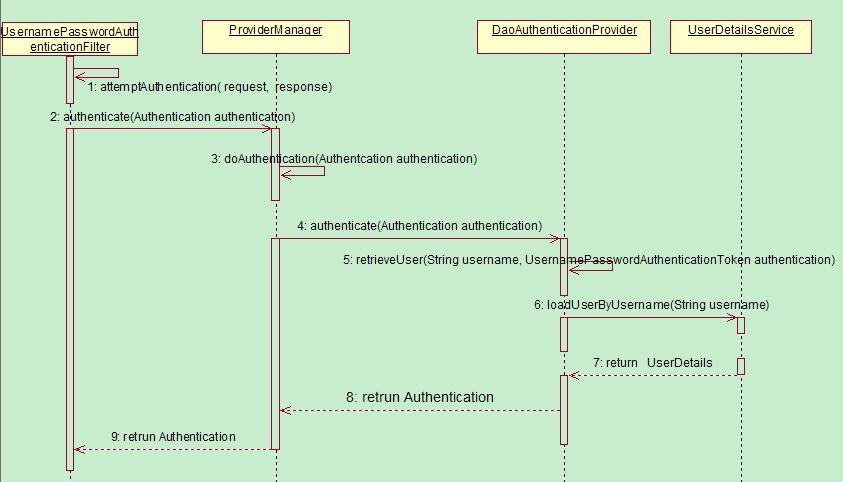
我们的参考完全是表单认证,在之前章节中,已经了解了表单认证相关的核心流程,将此图再贴一遍:
 http://kirito.iocoder.cn/2011121410543010.jpg
在IP登录的demo中,使用IpAuthenticationProcessingFilter拦截IP登录请求,同样使用ProviderManager作为全局AuthenticationManager接口的实现类,将ProviderManager内部的DaoAuthenticationProvider替换为IpAuthenticationProvider,而UserDetailsService则使用一个ConcurrentHashMap代替。更详细一点的设计:
- IpAuthenticationProcessingFilter–>UsernamePasswordAuthenticationFilter
- IpAuthenticationToken–>UsernamePasswordAuthenticationToken
- ProviderManager–>ProviderManager
- IpAuthenticationProvider–>DaoAuthenticationProvider
- ConcurrentHashMap–>UserDetailsService
5.3 IpAuthenticationToken
public class IpAuthenticationToken extends AbstractAuthenticationToken {

    private String ip;

    public String getIp() {
        return ip;
    }

    public void setIp(String ip) {
        this.ip = ip;
    }

    public IpAuthenticationToken(String ip) {
        super(null);
        this.ip = ip;
        super.setAuthenticated(false);//注意这个构造方法是认证时使用的
    }

    public IpAuthenticationToken(String ip, Collection<? extends GrantedAuthority> authorities) {
        super(authorities);
        this.ip = ip;
        super.setAuthenticated(true);//注意这个构造方法是认证成功后使用的

    }

    @Override
    public Object getCredentials() {
        return null;
    }

    @Override
    public Object getPrincipal() {
        return this.ip;
    }

}
5.4 IpAuthenticationProcessingFilter两个构造方法需要引起我们的注意,这里设计的用意是模仿的UsernamePasswordAuthenticationToken,第一个构造器是用于认证之前,传递给认证器使用的,所以只有IP地址,自然是未认证;第二个构造器用于认证成功之后,封装认证用户的信息,此时需要将权限也设置到其中,并且setAuthenticated(true)。这样的设计在诸多的Token类设计中很常见。
-
5.5 IpAuthenticationProviderAbstractAuthenticationProcessingFilter这个过滤器在前面一节介绍过,是UsernamePasswordAuthenticationFilter的父类,我们的IpAuthenticationProcessingFilter也继承了它
public class IpAuthenticationProcessingFilter extends AbstractAuthenticationProcessingFilter {
    //使用/ipVerify该端点进行ip认证
    IpAuthenticationProcessingFilter() {
        super(new AntPathRequestMatcher("/ipVerify"));
    }

    @Override
    public Authentication attemptAuthentication(HttpServletRequest request, HttpServletResponse response) throws AuthenticationException, IOException, ServletException {
        //获取host信息
        String host = request.getRemoteHost();
        //交给内部的AuthenticationManager去认证,实现解耦
        return getAuthenticationManager().authenticate(new IpAuthenticationToken(host));
    }
}
- 构造器中传入了/ipVerify作为IP登录的端点
- attemptAuthentication()方法中加载请求的IP地址,之后交给内部的AuthenticationManager去认证
public class IpAuthenticationProvider implements AuthenticationProvider {
    final static Map<String, SimpleGrantedAuthority> ipAuthorityMap = new ConcurrenHashMap();
    //维护一个ip白名单列表,每个ip对应一定的权限
    static {
        ipAuthorityMap.put("127.0.0.1", new SimpleGrantedAuthority("ADMIN"));
        ipAuthorityMap.put("10.236.69.103", new SimpleGrantedAuthority("ADMIN"));
        ipAuthorityMap.put("10.236.69.104", new SimpleGrantedAuthority("FRIEND"));
    }

    @Override
    public Authentication authenticate(Authentication authentication) throws AuthenticationException {
        IpAuthenticationToken ipAuthenticationToken = (IpAuthenticationToken) authentication;
        String ip = ipAuthenticationToken.getIp();
        SimpleGrantedAuthority simpleGrantedAuthority = ipAuthorityMap.get(ip);
        //不在白名单列表中
        if (simpleGrantedAuthority == null) {
            return null;
        } else {
            //封装权限信息,并且此时身份已经被认证
            return new IpAuthenticationToken(ip, Arrays.asList(simpleGrantedAuthority));
        }
    }

    //只支持IpAuthenticationToken该身份
    @Override
    public boolean supports(Class<?> authentication) {
        return (IpAuthenticationToken.class
                .isAssignableFrom(authentication));
    }
}
5.6 配置WebSecurityConfigAdapterreturn new IpAuthenticationToken(ip, Arrays.asList(simpleGrantedAuthority));使用了IpAuthenticationToken的第二个构造器,返回了一个已经经过认证的IpAuthenticationToken。
@Configuration
@EnableWebSecurity
public class WebSecurityConfig extends WebSecurityConfigurerAdapter {

    //ip认证者配置
    @Bean
    IpAuthenticationProvider ipAuthenticationProvider() {
        return new IpAuthenticationProvider();
    }

    //配置封装ipAuthenticationToken的过滤器
    IpAuthenticationProcessingFilter ipAuthenticationProcessingFilter(AuthenticationManager authenticationManager) {
        IpAuthenticationProcessingFilter ipAuthenticationProcessingFilter = new IpAuthenticationProcessingFilter();
        //为过滤器添加认证器
        ipAuthenticationProcessingFilter.setAuthenticationManager(authenticationManager);
        //重写认证失败时的跳转页面
        ipAuthenticationProcessingFilter.setAuthenticationFailureHandler(new SimpleUrlAuthenticationFailureHandler("/ipLogin?error"));
        return ipAuthenticationProcessingFilter;
    }

    //配置登录端点
    @Bean
    LoginUrlAuthenticationEntryPoint loginUrlAuthenticationEntryPoint(){
        LoginUrlAuthenticationEntryPoint loginUrlAuthenticationEntryPoint = new LoginUrlAuthenticationEntryPoint
                ("/ipLogin");
        return loginUrlAuthenticationEntryPoint;
    }

    @Override
    protected void configure(HttpSecurity http) throws Exception {
        http
            .authorizeRequests()
                .antMatchers("/", "/home").permitAll()
                .antMatchers("/ipLogin").permitAll()
                .anyRequest().authenticated()
                .and()
            .logout()
                .logoutSuccessUrl("/")
                .permitAll()
                .and()
            .exceptionHandling()
                .accessDeniedPage("/ipLogin")
                .authenticationEntryPoint(loginUrlAuthenticationEntryPoint())
        ;

        //注册IpAuthenticationProcessingFilter  注意放置的顺序 这很关键
        http.addFilterBefore(ipAuthenticationProcessingFilter(authenticationManager()), UsernamePasswordAuthenticationFilter.class);

    }

    @Override
    protected void configure(AuthenticationManagerBuilder auth) throws Exception {
        auth.authenticationProvider(ipAuthenticationProvider());
    }

}
5.7 配置SpringMVCWebSecurityConfigAdapter提供了我们很大的便利,不需要关注AuthenticationManager什么时候被创建,只需要使用其暴露的configure(AuthenticationManagerBuilder auth)便可以添加我们自定义的ipAuthenticationProvider。剩下的一些细节,注释中基本都写了出来。
@Configuration
public class MvcConfig extends WebMvcConfigurerAdapter {

    @Override
    public void addViewControllers(ViewControllerRegistry registry) {
        registry.addViewController("/home").setViewName("home");
        registry.addViewController("/").setViewName("home");
        registry.addViewController("/hello").setViewName("hello");
        registry.addViewController("/ip").setViewName("ipHello");
        registry.addViewController("/ipLogin").setViewName("ipLogin");

    }

}
5.8 运行效果页面的具体内容和表单登录基本一致,可以在文末的源码中查看。
成功的流程
http://127.0.0.1:8080/访问首页,其中here链接到的地址为:http://127.0.0.1:8080/hello
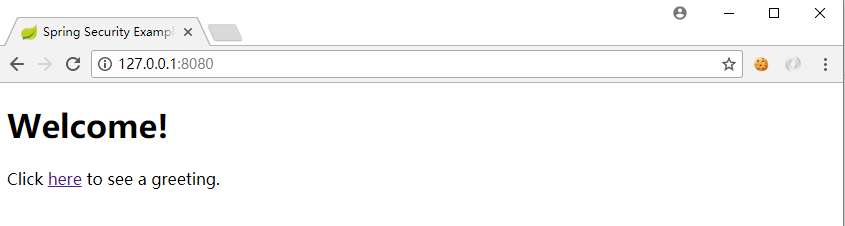 首页
首页
- 点击here,由于
http://127.0.0.1:8080/hello是受保护资源,所以跳转到了校验IP的页面。此时若点击Sign In by IP按钮,将会提交到/ipVerify端点,进行IP的认证。
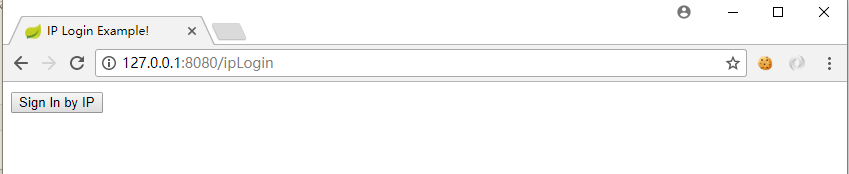 登录
登录
- 登录校验成功之后,页面被成功重定向到了原先访问的
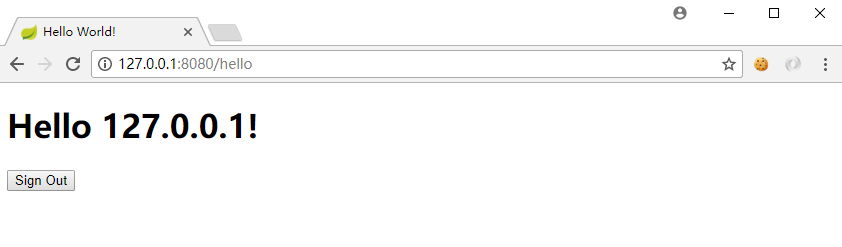 受保护的hello页
失败的流程
- 注意此时已经注销了上次的登录,并且,使用了localhost(localhost和127.0.0.1是两个不同的IP地址,我们的内存中只有127.0.0.1的用户,没有localhost的用户)
 首页
首页
-
点击here后,由于没有认证过,依旧跳转到登录页面
 登录
登录 -
此时,我们发现使用localhost,并没有认证成功,符合我们的预期
 认证失败
认证失败
5.9 总结
一个简单的使用Spring Security来进行验证IP地址的登录demo就已经完成了,这个demo主要是为了更加清晰地阐释Spring Security内部工作的原理设置的,其本身没有实际的项目意义,认证IP其实也不应该通过Spring Security的过滤器去做,退一步也应该交给Filter去做(这个Filter不存在于Spring Security的过滤器链中),而真正项目中,如果真正要做黑白名单这样的功能,一般选择在网关层或者nginx的扩展模块中做。再次特地强调下,怕大家误解。
最后祝大家国庆玩的开心~
本节的代码可以在github中下载源码:https://github.com/lexburner/spring-security-ipLogin