# 先要写一个:
#!/usr/bin/python
import os, time

while True:
    if '192' not in os.popen('sudo wpa_cli status').read():
        print '
****** wifi is down, restart... ******
'
        os.system('sudo ifup wlan0')
    time.sleep(300) #5 minutes
保存为:autowifi.py并后台启动:python /home/pi/autowifi.py &
设置开机启动:(亮点来了,hold my beer)
sudo cp -f /home/pi/autowifi.sh /etc/init.d/
sudo chmod +x /etc/init.d/autowifi.sh
sudo chown root:root /etc/init.d/autowifi.sh
sudo update-rc.d autowifi.sh defaults # ???这句不是太懂
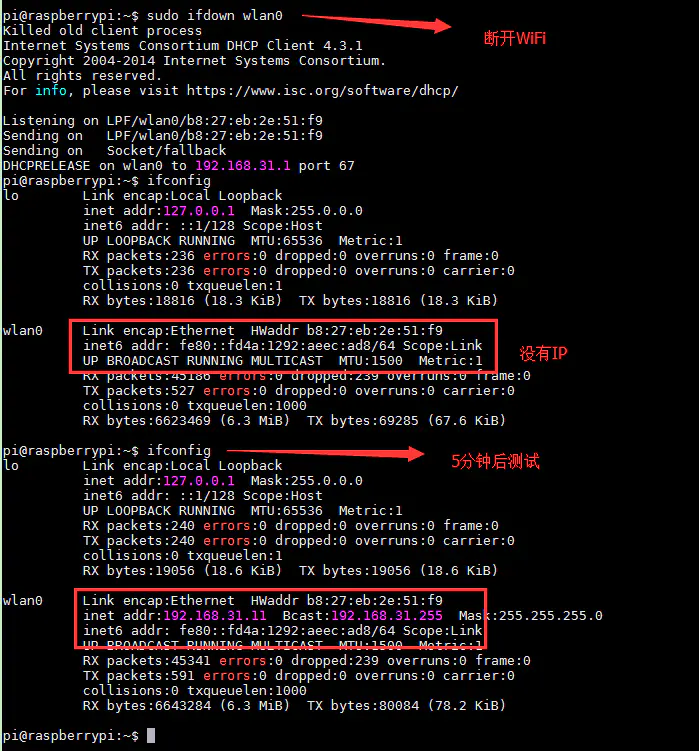
看看大佬的测试结果:

附:树莓派查看Wi-Fi的方法:官方文档
To scan for wireless networks, use the command
sudo iwlist wlan0 scan.
This will list all available wireless networks, along with other useful information.
You can verify whether it has successfully connected using ifconfig wlan0. If the inet addr field has an address beside it, the Raspberry Pi has connected to the network. If not, check that your password and ESSID are correct.
附:树莓派配置Wi-Fi的方法:官方文档
GNU nano 2.2.6    File: /etc/wpa_supplicant/wpa_supplicant.conf

country=GB
ctrl_interface=DIR=/var/run/wpa_supplicant GROUP=netdev
update_config=1

network={
        ssid="你的WiFi名称"
        psk="你的密码"
        key_mgmt="WPA-PSK"
        priority=5
}
network={
        ssid="你的WiFi名称2"
        psk="你的密码2"
        key_mgmt="WPA-PSK"
        priority=4
}
最后一步,更新设置
Reconfigure the interface with
wpa_cli -i wlan0 reconfigure
附:加密上面密码,非明文更安全:官方文档
上面的文件是明文显示密码的,虽然可以通过文件权限控制显示,单总是不安全,其实可以用加密算法加密的:
You can use the
wpa_passphraseutility to generate an encrypted PSK. This takes the SSID and the password, and generates the encrypted PSK.
下面给出实例:
想要加密这个:
network={
    ssid="testing"
    psk="testingPassword"
}
you can generate the PSK with wpa_passphrase "testing". Then you will be asked for the password of the wireless network (in this case testingPassword).
结果如下:
network={
      ssid="testing"
      #psk="testingPassword"
      psk=131e1e221f6e06e3911a2d11ff2fac9182665c004de85300f9cac208a6a80531
  }
更高级别的加密:

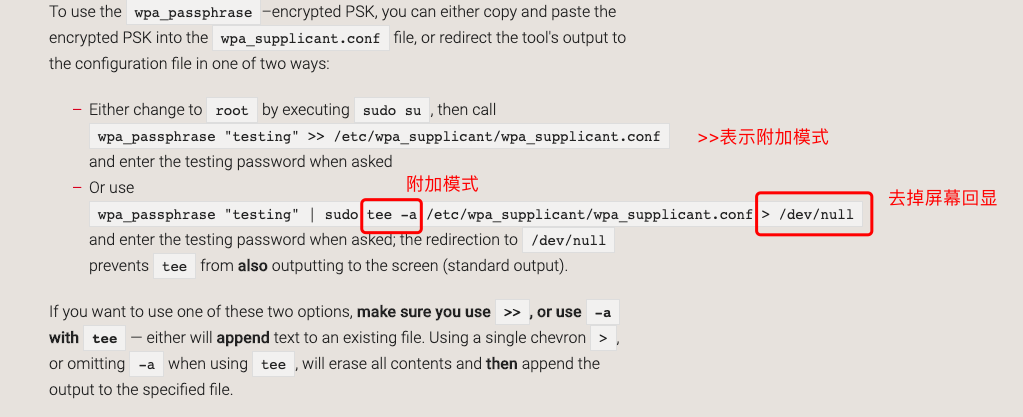
也就是在使用加密工具时,外加一个文档,用后删除,这招绝了,确实难破译
数据重定向

有时候还要设置国家什么的

转自:https://www.jianshu.com/p/e798bf6624aa,致敬anxiaozhu