首先官方的demo项目地址在这里,可以先用idea下载到本地:
https://gitee.com/itCjb/springboot-dubbo-mybatisplus-seata
其实这次我尝试seata都是跟着官方文档来的,我先把文档贴出来吧
https://seata.io/zh-cn/blog/springboot-dubbo-mybatisplus-seata.html 文档1
https://seata.io/zh-cn/blog/seata-nacos-analysis.html 文档2
照着文档1,文档2做就行了,我只是记录一些坑,写的可能顺序性不强,对不住啦。。。。。
文档1和文档2其实是一个顺序关系,文档1使用zookeeper作为配置中心,文档2使用nacos作为配置中心,而项目下载下来之后,zookeeper之类的依赖和配置都已经清理掉了,所以不需要再自己做了。
我用的电脑是windows,nacos的下载安装参照这个官网就行:https://nacos.io/zh-cn/docs/quick-start.html 我就不把这个过程写出来了,所以我的步骤是默认你已经在本机部署好nacos,并且已经可以启动了。
(1)下载seata
连接:https://seata.io/zh-cn/blog/download.html 我的是1.4.2版本
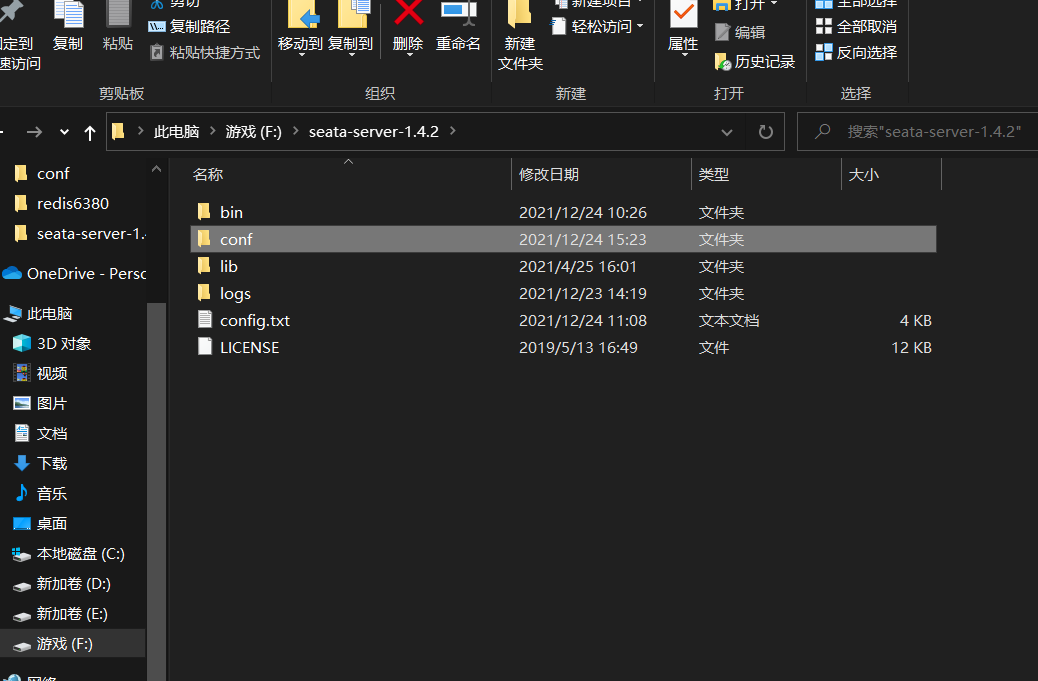
第一个坑:解压之后是这样一个结构:(这一步你们可以试试不这么做行不行。。。)
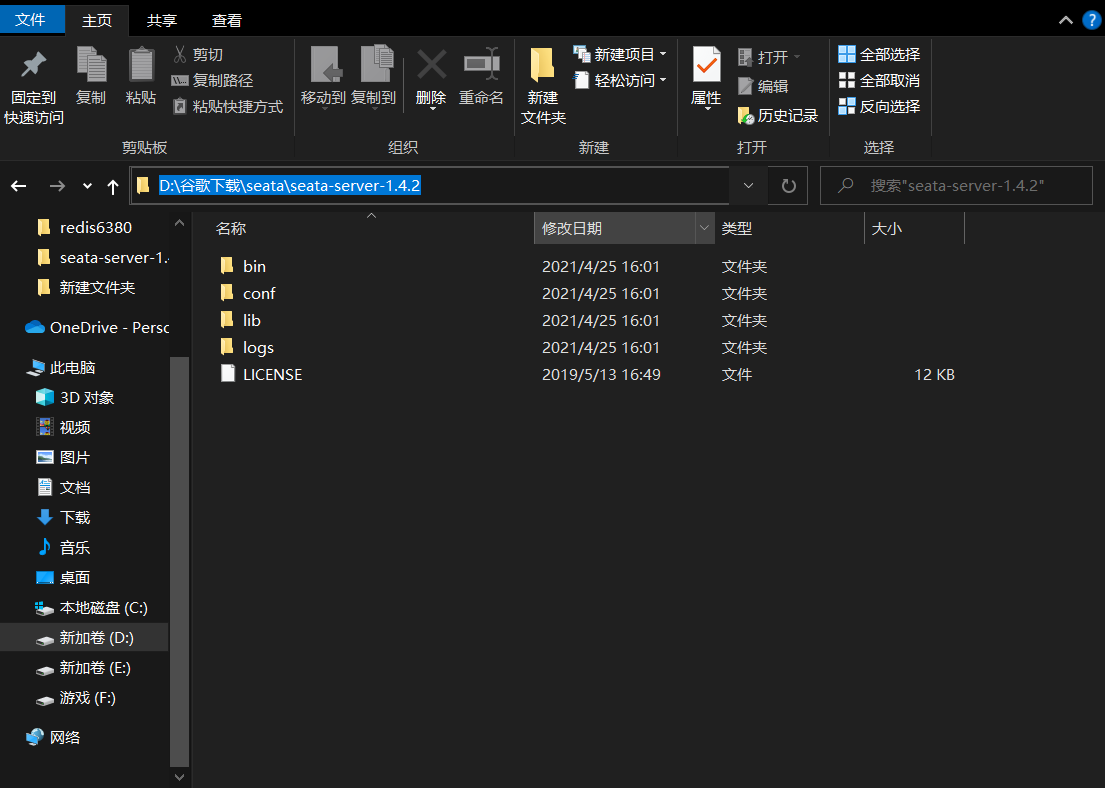
直接把seata-server-1.4.2这个文件夹拷贝出来,直接放在硬盘下面:
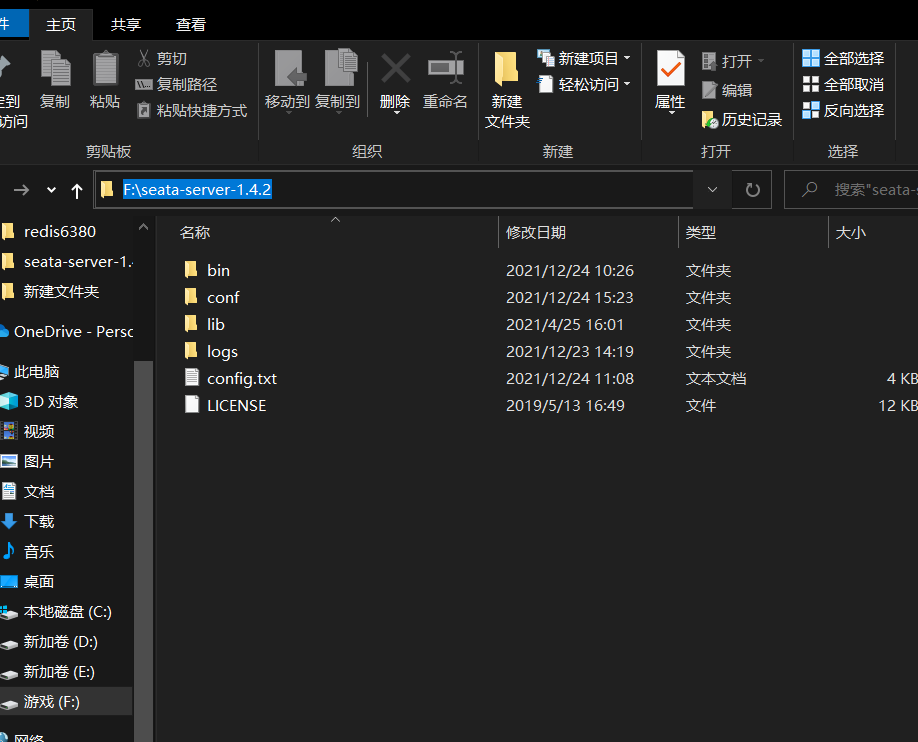
注意config.txt要放在conf文件夹的外层,conf文件夹下面放 nacos-config.sh(向nacos推送seata用的配置的脚本)因为要用到脚本向nacos传输seata的配置,脚本这玩意我也不熟,如果不这样做,脚本会找不到config.txt的位置
(2)第二个坑,在下载的seata-server-1.4.2里面找不到一些文件,比如config.txt,nacos-config.sh等。
解决方法:在conf文件夹下有个readme文件,打开:可以看到所需的一些文件的地址
# 脚本说明

## [client](https://github.com/seata/seata/tree/develop/script/client)

> 存放用于客户端的配置和SQL

- at: AT模式下的 `undo_log` 建表语句
- conf: 客户端的配置文件
- saga: SAGA 模式下所需表的建表语句
- spring: SpringBoot 应用支持的配置文件

## [server](https://github.com/seata/seata/tree/develop/script/server)

> 存放server侧所需SQL和部署脚本

- db: server 侧的保存模式为 `db` 时所需表的建表语句
- docker-compose: server 侧通过 docker-compose 部署的脚本
- helm: server 侧通过 Helm 部署的脚本
- kubernetes: server 侧通过 Kubernetes 部署的脚本

## [config-center](https://github.com/seata/seata/tree/develop/script/config-center)

> 用于存放各种配置中心的初始化脚本,执行时都会读取 `config.txt`配置文件,并写入配置中心

- nacos: 用于向 Nacos 中添加配置
- zk: 用于向 Zookeeper 中添加配置,脚本依赖 Zookeeper 的相关脚本,需要手动下载;ZooKeeper相关的配置可以写在 `zk-params.txt` 中,也可以在执行的时候输入
- apollo: 向 Apollo 中添加配置,Apollo 的地址端口等可以写在 `apollo-params.txt`,也可以在执行的时候输入
- etcd3: 用于向 Etcd3 中添加配置
- consul: 用于向 consul 中添加配置
config.txt和nacos-config.sh在: https://github.com/seata/seata/tree/develop/script/config-center
还有俩文件: https://github.com/seata/seata/tree/develop/script/client/conf
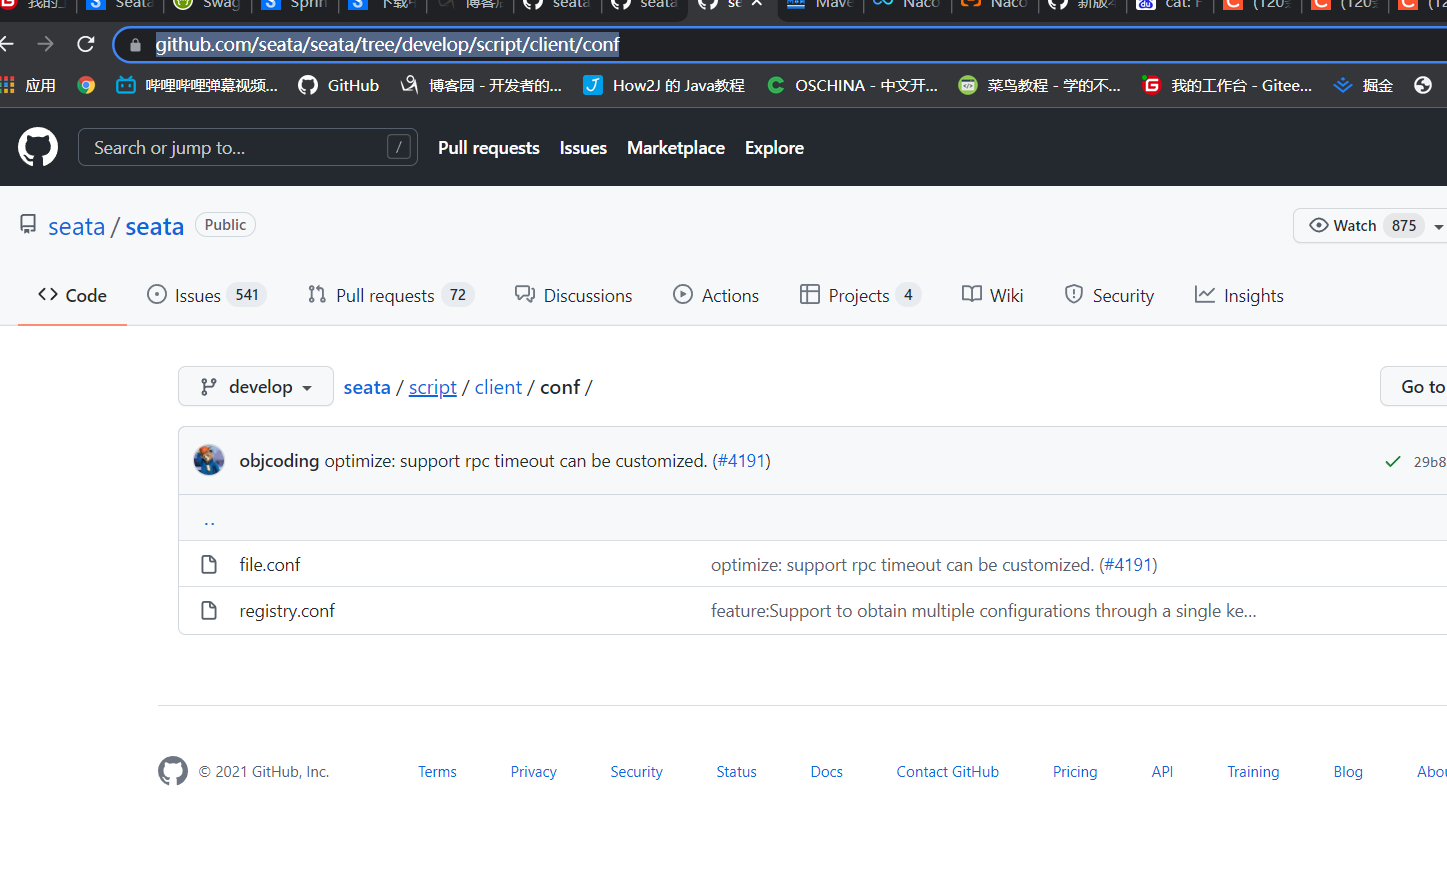
file.conf与registry.conf放在conf文件夹下,应该是把seata配置传到nacos上用得到
file.conf需要改变的地方如下:
## transaction log store, only used in seata-server
store {
  ## store mode: file、db、redis
  mode = "db" #这里要改成db,记得把我写的#后的句子全都删了
  ## rsa decryption public key
  publicKey = ""
  ## file store property
  file {
    ## store location dir
    dir = "sessionStore"
    # branch session size , if exceeded first try compress lockkey, still exceeded throws exceptions
    maxBranchSessionSize = 16384
    # globe session size , if exceeded throws exceptions
    maxGlobalSessionSize = 512
    # file buffer size , if exceeded allocate new buffer
    fileWriteBufferCacheSize = 16384
    # when recover batch read size
    sessionReloadReadSize = 100
    # async, sync
    flushDiskMode = async
  }

  ## database store property
  db {
    ## the implement of javax.sql.DataSource, such as DruidDataSource(druid)/BasicDataSource(dbcp)/HikariDataSource(hikari) etc.
    datasource = "druid"
    ## mysql/oracle/postgresql/h2/oceanbase etc.
    dbType = "mysql"
    driverClassName = "com.mysql.cj.jdbc.Driver" #这里,如果是mysql8,要加个cj
    ## if using mysql to store the data, recommend add rewriteBatchedStatements=true in jdbc connection param
    url = "jdbc:mysql://127.0.0.1:3306/seata?rewriteBatchedStatements=true"
    user = "root"
    password = "admin" #这几行改成自己的数据库和用户名密码
    minConn = 5
    maxConn = 100
    globalTable = "global_table"
    branchTable = "branch_table"
    lockTable = "lock_table"
    queryLimit = 100
    maxWait = 5000
  }

  ## redis store property
  redis {
    ## redis mode: single、sentinel
    mode = "single"
    ## single mode property
    single {
      host = "127.0.0.1"
      port = "6379"
    }
    ## sentinel mode property
    sentinel {
      masterName = ""
      ## such as "10.28.235.65:26379,10.28.235.65:26380,10.28.235.65:26381"
      sentinelHosts = ""
    }
    password = ""
    database = "0"
    minConn = 1
    maxConn = 10
    maxTotal = 100
    queryLimit = 100
  }
}
register.conf用下面这个: 其实就是官方文档的内容https://seata.io/zh-cn/blog/seata-nacos-analysis.html
registry {
  # file 、nacos 、eureka、redis、zk、consul、etcd3、sofa
  type = "nacos" #这里注意   删掉我的字

  nacos {
    serverAddr = "localhost"
    namespace = ""
    cluster = "default"
  }
  eureka {
    serviceUrl = "http://localhost:8761/eureka"
    application = "default"
    weight = "1"
  }
  redis {
    serverAddr = "localhost:6379"
    db = "0"
  }
  zk {
    cluster = "default"
    serverAddr = "127.0.0.1:2181"
    session.timeout = 6000
    connect.timeout = 2000
  }
  consul {
    cluster = "default"
    serverAddr = "127.0.0.1:8500"
  }
  etcd3 {
    cluster = "default"
    serverAddr = "http://localhost:2379"
  }
  sofa {
    serverAddr = "127.0.0.1:9603"
    application = "default"
    region = "DEFAULT_ZONE"
    datacenter = "DefaultDataCenter"
    cluster = "default"
    group = "SEATA_GROUP"
    addressWaitTime = "3000"
  }
  file {
    name = "file.conf"
  }
}

config {
  # file、nacos 、apollo、zk、consul、etcd3
  type = "nacos"

  nacos {
    serverAddr = "localhost"
    namespace = ""
  }
  consul {
    serverAddr = "127.0.0.1:8500"
  }
  apollo {
    app.id = "seata-server"
    apollo.meta = "http://192.168.1.204:8801"
  }
  zk {
    serverAddr = "127.0.0.1:2181"
    session.timeout = 6000
    connect.timeout = 2000
  }
  etcd3 {
    serverAddr = "http://localhost:2379"
  }
  file {
    name = "file.conf"
  }
}
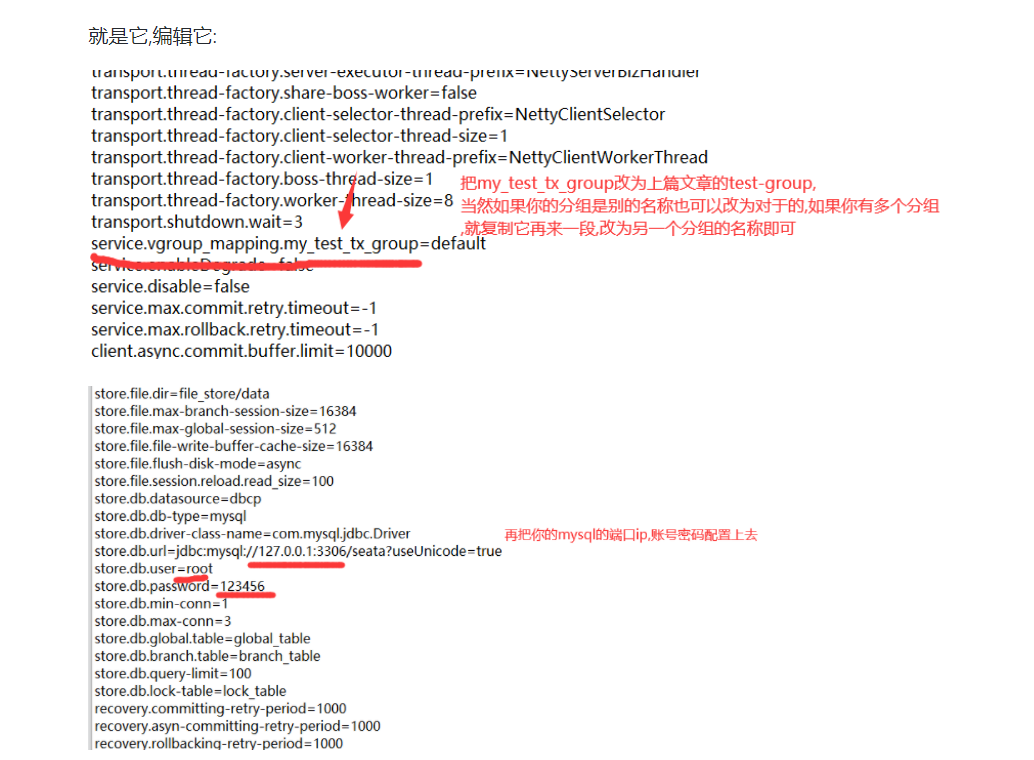
(3)坑:config.txt文件的改动 还是文档2里的图
图里面有一行已经过时了:要用下面这行
service.vgroupMapping.my_test_tx_group=default
之后注意一下config.txt文档的位置,要在conf文件夹外面,这样脚本才能把seata配置打在nacos上
之后运行nacos.config.sh即可
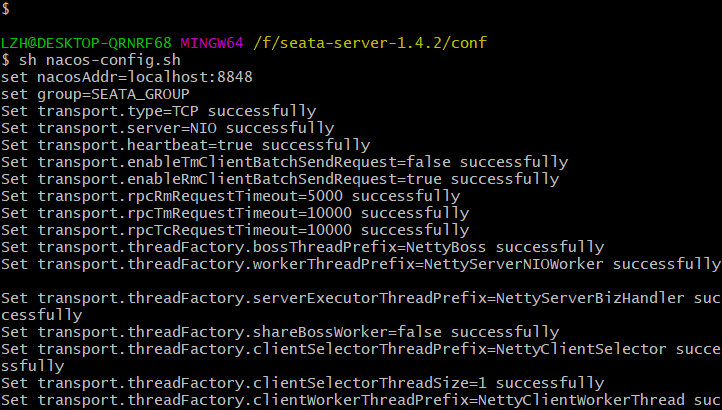
nacos配置中心里面有配置就行

(4)坑4
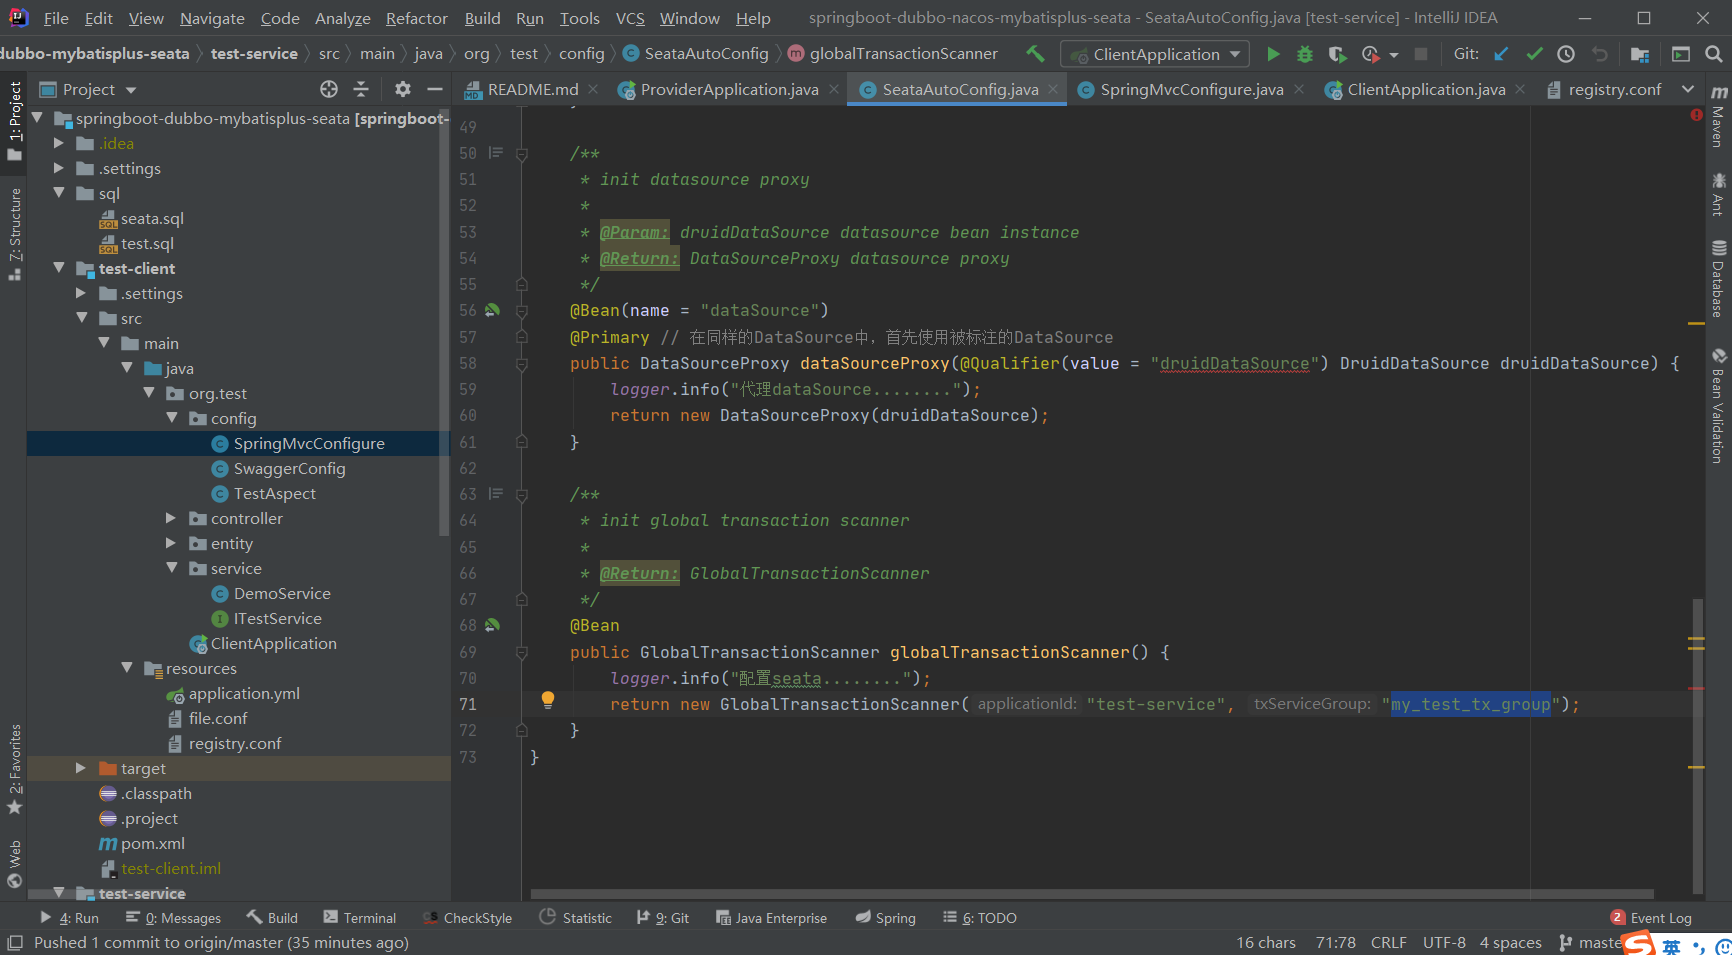
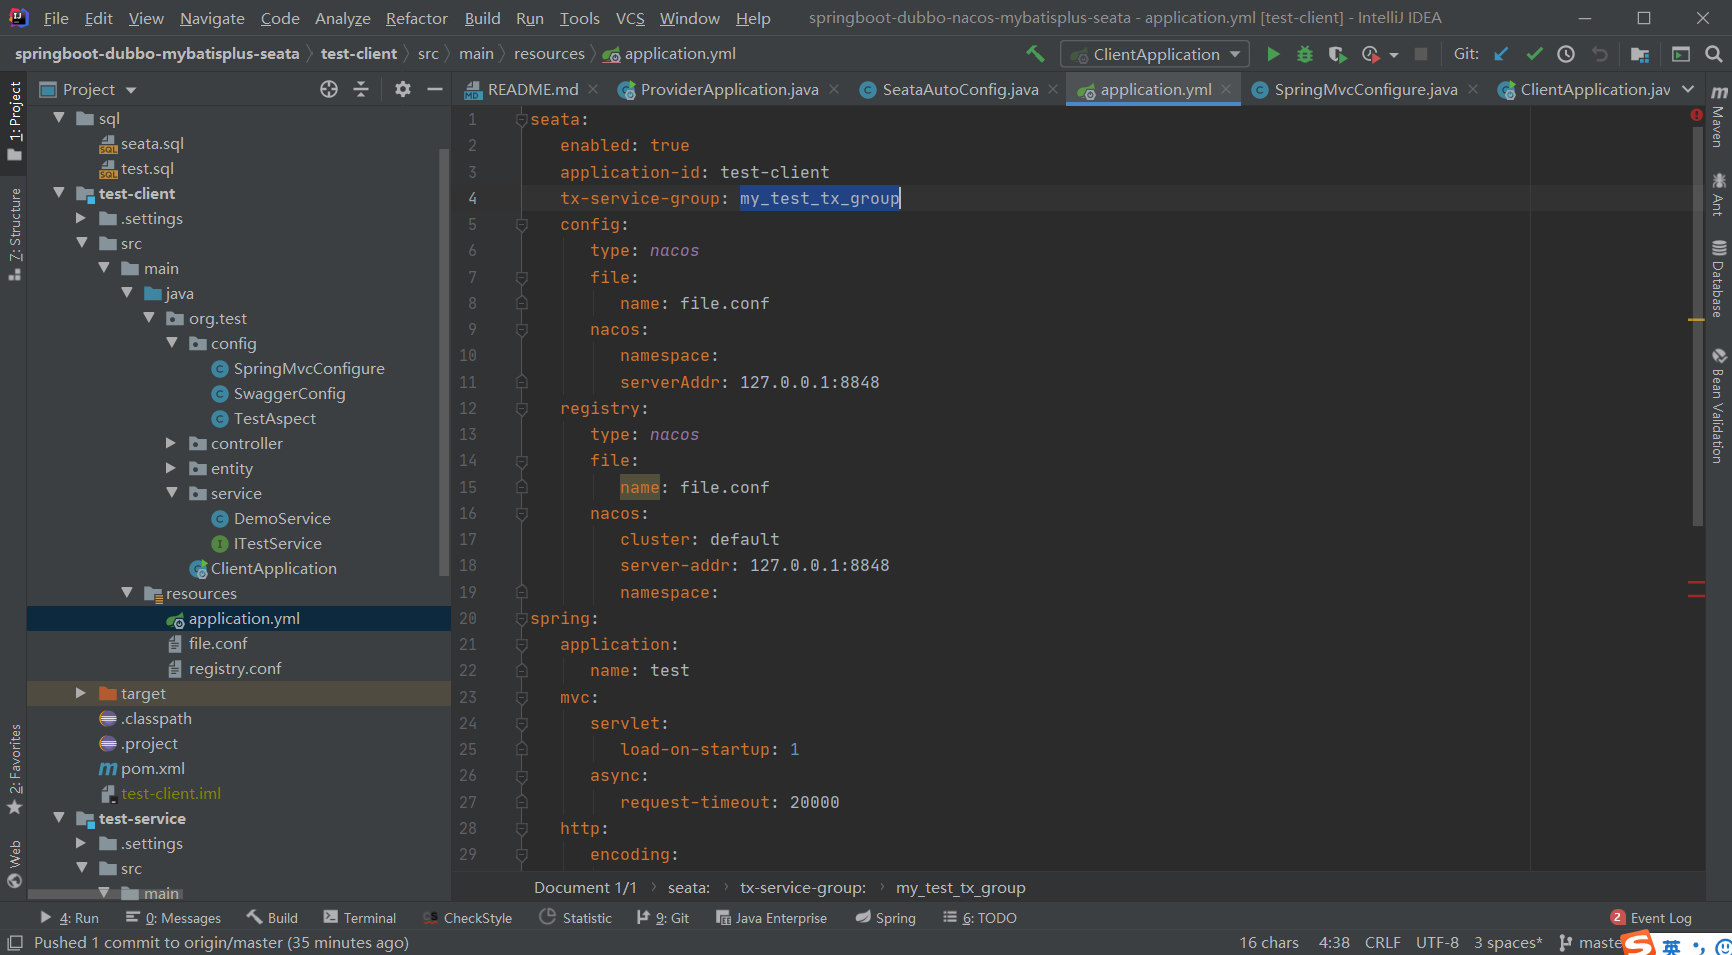
service.vgroupMapping.my_test_tx_group=default
这个group默认就是my_test这个,要与代码里的对齐


(5)最大的坑
下载下来的demo代码,是不完整的,我当时以为里面的代码是完整的,直接没看文档一,看文档2做,死活跑不出来,直到最后才发现要按照文档1把一些代码加上。。。比如swagger的配置,
还有文档一里的下面这段,是数据源的配置,要写在服务提供者里面,当然test-client里面也有一些代码需要加,我就不细说了,记得要从头到尾把文档一看一下,demo里面没有的代码记得加上,zookeeper相关的可以不管
package org.test.config;

import javax.sql.DataSource;

import org.slf4j.Logger;
import org.slf4j.LoggerFactory;
import org.springframework.beans.factory.annotation.Autowired;
import org.springframework.beans.factory.annotation.Qualifier;
import org.springframework.boot.autoconfigure.jdbc.DataSourceProperties;
import org.springframework.context.annotation.Bean;
import org.springframework.context.annotation.Configuration;
import org.springframework.context.annotation.Primary;

import com.alibaba.druid.pool.DruidDataSource;

import io.seata.rm.datasource.DataSourceProxy;
import io.seata.spring.annotation.GlobalTransactionScanner;

@Configuration
public class SeataAutoConfig {
    @Autowired(required = true)
    private DataSourceProperties dataSourceProperties;
    private final static Logger logger = LoggerFactory.getLogger(SeataAutoConfig.class);

    @Bean(name = "druidDataSource") // 声明其为Bean实例
    public DataSource druidDataSource() {
        DruidDataSource druidDataSource = new DruidDataSource();
        logger.info("dataSourceProperties.getUrl():{}", dataSourceProperties.getUrl());
        druidDataSource.setUrl(dataSourceProperties.getUrl());
        druidDataSource.setUsername(dataSourceProperties.getUsername());
        druidDataSource.setPassword(dataSourceProperties.getPassword());
        druidDataSource.setDriverClassName(dataSourceProperties.getDriverClassName());
        druidDataSource.setInitialSize(0);
        druidDataSource.setMaxActive(180);
        druidDataSource.setMaxWait(60000);
        druidDataSource.setMinIdle(0);
        druidDataSource.setValidationQuery("Select 1 from DUAL");
        druidDataSource.setTestOnBorrow(false);
        druidDataSource.setTestOnReturn(false);
        druidDataSource.setTestWhileIdle(true);
        druidDataSource.setTimeBetweenEvictionRunsMillis(60000);
        druidDataSource.setMinEvictableIdleTimeMillis(25200000);
        druidDataSource.setRemoveAbandoned(true);
        druidDataSource.setRemoveAbandonedTimeout(1800);
        druidDataSource.setLogAbandoned(true);
        logger.info("装载dataSource........");
        return druidDataSource;
    }

    /**
     * init datasource proxy
     *
     * @Param: druidDataSource datasource bean instance
     * @Return: DataSourceProxy datasource proxy
     */
    @Bean(name = "dataSource")
    @Primary // 在同样的DataSource中,首先使用被标注的DataSource
    public DataSourceProxy dataSourceProxy(@Qualifier(value = "druidDataSource") DruidDataSource druidDataSource) {
        logger.info("代理dataSource........");
        return new DataSourceProxy(druidDataSource);
    }

    /**
     * init global transaction scanner
     *
     * @Return: GlobalTransactionScanner
     */
    @Bean
    public GlobalTransactionScanner globalTransactionScanner() {
        logger.info("配置seata........");
        return new GlobalTransactionScanner("test-service", "test-group");
    }
}
还有就是,官方的demo里面,test-client和test-service的resource目录下也是要放file.conf与registry.conf的,这俩文件和seata-service-1.4.2(也就是seata服务)里面的同名文件是不同的!要看文档一里的
file.conf:
transport {
  type = "TCP"
  server = "NIO"
  heartbeat = true
  thread-factory {
    boss-thread-prefix = "NettyBoss"
    worker-thread-prefix = "NettyServerNIOWorker"
    server-executor-thread-prefix = "NettyServerBizHandler"
    share-boss-worker = false
    client-selector-thread-prefix = "NettyClientSelector"
    client-selector-thread-size = 1
    client-worker-thread-prefix = "NettyClientWorkerThread"
    boss-thread-size = 1
    worker-thread-size = 8
  }
  shutdown {
    wait = 3
  }
  serialization = "seata"
  compressor = "none"
}
service {
  vgroup_mapping.test-group = "default"
  default.grouplist = "127.0.0.1:8091"
  enableDegrade = false
  disable = false
  max.commit.retry.timeout = "-1"
  max.rollback.retry.timeout = "-1"
}

client {
  async.commit.buffer.limit = 10000
  lock {
    retry.internal = 10
    retry.times = 30
  }
  report.retry.count = 5
  tm.commit.retry.count = 1
  tm.rollback.retry.count = 1
  undo.log.table = "undo_log"
}

recovery {
  committing-retry-period = 1000
  asyn-committing-retry-period = 1000
  rollbacking-retry-period = 1000
  timeout-retry-period = 1000
}

transaction {
  undo.data.validation = true
  undo.log.serialization = "jackson"
  undo.log.save.days = 7
  undo.log.delete.period = 86400000
  undo.log.table = "undo_log"
}

metrics {
  enabled = false
  registry-type = "compact"
  exporter-list = "prometheus"
  exporter-prometheus-port = 9898
}

support {
  spring {
    datasource.autoproxy = false
  }
}
registry.conf:
registry {
  type = "file"
  file {
    name = "file.conf"
  }
}
config {
  type = "file"
  file {
    name = "file.conf"
  }
  zk {
    serverAddr = "127.0.0.1:2181"
    session.timeout = 6000
    connect.timeout = 2000
  }
}
(6)依赖要和seata的版本一致,seata用的是1.42版本。
<dependency>
        <groupId>io.seata</groupId>
        <artifactId>seata-spring-boot-starter</artifactId>
        <version>${seata.version}</version>
        <exclusions>
          <exclusion>
            <groupId>com.alibaba</groupId>
            <artifactId>druid</artifactId>
          </exclusion>
        </exclusions>
      </dependency>