上一篇我们简单对MvvmLight做了介绍。罗列了三个DLL中,各个命名空间下主要类的定义及大致作用。因为只是范范的概论,对于从未接触过MvvmLight的萌新来说,根本就是在晃点他们。不过万事开头难么,本篇则会以Hello World般的简单例子,来给萌新们当头一击,教会他们使用MvvmLight最最基础的部分。
首先还是动手练习,打开免费又强大的Visual Studio 2015 Community,创建一个WPF Application。不创建Win10的Universal App是因为MvvmLight V5.2还不能给Universal App自动添加ViewModel等代码(我们下次自己加)。不使用8.1 Runtime App是因为我没在自己电脑上装8.1的SDK ^o^。
新建的WPF Application是一个简单至极的空项目,仅有App.xaml和MainWindow.xaml两个文件。XAML文件空空如也。

然后我们通过NuGet添加MvvmLight的类库,完成之后多出ViewModel文件夹,包含以下两个文件:
MainViewModel.cs
ViewModelLocator.cs
另外App.xaml里将ViewModelLocator作为资源添加全局的Application.Resources里:
      <Application.Resources>
        <ResourceDictionary>
          <vm:ViewModelLocator x:Key="Locator" d:IsDataSource="True" xmlns:vm="clr-namespace:HelloMvvmLight.ViewModel" />
        </ResourceDictionary>
    </Application.Resources>
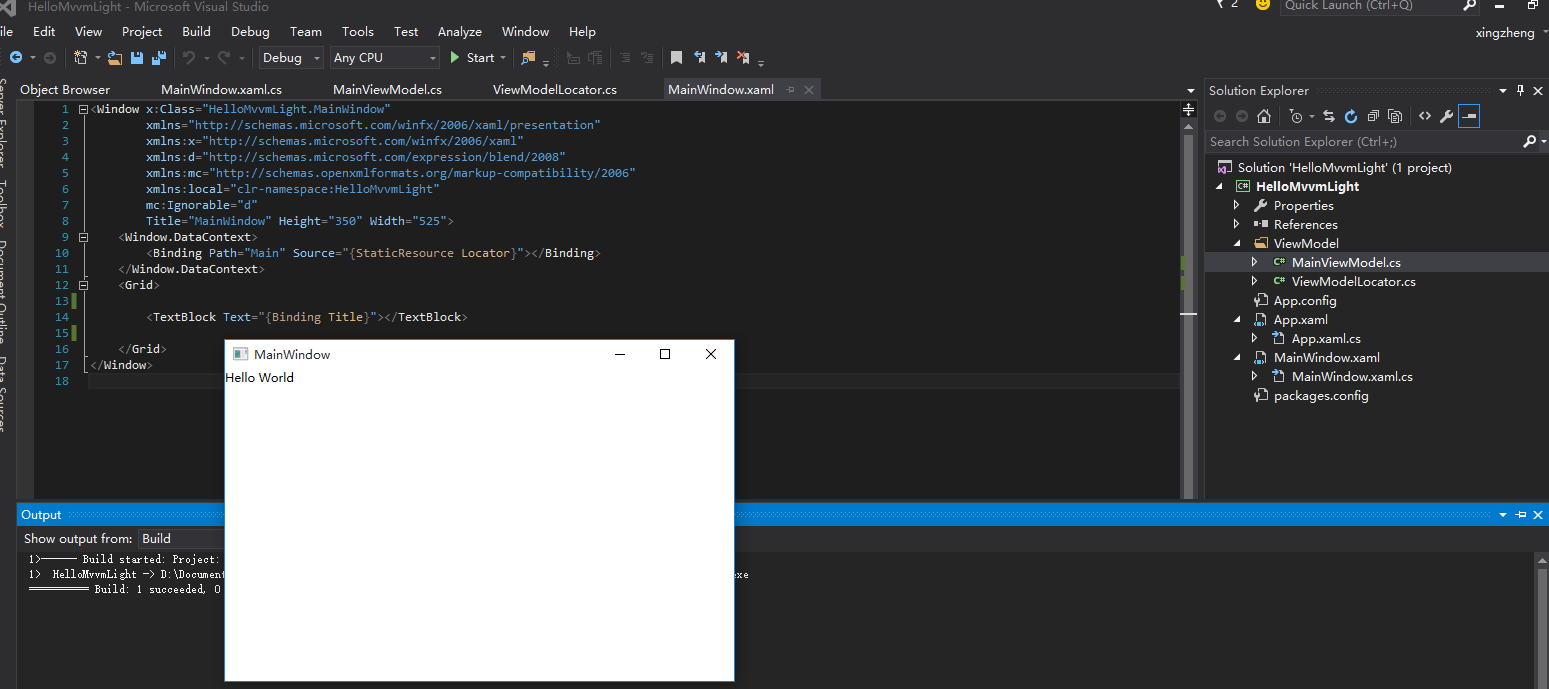
非常遗憾没有像Windows Phone工程那样贴心的在MainWindow里添加对MainViewModel的DataContext绑定,心情很糟糕的我们只有自己来了,顺便给MainViewModel里加上HelloWord的字样呗,完成后运行如下图:
下面我们来大致讲解MvvmLight在程序中起到的作用。
MainWindow对应的ViewModel是MainViewModel,通常我们是在MainWindow的XAML或cs文件里new一个ViewModel的实例,赋值给DataContext。但在MvvmLight中,创建实例的工作,交给了ViewModelLocator这个类。
在类ViewModelLocator里,我们注册了MainViewModel,并通过属性Main来获取实例。

    public class ViewModelLocator
    {
        /// <summary>
        /// Initializes a new instance of the ViewModelLocator class.
        /// </summary>
        public ViewModelLocator()
        {
            ServiceLocator.SetLocatorProvider(() => SimpleIoc.Default);
            SimpleIoc.Default.Register<MainViewModel>();
        }

        public MainViewModel Main
        {
            get
            {
                return ServiceLocator.Current.GetInstance<MainViewModel>();
            }
        }

        public static void Cleanup()
        {
            // TODO Clear the ViewModels
        }
    }
之前提到安装MvvmLight库时App.xaml添加了ViewModelLocator实例的资源,在XAML中以StaticResource key的形式获取,Binding到MainWindow的DataContext。
    <Window.DataContext>
            <Binding Path="Main" Source="{StaticResource Locator}"></Binding>
    </Window.DataContext>
使用ViewModelLocator有啥好处呢?
首先View和ViewModel之间不再直接引用,而是通过ViewModelLocator关联。
其次储存在ViewModelLocator里的ViewModel类似于单例的存在,可以在全局引用绑定。
同时避免了某些情况下频繁创建ViewModel,却未做好资源释放造成的内存泄漏。(这里并不是说所有的ViewModel都必须放到ViewModelLocator)
下面我们来看下Command是如何绑定的,通知PropertyChanged以及ViewModelBase类 。
我们添加一个Button,然后通过Command来把文字修改为Hello MvvmLight。
ViewModel的代码:
    public class MainViewModel : ViewModelBase
    {
        private string title;

        public string Title
        {
            get { return title; }
            set { Set(ref title , value); }
        }

        public ICommand ChangeTitleCommand { get; set; }

        /// <summary>
        /// Initializes a new instance of the MainViewModel class.
        /// </summary>
        public MainViewModel()
        {
            Title = "Hello World";
            ChangeTitleCommand = new RelayCommand(ChangeTitle);
        }

        private void ChangeTitle()
        {
            Title = "Hello MvvmLight";
        }
    }
MainWindow的XAML:
<Window x:Class="HelloMvvmLight.MainWindow"
        xmlns="http://schemas.microsoft.com/winfx/2006/xaml/presentation"
        xmlns:x="http://schemas.microsoft.com/winfx/2006/xaml"
        xmlns:d="http://schemas.microsoft.com/expression/blend/2008"
        xmlns:mc="http://schemas.openxmlformats.org/markup-compatibility/2006"
        xmlns:local="clr-namespace:HelloMvvmLight"
        mc:Ignorable="d"
        Title="MainWindow" Height="350" Width="525">
    <Window.DataContext>
        <Binding Path="Main" Source="{StaticResource Locator}"></Binding>
    </Window.DataContext>
    <Grid>
        <Grid.RowDefinitions>
            <RowDefinition></RowDefinition>
            <RowDefinition></RowDefinition>
        </Grid.RowDefinitions>
        <TextBlock Text="{Binding Title}"></TextBlock>
        <Button Grid.Row="1" Command="{Binding ChangeTitleCommand}"></Button>
    </Grid>
</Window>
MvvmLight很贴心的为我们实现了RelayCommand类,该类继承自ICommand接口。直接在XAML里绑定就可以了。当然如果是没有提供Command属性的控件,就需要用到Blend来添加behavior了(可以期待后续篇章介绍)。
MvvmLight的ViewModelBase很有意思,继承了INotifyPropertyChanged接口,并提供了一个Set方法来给属性赋值,简单理解就是不用自己在ViewModel实现INotifyPropertyChanged,然后在属性赋值时通知了。当然MvvmLight也提供了手动通知的方法:
        protected virtual void RaisePropertyChanged([CallerMemberName] string propertyName = null);

        protected virtual void RaisePropertyChanged<T>(Expression<Func<T>> propertyExpression);
至此一个最简单的使用MvvmLight框架的程序已经完成了。因为是入门写的比较简单,请各位大牛轻踩。
转自:http://www.cnblogs.com/manupstairs/p/4909585.html