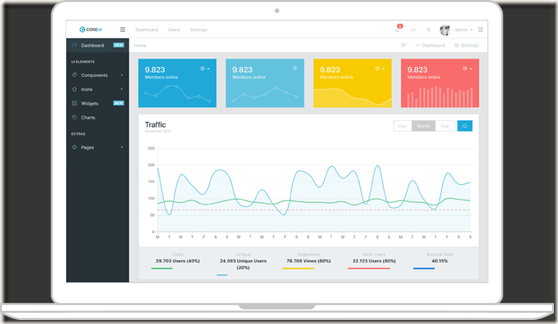
开源地址:https://github.com/mrholek/CoreUI-Free-Bootstrap-Admin-Template/tree/master/Angular2_CLI_Starter
分页插件在:https://github.com/michaelbromley/ng2-pagination
操作步骤:
下载到本地,解压Angular2_CLI_Full_Project,这个是Demo完整包,
在Angular2_CLI_Full_Project目录下执行 npm install,完成node_modules的下载。
执行ng serve启动服务,默认端口是4200。如果要发布可以运行ng build将会生成一个disk目录,即为发布目录。
开发步骤:
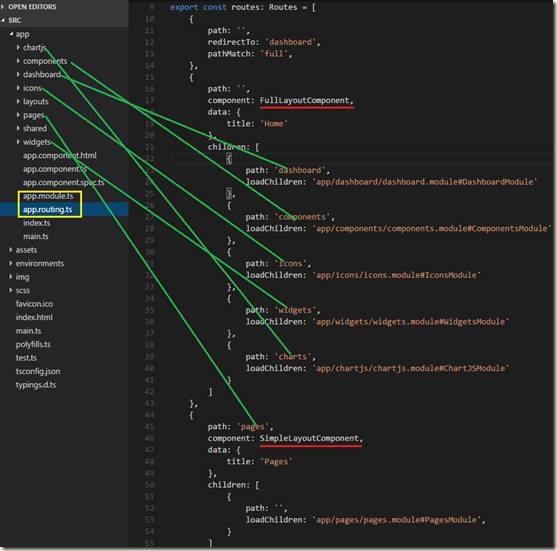
先分析一下目录
绿线代表系统的模块,在路由中配置访问路径,但是为什么把pages和其他的单独开了呢?后面再说。
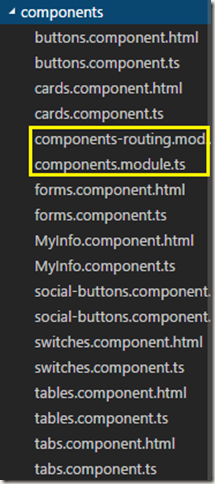
按照这个模块思路,我们拿一个研究,打开components模块。
这里面有该模块的路由文件(黄色线部分)。我新建了一个MyInfo页面,需要修改这2个文件。首先打开components.module.ts,添加2句:
import { MyInfoComponent } from './MyInfo.component';
declarations: [
…
MyInfoComponent
]
页面加了,还得配置菜单,才能点进来,打开Layouts目录下的full-layout.component.html,在components下面添加
<li class="nav-item">
<a class="nav-link" routerLinkActive="active" [routerLink]="['/components/myinfo']"><i class="icon-star"></i> My Info</a>
</li>
为什么要打开full-layout.component.html文件加菜单呢?和上面是同一个问题。
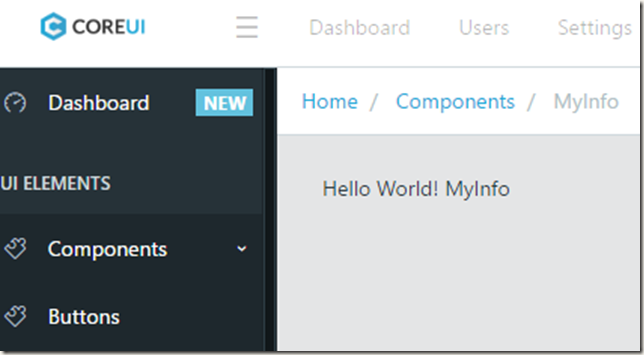
运行起来效果是:
那么加其他页面道理一样。
现在来回答上面的问题:
path: '',
component: FullLayoutComponent,
data: {
title: 'Home'
},
children: [
{
path: 'dashboard',
loadChildren: 'app/dashboard/dashboard.module#DashboardModule'
},
{
path: 'components',
loadChildren: 'app/components/components.module#ComponentsModule'
},…
]
意思是将children中的页面加载到FullLayoutComponent组件的指定位置,所以刚才运行结果有菜单,有样式等等。加载的位置用<router-outlet></router-outlet>表示定义了视图的显示位置,即导航的模块显示区域。
而pages:
path: 'pages',
component: SimpleLayoutComponent,
data: {
title: 'Pages'
},
children: [
{
path: '',
loadChildren: 'app/pages/pages.module#PagesModule',
}
]
用的是SimpleLayoutComponent组件,所以没有菜单。要做多风格系统使用这个再合适不过了。
顺便说一句:使用基于TypeScript的Angular2 开发web应用真心不是一般的爽。
Angular 2 分页说明:
1. 先下载插件:npm install ng2-pagination --save
2. 添加引用:
在components.module.ts中加入:
@NgModule({
    imports: [
        CommonModule,
        ComponentsRoutingModule,
        TabsModule,
        Ng2PaginationModule
    ],
另需要引入,否则报什么属性不能绑定什么的那个错:
import { CommonModule } from '@angular/common';
import { BrowserModule } from '@angular/platform-browser';
import { Ng2PaginationModule } from 'ng2-pagination'; //importing ng2-pagination
3. ts代码:
import { ChangeDetectionStrategy, Component, Input } from "@angular/core";

@Component({
    templateUrl: 'MyInfo.component.html',
    changeDetection: ChangeDetectionStrategy.OnPush
})
export class MyInfoComponent {

    @Input('data') meals: string[];
    page: number = 1;
    total: number;

    ngOnInit() {
        this.getPage(1);
    }
    getPage(page: number) {
        this.meals = [
            "111111111111",
            "222222222222",
            "3333333333333",
            "4444444444444",
            "555555555555555",
        ];
        this.page=page;
        alert(page);
        this.total=16;
    }
    constructor() { };
}
Html代码:
<ul class="meal-list">
    <li *ngFor="let meal of meals | paginate: { itemsPerPage: 5, currentPage: page, totalItems: total,id: 'server' }">
        {{ meal }}
    </li>
</ul>
<div class="is-text-centered">
<pagination-controls (pageChange)="getPage($event)" id="server"></pagination-controls>
</div>
另外样式有冲突,我改了下:
exports.DEFAULT_STYLES = ".ng2-pagination { margin-left:0; margin-bottom:1rem;}.ng2-pagination::before,.ng2-pagination::after { content:' '; display:table;}.ng2-pagination::after { clear:both;}.ng2-pagination li { -moz-user-select:none; -webkit-user-select:none; -ms-user-select:none; font-size:0.875rem; margin-right:0.0625rem; border-radius:0;}.ng2-pagination li { display:inline-block;}.ng2-pagination a,.ng2-pagination button { color:#0a0a0a; display:block; padding:0.1875rem 0.625rem; border-radius:0; cursor:pointer; }.ng2-pagination a:hover,.ng2-pagination button:hover { background:#e6e6e6; cursor:pointer; }.ng2-pagination .current { padding:0.1875rem 0.625rem; background:#2199e8; color:#fefefe; cursor:default;}.ng2-pagination .disabled { padding:0.1875rem 0.625rem; color:#cacaca; cursor:default;}.ng2-pagination .disabled:hover { background:transparent;}.ng2-pagination .ellipsis::after { content:'u2026'; padding:0.1875rem 0.625rem; color:#0a0a0a;}.ng2-pagination .pagination-previous a::before,.ng2-pagination .pagination-previous.disabled::before { content:'u00AB'; display:inline-block; margin-right:0.5rem;}.ng2-pagination .pagination-next a::after,.ng2-pagination .pagination-next.disabled::after { content:'u00BB'; display:inline-block; margin-left:0.5rem;}.ng2-pagination .show-for-sr { position:absolute !important; 1px; height:1px; overflow:hidden; clip:rect(0,0,0,0);}";
在node_modules g2-paginationdist emplate.js


