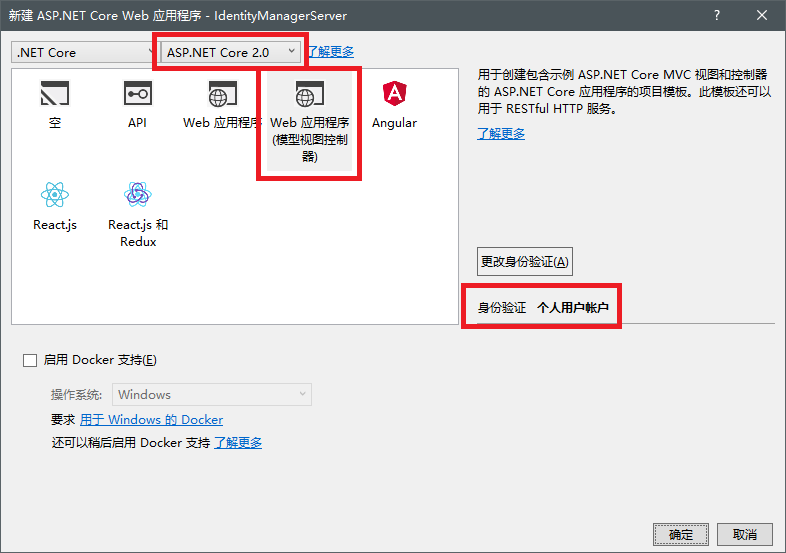
新建 ASP.NET Core Identity 项目
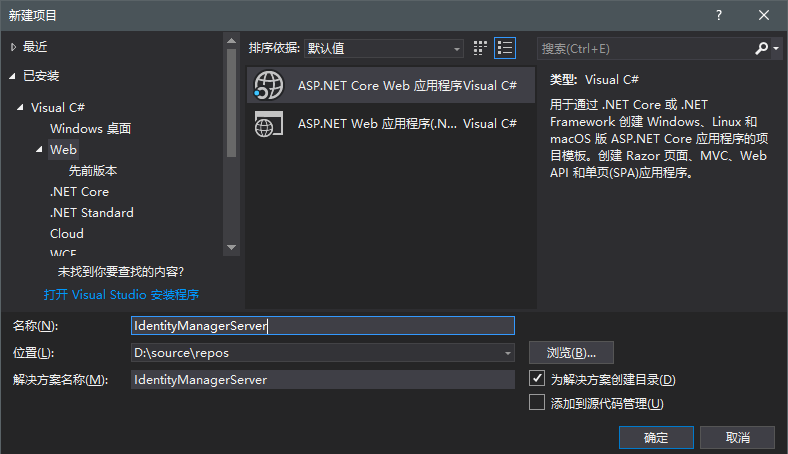
在新建 ASP.NET Core Web 应用程序 窗口中分别选择:ASP.NET Core 2.0,Web应用程序(模型视图控制器)和个人用户账号
项目建立后, 运行方式改为使用控制台运行而不是IISExpress, 以便查看各种debug信息.
打开launchSettings.json:
{
  "profiles": {
    "IdentityManagerServer": {
      "commandName": "Project",
      "launchBrowser": true,
      "environmentVariables": {
        "ASPNETCORE_ENVIRONMENT": "Development"
      },
      "applicationUrl": "http://localhost:5000/"
    }
  }
}
把IISExpress相关的内容删掉, 然后端口改为5000。
Program.cs里的BuildWebHost也应该加上Url:
        public static IWebHost BuildWebHost(string[] args) =>
            WebHost.CreateDefaultBuilder(args)
                .UseStartup<Startup>()
                .UseUrls("http://*:5000")
                .UseKestrel()
                .Build();
项目名称上右键,选择 编辑IdentityManagerServer.csproj
项目最终部署在 Ubuntu Server 上,发布时要把服务器需要的包全部发布出来,通过在 csjproj 文件中增加以下一行来实现这个目的:
<PublishWithAspNetCoreTargetManifest>false</PublishWithAspNetCoreTargetManifest>
看起来象下行这个样子:
  <PropertyGroup>
    <TargetFramework>netcoreapp2.0</TargetFramework>
    <PublishWithAspNetCoreTargetManifest>false</PublishWithAspNetCoreTargetManifest>
    <UserSecretsId>aspnet-IdentityManagerServer-47CFE0C9-3D63-4880-B670-22AD145CF51C</UserSecretsId>
  </PropertyGroup>
没有添加上面那一行,发布后在 Ubuntu 上运行时会显示类似以下的错误:
Error:
An assembly specified in the application dependencies manifest (..deps.json) was not found:
package: 'Microsoft.AspNetCore.Antiforgery', version: '2.0.3'
path: 'lib/netstandard2.0/Microsoft.AspNetCore.Antiforgery.dll'
This assembly was expected to be in the local runtime store as the application was published using the following target manifest files:
aspnetcore-store-2.0.8.xml
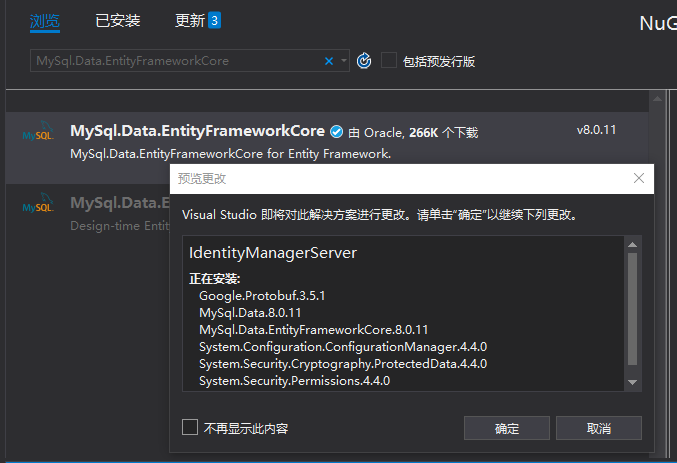
使用 MariaDB/MySQL 数据库
在 NuGet 中添加 MySql.Data.EntityFrameworkCore 包
修改数据库的连接字符串
打开 appsettings.josn 文件,找到类似以下内容的连接字符串:
  "ConnectionStrings": {
    "DefaultConnection": "Server=(localdb)\mssqllocaldb;Database=aspnet-IdentityManagerServer-47CFE0C9-3D63-4880-B670-22AD145CF51C;Trusted_Connection=True;MultipleActiveResultSets=true"
 },
修改为以下的样子,(此处将原来的连接字符串注释掉,并添加新的):
  //"ConnectionStrings": {
  //  "DefaultConnection": "Server=(localdb)\mssqllocaldb;Database=aspnet-IdentityManagerServer-47CFE0C9-3D63-4880-B670-22AD145CF51C;Trusted_Connection=True;MultipleActiveResultSets=true"
  //},
  "ConnectionStrings": {
    "DefaultConnection": "Server=127.0.0.1;Database=aspnet-IdentityManagerServer-180725;userid=root;pwd=123456;port=3306;sslmode=none;"
  },
如果有云主机或服务器,请将
Server=127.0.0.1中的IP替换为数据库服务器的实际IP。
使用依赖注入创建 MySQL 的 DbContext 实例
打开当前项目中的 Startup.cs 文件,找到 ConfigureServices 中原来使用 SqlServer 的数据上下文的代码
     services.AddDbContext<ApplicationDbContext>(options =>
         options.UseSqlServer(Configuration.GetConnectionString("DefaultConnection")));
将其更改为使用 MySQL 数据库:
     services.AddDbContext<ApplicationDbContext>(options =>
        options.UseMySQL(Configuration.GetConnectionString("DefaultConnection")));
将原来使用 UseSqlServer 的语句注释并添加 UseMySQL 后的完整代码如下:
     services.AddDbContext<ApplicationDbContext>(options =>
        options.UseMySQL(Configuration.GetConnectionString("DefaultConnection")));
     // services.AddDbContext<ApplicationDbContext>(options =>
     //     options.UseSqlServer(Configuration.GetConnectionString("DefaultConnection")));
用户的密码选项及其他 Identity 选项
在 ConfigureServices 中的 services.AddIdentity 语句结束之后另起一行添加以下内容:
services.Configure<IdentityOptions>(options =>
     {
        // Password settings 密码设置
        options.Password.RequireDigit = false;    //必须数字
        options.Password.RequiredLength = 6;   //密码最小长度
        options.Password.RequireNonAlphanumeric = false;  //必须 有数字、字母以外的其他字符
        options.Password.RequireUppercase = false;  //必须 有大写字母
        options.Password.RequireLowercase = false;  //必须 有小写字母
        options.Password.RequiredUniqueChars = 6;

        // Lockout settings
        options.Lockout.DefaultLockoutTimeSpan = TimeSpan.FromMinutes(30);
        options.Lockout.MaxFailedAccessAttempts = 10;
        options.Lockout.AllowedForNewUsers = true;

         // User settings
        options.User.RequireUniqueEmail = true;
    });

services.ConfigureApplicationCookie(options =>
     {
         // Cookie settings
        options.Cookie.HttpOnly = true;
        options.ExpireTimeSpan = TimeSpan.FromMinutes(30);
        // If the LoginPath isn't set, ASP.NET Core defaults
        // the path to /Account/Login.
        options.LoginPath = "/Account/Login";
         // If the AccessDeniedPath isn't set, ASP.NET Core defaults
         // the path to /Account/AccessDenied.
         options.AccessDeniedPath = "/Account/AccessDenied";
        options.SlidingExpiration = true;
     });
程序调试运行的时候,不想每次都输入特别复杂的密码,所以 在上面
Password settings中将各个选项都设为了false,等实际部署时,应视情况需要设置。
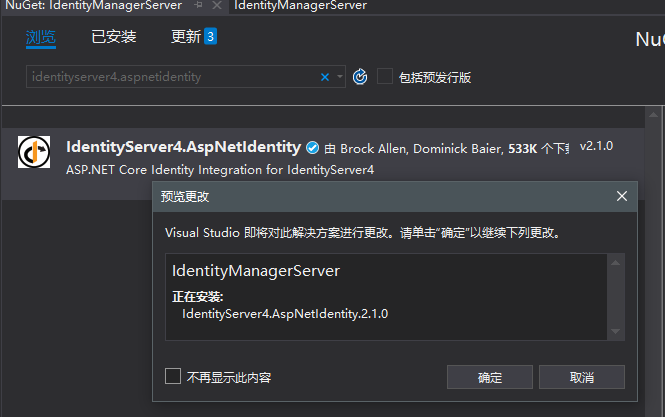
安装 IdentityServer 的NuGet包
在 NuGet 中添加 IdentityServer4 和 IdentityServer4.AspNetIdentity 包。 IdentityServer4.AspNetIdentity 包依赖于 IdentityServer4 ,安装 IdentityServer4.AspNetIdentity 的时候会自动把 IdentityServer4 也一起装上。
如果在应用中需要使用的IdentityServer4 的 QuickStart UI ,需要单独安装 IdentityServer4 ,否则,Consent、Diagnostics和Grants 这三个控制器将会缺少正确的引用而无法运行。
添加 IdentiryServer4 配置文件
在项目中新建 ConfigurationConfig.cs 文件,并修改为如下内容:
using IdentityServer4;
using IdentityServer4.Models;
using System;
using System.Collections.Generic;
using System.Linq;
using System.Threading.Tasks;

namespace IdentityManagerServer.Configuration
{
    public class Config
    {
        public static IEnumerable<ApiResource> GetApiResources()
        {
            return new List<ApiResource>
            {
                new ApiResource("socialnetwork", "社交网络")
                {
                    UserClaims = new [] { "email" }
                }
            };
        }

        public static IEnumerable<Client> GetClients()
        {
            return new List<Client>
            {
                new Client
                {
                    ClientId = "socialnetwork",
                    ClientSecrets = new [] { new Secret("secret".Sha256()) },
                    AllowedGrantTypes = GrantTypes.ResourceOwnerPasswordAndClientCredentials,
                    AllowedScopes = new [] { "socialnetwork" }
                },
                new Client
                {
                    ClientId = "mvc_code",
                    ClientName = "MVC Client",
                    AllowedGrantTypes = GrantTypes.HybridAndClientCredentials,
                    RequireConsent = true, //是否需要用户点击确认进行跳转
                    ClientSecrets =
                    {
                        new Secret("secret".Sha256())
                    },
                    RedirectUris = { "http://localhost:5002/signin-oidc" },
                    PostLogoutRedirectUris = { "http://localhost:5002/signout-callback-oidc" },
                    AllowedScopes =
                    {
                        IdentityServerConstants.StandardScopes.OpenId,
                        IdentityServerConstants.StandardScopes.Profile,
                        IdentityServerConstants.StandardScopes.Email,
                        "socialnetwork"
                    },
                    AllowOfflineAccess = true,
                    AllowAccessTokensViaBrowser = true
                }
            };
        }

        public static IEnumerable<IdentityResource> GetIdentityResources()
        {
            return new List<IdentityResource>
            {
                new IdentityResources.OpenId(),
                new IdentityResources.Profile(),
                new IdentityResources.Email()
            };
        }
    }
}
在Startup.cs 配置 IdentityServer
在 ConfigureServices 的末尾添加 AddIdentityServer() 的相关配置,部分代码如以下内容所示:
            // Add application services.
            services.AddTransient<IEmailSender, EmailSender>();

            services.AddMvc();

            // configure identity server with in-memory stores, keys, clients and scopes
            services.AddIdentityServer()
                .AddDeveloperSigningCredential()
                .AddInMemoryPersistedGrants()
                .AddInMemoryIdentityResources(Config.GetIdentityResources())
                .AddInMemoryApiResources(Config.GetApiResources())
                .AddInMemoryClients(Config.GetClients())
                .AddAspNetIdentity<ApplicationUser>();
在 Configure 中用 UseIdentityServer 替换掉 UseAuthentication,效果如以下代码:
        public void Configure(IApplicationBuilder app, IHostingEnvironment env)
        {
            if (env.IsDevelopment())
            {
                app.UseBrowserLink();
                app.UseDeveloperExceptionPage();
                app.UseDatabaseErrorPage();
            }
            else
            {
                app.UseExceptionHandler("/Home/Error");
            }

            app.UseStaticFiles();

            //app.UseAuthentication(); //UseIdentityServer中已经包含有此功能
            app.UseIdentityServer();
            app.UseMvc(routes =>
            {
                routes.MapRoute(
                    name: "default",
                    template: "{controller=Home}/{action=Index}/{id?}");
            });
        }
创建用户数据库
鉴于这是一个新的 ASP.NET Identity 项目,需要创建数据库(二个方法选其中一个就可以)。
一、可以通过从项目目录运行命令提示符并运行以下命令来执行此操作:
dotnet ef database update -c ApplicationDbContext
如下所示:

二、也可以在 VS2017 的 程序包管理器控制台 输入以下命令:
update-database -c ApplicationDbContext
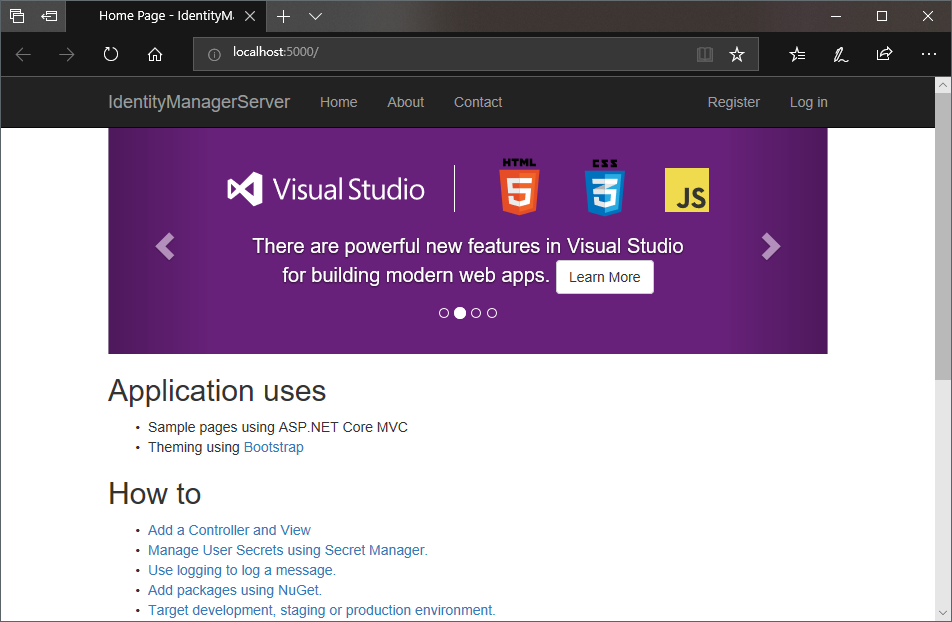
运行程序
启动应用程序 ,并点击链接 "Register" 创建一个新用户。
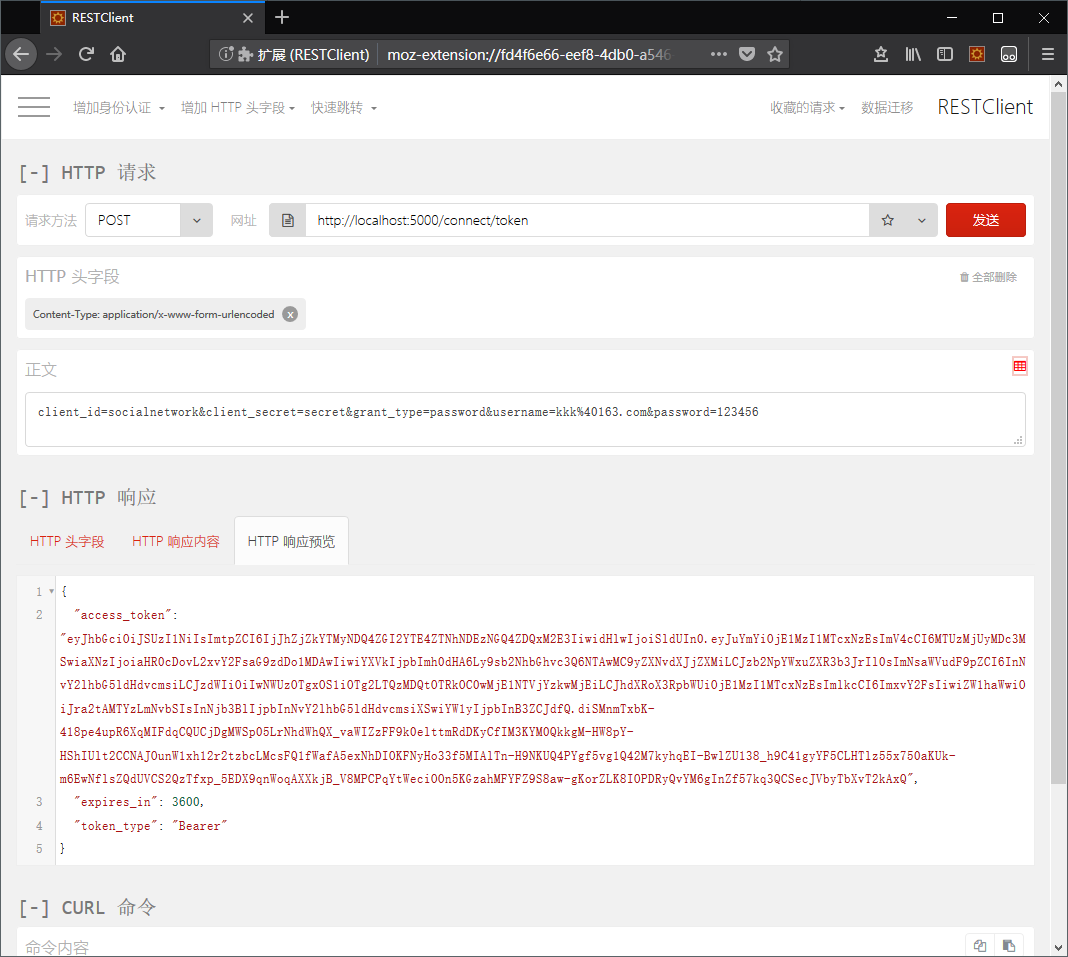
获取Token
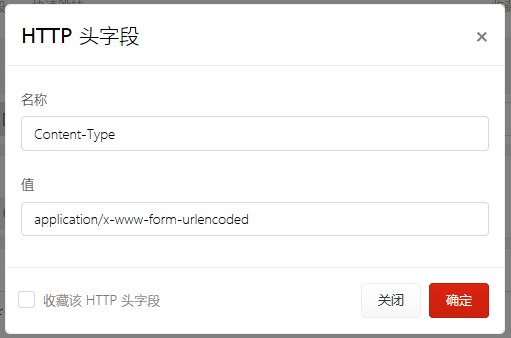
在 Firefox 浏览器 中安装并运行 RESTClient 插件(postman 插件据说也很好用,但 Chrome才能用。而 Chrome应用商店 要爬墙,所以 Firefox 才是我的真爱),添加 HTTP头字段
请求方法为:POST,网址为 :http://localhost:5000/connect/token
编辑正文:

其中的
username的值:kkk@163.com和password的值:123456为上一步骤注册的账户名称和密码,请替换为实际注册的值。
点击发送 按钮后,可以在 HTTP 响应 中看到返回的 Token 值