概要
最近项目需要用java实现输出随机验证码图片到前台,正好有机会接触下java的绘图类,完成需求后也有时间做个总结,写篇随笔记录下也希望能帮助到有同样需求的人!
需求流程图
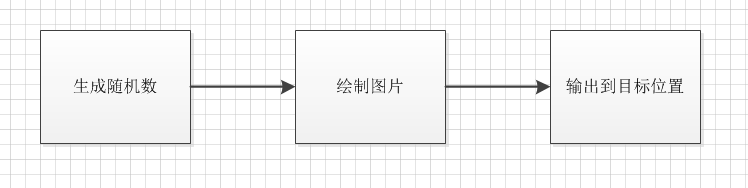
1.生成随机数
在java中生成随机数无非就是调用Random的api,但为了后续更好的实用,应该分成多种组合以适应需求的变化,应将生成随机数的个数和类型组合还有排除字符抽取成参数,这个也比较简单,没有什么难度,就直接贴上代码
 1 /**
 2      * 生成随机验证码
 3      * @param type  类型
 4      * @param length   长度
 5      * @param exChars  排除的字符
 6      * @return
 7      */
 8     public static String getRandomCode(int type,int length,String exChars){
 9       case TYPE_NUM_CHAR://数字+(大小写)字母
10             while(i<length){
11                 int t=random.nextInt(123);
12                 if((t>=97||(t>=65&&t<=90)||(t>=48&&t<=57))&&(exChars==null||exChars.indexOf((char)t)<0)){
13                     sb.append((char)t);
14                     i++;
15                 }
16             }
17             break;
18
19 }
2.绘制图片
绘制图片是重点也是难点,老实说我之前都没用过BufferedImage、Graphics、Color等对象,都是从度娘处脑补并结合帖子写出来的输出图片
1)创建BufferedImage对象
如果把BufferedImage比作是画板,那么Graphics就是画纸,这样比较好理解,后续的操作都是在这画纸上进行的
1     BufferedImage image = new BufferedImage(width,height,BufferedImage.TYPE_INT_RGB);
2     Graphics g = image.getGraphics();
3     //随机操作对象
4     Random r=new Random();
2)绘制背景
Graphics有个setColor()方法,可理解为画笔,在绘制任何东西前要选好画笔,即颜色,然后调用fillRect()进行轮廓的绘制,后续的绘制范围不会超过这个轮廓
1         g.setColor(backColor==null?getRandomColor():backColor);
2         g.fillRect(0,0,width,height);
3)绘制干扰线
调用drawLine画直线,绘制不超过interLine条干扰线
 1       if(interLine>0){
 3             int x=r.nextInt(4),y=0;
 4             int x1=width-r.nextInt(4),y1=0;
 5             for(int i=0;i<interLine;i++){
 6                 g.setColor(lineColor==null?getRandomColor():lineColor);
 7                 y=r.nextInt(height-r.nextInt(4));
 8                 y1=r.nextInt(height-r.nextInt(4));
 9                 g.drawLine(x,y,x1,y1);
10             }
11         }
4)写验证码
写验证码时调用drawString()方法,为了不整整齐齐而且重叠的写,应将每个字符的高度和水平位置随机,重点在于每绘制完一个字符后,需将画笔的水平坐标往右边移动一定的位置,这里我用了依据宽度浮动,可不必照搬这里的,有合适的算法就行
 1      int fsize=(int)(height*0.8);//字体大小为图片高度的80%
 2         int fx=0;
 3         int fy=fsize;
 4         g.setFont(new Font(Font.SANS_SERIF,Font.PLAIN,fsize));
 5         //写字符
 6         for(int i=0;i<textCode.length();i++){
 7             fy=randomLocation?(int)((Math.random()*0.3+0.6)*height):fy;//每个字符高低是否随机
 8             g.setColor(foreColor==null?getRandomColor():foreColor);
 9             g.drawString(textCode.charAt(i)+"",fx,fy);
10             fx+=(width / textCode.length()) * (Math.random() * 0.3 + 0.8); //依据宽度浮动
11        }
5)扭曲图片
图片的扭曲就是将图片水平和垂直按不同比例平移,copyArea()方法简单明了,直接是复制区域,也是同个意识
 1      //扭曲图片
 2          shearX(g, width, height, backColor);
 3          shearY(g, width, height, backColor);
 4          private static void shearX(Graphics g, int w1, int h1, Color color) {
 5          Random random=new Random();
 6          int period = 2;
 7
 8          boolean borderGap = true;
 9          int frames = 1;
10         int phase = random.nextInt(2);
11
12         for (int i = 0; i < h1; i++) {
13             double d = (double) (period >> 1)* Math.sin((double) i / (double) period
14           + (2.2831853071795862D * (double) phase)/ (double) frames);
15             g.copyArea(0, i, w1, 1, (int) d, 0);
16             if (borderGap) {
17                 g.setColor(color);
18                 g.drawLine((int) d, i, 0, i);
19                 g.drawLine((int) d + w1, i, w1, i);
20             }
21         }
22
23     }
24
25     private static void shearY(Graphics g, int w1, int h1, Color color) {
26         Random random=new Random();
27         int period = random.nextInt(40) + 10; // 50;
28
29         boolean borderGap = true;
30         int frames = 20;
31         int phase = random.nextInt(2);
32         for (int i = 0; i < w1; i++) {
33             double d = (double) (period >> 1)
34                     * Math.sin((double) i / (double) period
35                             + (2.2831853071795862D * (double) phase)/ (double) frames);
36             g.copyArea(i, 0, 1, h1, 0, (int) d);
37             if (borderGap) {
38                 g.setColor(color);
39                 g.drawLine(i, (int) d, i, 0);
40                 g.drawLine(i, (int) d + h1, i, h1);
41             }
42
43         }
44
45     }
6)添加噪点
噪点的添加实质上就是在画纸上没有规律的点点点...,所以用随机颜色随机位置来执行image.setRGB()方法最合适了
1      float yawpRate = 0.05f;// 噪声率
2         int area = (int) (yawpRate * width * height);//噪点数量
3         for (int i = 0; i < area; i++) {
4             int xxx = r.nextInt(width);
5             int yyy = r.nextInt(height);
6             int rgb = getRandomColor().getRGB();
7             image.setRGB(xxx, yyy, rgb);
8         }
7)封笔
以上一切画完之后,下一步就是封笔了,思来想去这样表达最合适,绘制完之后就是放好笔,收起画纸,这里就是返回BufferedImage对象
1         g.dispose();
2         return image;
输出目标位置
1)输出文件
这里写了一个简单的测试类,将图片输出成文件
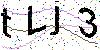
 1 public static void main(String[] args) {
 2         String randomCode = CodeUtils.getRandomCode(CodeUtils.TYPE_NUM_CHAR, 4, null);
 3         System.out.println(randomCode);
 4         BufferedImage imageFromCode = ImageUtils.getImageFromCode(randomCode, 100, 50, 3, true, Color.WHITE, Color.BLACK, null);
 5          try {
 6             File file = new File("d:/test01.jpg");
 7             ImageIO.write(imageFromCode,"jpg",file);
 8             System.out.println("成功保存到:"+file.getAbsolutePath());
 9         } catch (IOException e) {
10             System.out.println("保存失败");
11             e.printStackTrace();
12         }
13
14     }
效果图:
2)输出流
输出到流中也是用到和到文件中的方法,根据业务保存到目标位置即可
 1     public static void outputStream(HttpServletRequest request,HttpServletResponse response){
 2         try {
 3             // 设置浏览器不缓存本页
 4             response.addHeader("Pragma", "no-cache");
 5             response.addHeader("Cache-Control", "no-cache");
 6             response.addHeader("Expires", "0");
 7             // 生成验证码,写入用户session
 8             String verifyCode = CodeUtils.getRandomCode(CodeUtils.TYPE_NUM_CHAR, 4, null);
 9             request.getSession().setAttribute("imageVerify", verifyCode);
10             // 输出验证码给客户端
11             response.setContentType("image/jpeg");
12             BufferedImage bim = ImageUtils
13                     .getImageFromCode(verifyCode, 47, 18, 3, true,
14                             Color.WHITE, Color.BLACK, null);
15             ImageIO.write(bim, "JPEG", response.getOutputStream());
16
17         } catch (Exception e) {
18         }
19         return null;
20     }
总结
也没有比较深入的去分析绘制类,有需求可以通过调整位置参数来实现自己要的效果