这是一步步的用EOSIO开发区块链DApp的第二部分,这部分将主要是为EOSIO平台开发智能合约。
示例智能合约的目的是模拟选举。我创建了一个EOSIO用户来托管智能合约。创建了两个公民用户来投票给候选人。投票记录保存在EOSIO区块链中。在此示例中,所有操作都在命令模式下运行。让我们开始吧。
开发智能合约
EOSIO执行以WebAssembly标准开发的智能合约。所以我用C++开发了选举智能合约。以下是election.cpp的完整源代码:
#include <eosiolib/eosio.hpp>

using namespace eosio;

class election : public contract
{
private:
  // create the multi index tables to store the data

  /// @abi table
  struct candidate {
    uint64_t _key;       // primary key
    std::string _name;   // candidate name
    uint32_t _count = 0; // voted count

    uint64_t primary_key() const { return _key; }
  };
  typedef eosio::multi_index<N(candidate), candidate> candidates;

  /// @abi table
  struct voter {
    uint64_t _key;
    uint64_t _candidate_key; // name of poll
    account_name _account;   // this account has voted, avoid duplicate voter

    uint64_t primary_key() const { return _key; }
    uint64_t candidate_key() const { return _candidate_key; }
  };
  typedef eosio::multi_index<N(voter), voter, indexed_by<N(_candidate_key), const_mem_fun<voter, uint64_t, &voter::candidate_key>>> voters;

  // local instances of the multi indexes
  candidates _candidates;
  voters _voters;
  uint64_t _candidates_count;

public:
  election(account_name s) : contract(s), _candidates(s, s), _voters(s, s), _candidates_count(0) {}

  // public methods exposed via the ABI
  // on candidates

  /// @abi action
  void version() {
    print("Election Smart Contract version 0.0.1
");
  };

  /// @abi action
  void addc(std::string name) {
    print("Adding candidate ", name, "
");

    uint64_t key = _candidates.available_primary_key();

    // update the table to include a new candidate
    _candidates.emplace(get_self(), [&](auto &p) {
      p._key = key;
      p._name = name;
      p._count = 0;
    });

    print("Candidate added successfully. candidate_key = ", key, "
");
  };

  /// @abi action
  void reset() {
    // Get all keys of _candidates
    std::vector<uint64_t> keysForDeletion;
    for (auto &itr : _candidates) {
      keysForDeletion.push_back(itr.primary_key());
    }

    // now delete each item for that poll
    for (uint64_t key : keysForDeletion) {
      auto itr = _candidates.find(key);
      if (itr != _candidates.end()) {
        _candidates.erase(itr);
      }
    }

    // Get all keys of _voters
    keysForDeletion.empty();
    for (auto &itr : _voters) {
      keysForDeletion.push_back(itr.primary_key());
    }

    // now delete each item for that poll
    for (uint64_t key : keysForDeletion) {
      auto itr = _voters.find(key);
      if (itr != _voters.end()) {
        _voters.erase(itr);
      }
    }

    print("candidates and voters reset successfully.
");
  };

  /// @abi action
  void results() {
    print("Start listing voted results
");
    for (auto& item : _candidates) {
      print("Candidate ", item._name, " has voted count: ", item._count, "
");
    }
  };

  /// @abi action
  void vote(account_name s, uint64_t candidate_key) {
    require_auth(s);

    bool found = false;

    // Did the voter vote before?
    for (auto& item : _voters) {
      if (item._account == s) {
        found = true;
        break;
      }
    }
    eosio_assert(!found, "You're voted already!");

    // Findout the candidate by id
    std::vector<uint64_t> keysForModify;
    for (auto& item : _candidates) {
      if (item.primary_key() == candidate_key) {
        keysForModify.push_back(item.primary_key());
        break;
      }
    }

    if (keysForModify.size() == 0) {
      eosio_assert(found, "Invalid candidate id!");
      return;
    }

    // Update the voted count inside the candidate
    for (uint64_t key : keysForModify) {
      auto itr = _candidates.find(key);
      auto candidate = _candidates.get(key);
      if (itr != _candidates.end()) {
        _candidates.modify(itr, get_self(), [&](auto& p) {
          p._count++;
        });

        print("Voted candidate: ", candidate._name, " successfully
");
      }
    }

    // Add this user to voters array
    _voters.emplace(get_self(), [&](auto& p) {
      p._key = _voters.available_primary_key();
      p._candidate_key = candidate_key;
      p._account = s;
    });
  };
};

EOSIO_ABI(election, (version)(reset)(addc)(results)(vote))
注意最后一行EOSIO_ABI()是一个宏语句,用于自动生成ABI文件而不是手动编写。ABI文件用于定义提交动作处理程序。这告诉了EOSIO智能合约中处理程序的定义。
EOSIO为我们提供了多索引数据库API,可以将数据保存到区块链中。在上面的选举智能合约中,我定义了两个multi_index(类似于SQL表):候选人和选民。实际上是两个数组存储两个结构:候选者和选民。我使用C++ STL来操作multi_index,例如add,update,delete。
请注意,两个结构在开头标有/// @abi table。这是告诉EOSIO abi生成器在election.abi文件中生成ABI表。这很方便。
编译选举智能合约:
$ eosiocpp -o election.wast election.cpp
分别生成WAST和WASM文件。但这对EOSIO来说还不够。我们还需要生成ABI文件:
$ eosiocpp -g election.abi election.cpp
Visual Studio Code的可选文件
为了增强开发体验,我为Visual Studio Code(VSCode)创建了一个属性文件c_cpp_properties.json,告诉它如何查找头文件。该文件需要存储在.vscode目录中,如下所示:
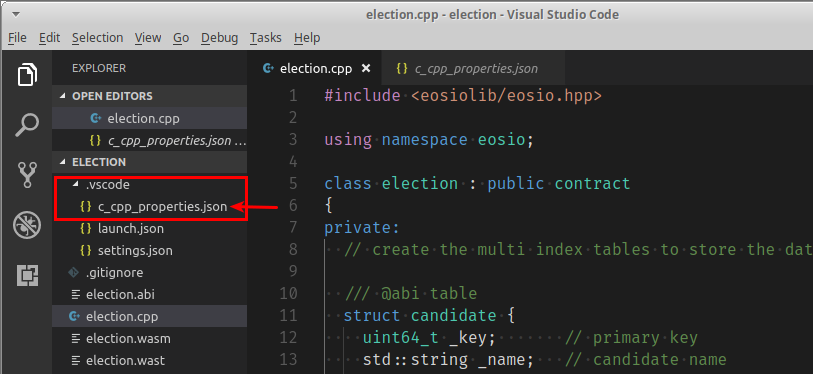
.vscode/c_cpp_properties文件内容如下:
{
  "configurations": [
    {
      "name": "Linux",
      "includePath": [
        "${workspaceFolder}/**",
        "~/eos/contracts",
        "~/opt/boost/include"
      ],
      "defines": [],
      "compilerPath": "/usr/bin/clang++-4.0",
      "cStandard": "c11",
      "cppStandard": "c++17",
      "intelliSenseMode": "clang-x64"
    }
  ],
  "version": 4
}
启动EOSIO
一直在使用配置良好的虚拟机(在第1部分中提到)。要启动单节点Testnet服务器:
$ nodeos -e -p eosio --plugin eosio::wallet_api_plugin --plugin eosio::chain_api_plugin --plugin eosio::history_api_plugin --access-control-allow-origin=* --contracts-console
单击此处获取nodeos参数的更多信息。
创建帐户
下一个任务是解锁默认钱包。EOSIO将密钥对存储在钱包中。每次服务器重启或每15分钟需要解锁一次。解锁钱包:
$ cleos wallet unlock --password ${wallet_password}
我们需要分别创建一个所有者密钥对和活动密钥对。然后将该私钥导入钱包。键入以下命令:
$ cleos create key # Create an owner key
$ cleos create key # Create an active key
$ cleos wallet import ${private_owner_key}
$ cleos wallet import ${private_active_key}
不要忘记在某个地方记录这些密钥对。
接下来的任务是创建一个新的帐户来保存选举智能合约。 键入以下命令:
$ cleos create account eosio election ${public_owner_key} ${public_active_key}
此外,为投票模拟创建两个公民:
$ cleos create account eosio voter1 ${public_owner_key} ${public_active_key}
$ cleos create account eosio voter2 ${public_owner_key} ${public_active_key}
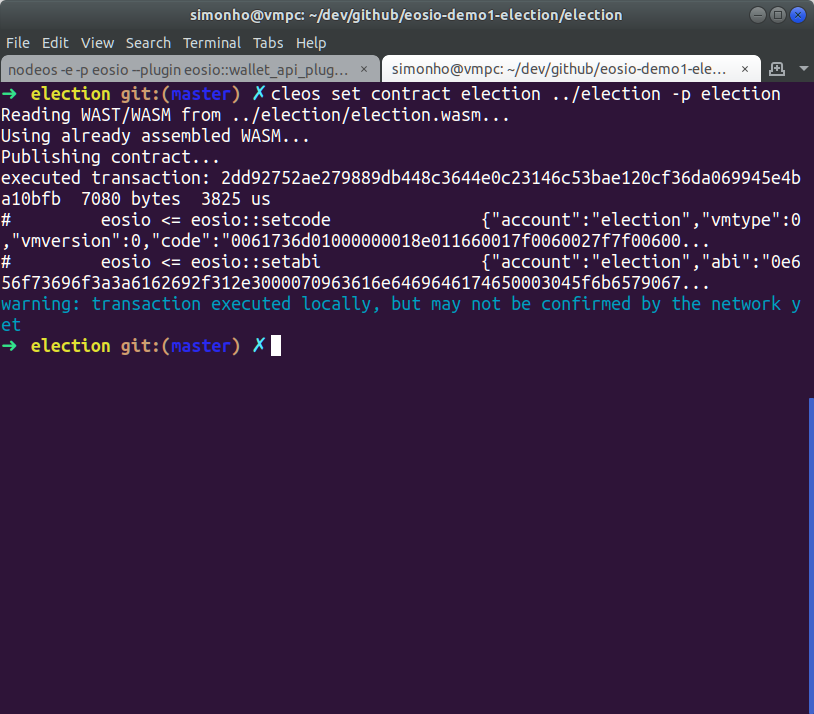
部署智能合约
输入以下命令上传选举智能合约:
$ cleos set contract election ../election -p election
结果类似下图:
运行智能合约
我们可以尝试运行合约。
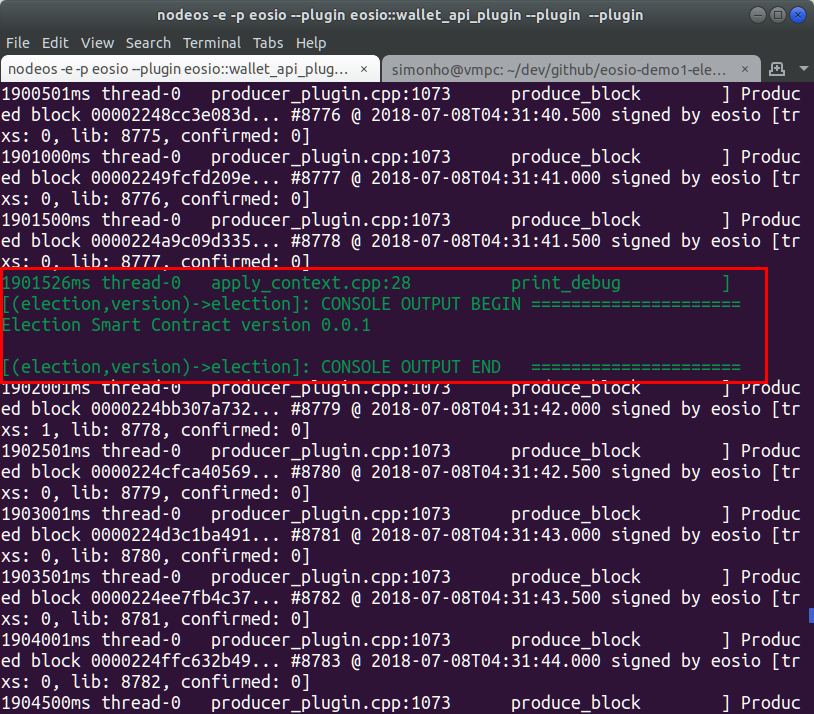
1.运行version操作
$ cleos push action election version '' -p election
我们可以从nodeos检查控制台输出:
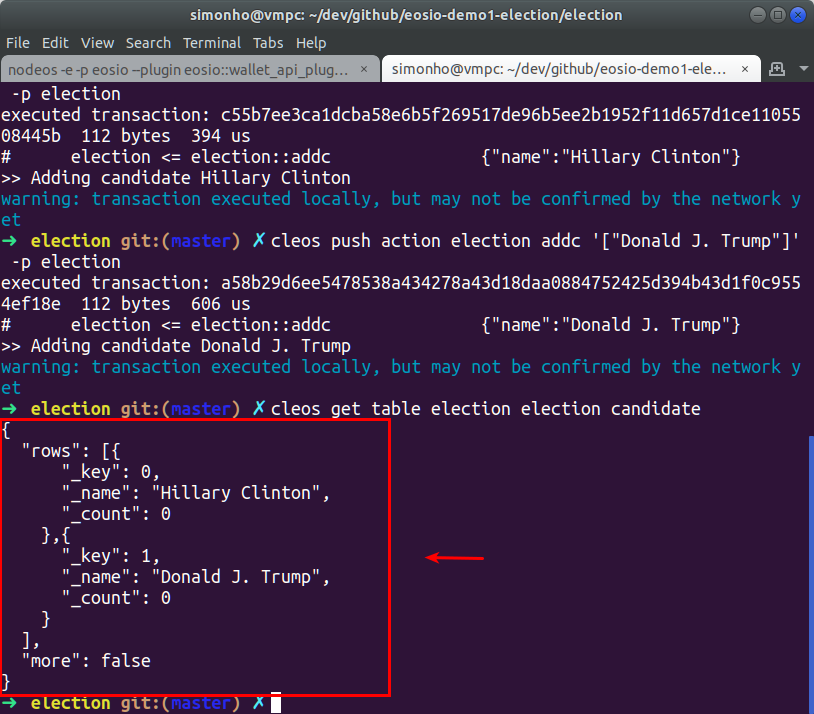
2.增加选举候选人
$ cleos push action election addc '["Hillary Clinton"]' -p election
$ cleos push action election addc '["Donald J. Trump"]' -p election
3.显示存储在区块链中的候选数据库
$ cleos get table election election candidate
结果如图所示:
4.模拟投票(两位选民都被投票给唐纳德·J·特朗普)
$ cleos push action election vote '["voter1", 1]' -p voter1
$ cleos push action election vote '["voter2", 1]' -p voter2
如果voter1再次投票:
$ cleos push action election vote '["voter1", 0]' -p voter1
EOSIO 将返回一个例外:
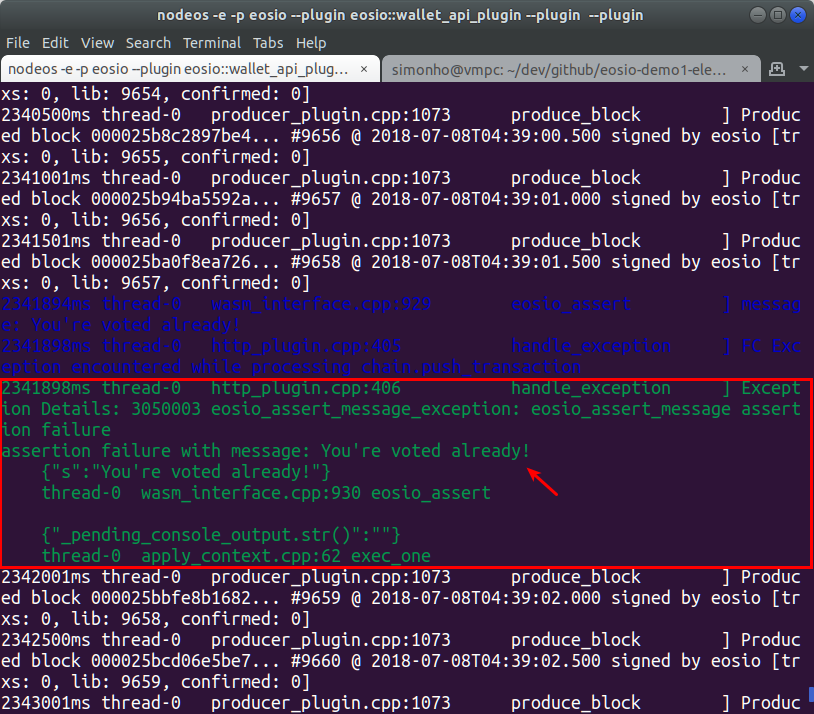
5.查看投票结果
$ cleos get table election election candidate
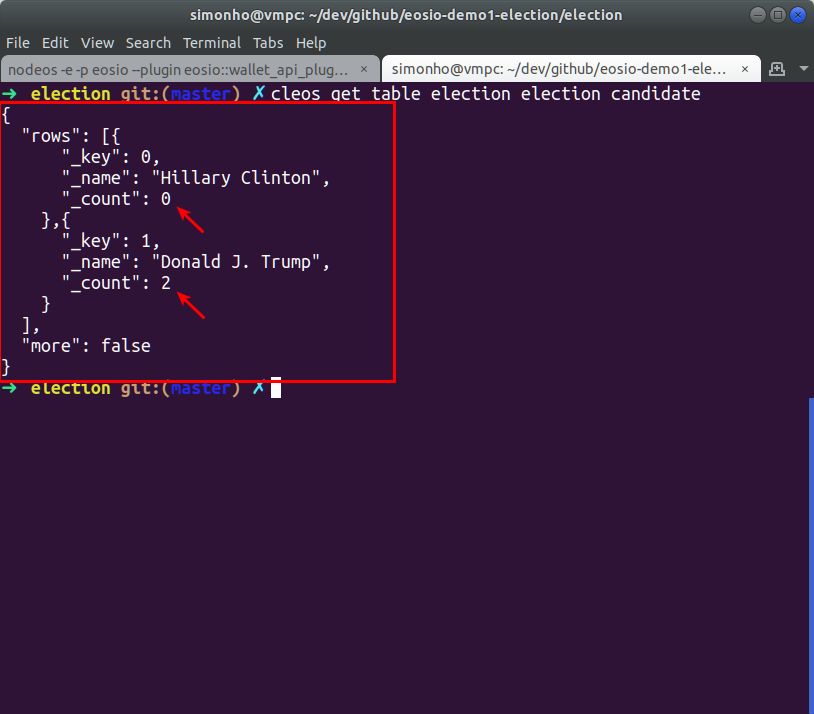
如你所见,候选人“Donald J. Trump”的投票数为2.这意味着选举智能合约正在工作!
这就是EOS开发dapp的第二部分。安利个EOS智能合约与DApp开发入门:http://t.cn/Rgs1kbm
在下一部分中,我将创建一个Web应用程序,用于演示Web访问者和区块链之间的交互。
源代码在这里github repo