在前几天工作中遇到一个问题,部署服务器,需要用rabbitmq自带的一个web UI监控组件,但是15672的端口没有对外映射。尝试了几种办法。开始修改rabbitmq.config,rabbitmq-ebv.config,总是不成功,因为修改的是rabbitmq-server的启动端口号,从外面访问的是web UI组件启动的端口号,两个是不一样的。然后尝试的rabbitmqadmin,因为web UI 监控页面也是调用的httpapi ,rabbitmqadmin是从官网下载一个文本文件赋予可执行权限才可,注意你放置这个文件的位置要在你的PATH里面。百度了半天都没,然后去了
http://stackoverflow.com/questions/28461823/rabbitmq-management-console-on-cloud9/28472142#28472142
这个上面查答案,平时没VPN也就很少用了。还是这个比较溜,几分钟就找到了。
原文:
I’m new to RabbitMQ, but after a bit of googling and experimentation,
I was able to run the management console.The problem is that only port 8080 is forwarded from your Cloud9
workspace, and RabbitMQ’s default port is explained here:The web UI is located at: http://server-name:15672/ To fix, we need to
modify the configuration to start the web UI at port 8080. Here are
the steps I followed to get that working:Install RabbitMQ (Steps outlined here:
http://www.rabbitmq.com/install-debian.html) Enable the management
console: sudo rabbitmq-plugins enable rabbitmq_management There wasn’t
a rabbitmq.config file for me in RABBITMQHOME/etc/rabbitmq/,soIcopiedtheexamplefrom/usr/share/doc/rabbitmq−server/(afterunzippingit).EditedRABBITMQHOME/etc/rabbitmq/,soIcopiedtheexamplefrom/usr/share/doc/rabbitmq−server/(afterunzippingit).EditedRABBITMQ_HOME/etc/rabbitmq/rabbitmq.config and
found the rabbitmq_management key. There’s already an existing setup
that’s commented out. I replaced it with:{listener, [{port, 8080},
{ip, “0.0.0.0”},
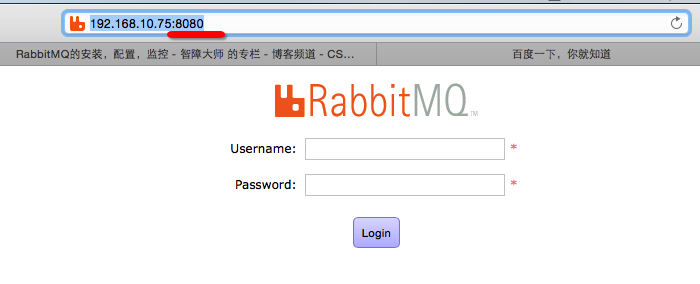
{ssl, false}]}Then I restarted the RabbitMQ server and visiting my url, i.e.:
https://-.c9.io showed me the RabbitMQ
management login screen.Hope this helps!
其实感觉他的这个配置文件的格式 有点奇怪 不像json却又像json。
[root@localhost ~]# ls
anaconda-ks.cfg               post-install
Desktop                      post-install.log
Documents                    Public
Downloads                    rabbitmq-server-3.5.6-1.noarch.rpm
erlang-17.4-1.el6.x86_64.rpm  Templates
Music                        Videos
Pictures
[root@localhost ~]# cd /usr/share/doc/rabbitmq-server-3.5.6/
[root@localhost rabbitmq-server-3.5.6]# ls
LICENSE                         LICENSE-BSD-glMatrix   LICENSE-MIT-Mochi
LICENSE-APACHE2-ExplorerCanvas  LICENSE-MIT-EJS10      LICENSE-MIT-Sammy060
LICENSE-Apache-Basho            LICENSE-MIT-eldap      LICENSE-MPL-RabbitMQ
LICENSE-APL2-Stomp-Websocket    LICENSE-MIT-Flot       rabbitmq.config.example
LICENSE-BSD-base64js            LICENSE-MIT-jQuery164  README
[root@localhost rabbitmq-server-3.5.6]#  cp /usr/share/doc/rabbitmq-server-3.5.6/rabbitmq.config.example /etc/rabbitmq/
[root@localhost rabbitmq]# cd /etc/rabbitmq/
[root@localhost rabbitmq]# mv rabbitmq.config.example rabbitmq.config
[root@localhost rabbitmq]# vim rabbitmq.config

搜索listener, 添加以下
{rabbitmq_management,
[
{listener, [{port, 8080},
{ip, "0.0.0.0"},
{ssl, false}
]},类似json,注意格式。
粘进去时候注意括号啥的,如果启动不起来 看日志 添加或者减少括号即可